Every leatherworker knows that dread — you finish a clean minimalist bag, then a bulky snap or visible hardware kills the whole look. A hidden magnetic closure fixes that. But embedding one takes more precision than most tutorials will tell you.
Get the placement off by a few millimeters and the closure fails. Pick the wrong magnet strength and the leather warps over time. Both mistakes are easy to make and hard to reverse.
This guide covers all three sides of the process: geometry, material science, and craft instinct. You’ll learn how to pick the right magnet type and how to get a flush exterior so clean it looks like there was never a closure there at all.
Why Hidden Magnetic Closures Are the Right Choice for Minimalist Leather Bags

Visible hardware takes up more space than most makers expect. A standard prong snap or turn lock measures 15–35 mm across. On a custom small bag with a front face around 220–260 mm wide, that single piece of metal claims up to 16% of the visible surface. For a custom minimalist leather bag where clean lines carry all the weight, that’s a real visual problem.
A hidden magnetic closure brings that number down to zero exposed metal. The magnet sits buried between layers, covered by leather on both sides. No glint, no hardware node, no focal point breaking the bag’s silhouette.
The Silhouette Stays Intact
Hardware doesn’t just change how a bag looks — it changes how the leather sits. A prong snap installation stacks layers: leather + snap seat + washer + reinforcement backing. That turns a 1.6–2.6 mm flap into a 3.0–4.5 mm section. You get a raised “hard point” that stands out on soft vegetable-tanned or NAPPA leather.
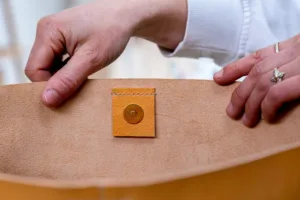
A flat sew-in magnetic snap — 1.2–1.8 mm thick — drops into a shallow recess cut into the inner layer. The finished flap stays within ±0.3–0.5 mm of the surrounding thickness. The closure line looks like continuous leather. No bump, no hardware ridge.
Functional Strength Without Compromise
The common worry with hidden magnets is holding power. The numbers don’t back that concern:
-
Small magnets: pull-off force around 0.5–1.0 kgf
-
Mid/large magnets: pull-off force 1.5–3.0 kgf — enough to hold a loaded bag closed through normal movement
-
Dual-point setup: two magnets at 1.0–1.5 kgf each add up to 2–3 kgf total. Single-hand opening stays easy, and you get real security
For everyday carry, a single hidden snap rated at ≥1.5 kgf holds a 1–3 kg load without issue. Drop-test at 1 meter with 3–5 kg inside, and a well-chosen magnet stays closed ≥95% of the time.
Understanding Magnet Types Before You Cut Anything

Three magnet formats exist for hidden closures. Pick the wrong one before you mark your leather and you’re recuting — or worse, you end up with a finished bag that won’t hold.
Embedded round neodymium magnets work best for leather bags. They’re compact, strong, and sit flush inside a punched recess. Practical sizes run 8–20 mm diameter, 1–3 mm thick. A 10 mm disc delivers 3 kgf of pull-off force. A 20 mm disc jumps to 15 kgf — far more than any bag closure needs.
Sew-in fabric magnetic snaps are built for soft goods and washable materials. They wrap the magnet in a PVC shell to protect the fabric. The trade-off: thick material cuts into closure force. You lose pull strength you can feel. These are not the right tool for structured leather builds.
Magnetic strips and steel target plates handle long linear closures — cabinet doors, tool organizers, bag gussets. Coverage is wide, but precise lock-point alignment is weak. Skip these for a single-flap minimalist bag.
Matching Neodymium Grade to Your Leather Stack
NdFeB magnets are the standard for embedded closures. They run 10× stronger than ferrite at the same size. Grades go from N35 up to N52. Each step up adds 3–5% more magnetic energy.
Your starting point depends on total stack thickness — not just the face leather alone. Measure everything: outer leather + lining + interlayer + seam allowance.
|
Total Stack |
Diameter × Thickness |
Recommended Grade |
|---|---|---|
|
1.2–1.8 mm |
8–10 mm × 1–2 mm |
N35–N42 |
|
1.8–2.5 mm |
10–15 mm × 2 mm |
N42–N48 |
|
2.5 mm+ / heavy flap |
15–20 mm × 2–3 mm |
N48–N52 |
Start at the lower grade. Test closure feel. Move up if the snap feels weak — not by default. Higher grades cost more and carry real handling risk. Two N52 discs snapping together without warning can chip edges or pinch fingers.
Coating: Nickel vs. Epoxy
Both coatings protect the neodymium core from rust. The core corrodes fast without them.
-
Nickel plating — harder surface, clean metallic look, good abrasion resistance. Works well in dry environments. Weak point: sweat and humidity can still breach it over time.
-
Epoxy coating — stronger seal against moisture, perspiration, and coastal humidity. The surface is a little softer, but it’s the right call for bags worn in humid climates or carried close to the body.
The rule is simple. Bag will see sweat, rain, or bathroom humidity? Go epoxy. Priority is surface hardness and a crisp, solid snap feel? Nickel works fine.
Step-by-Step: Installing the Mating Magnet on the Bag Body
The flap magnet is only half the closure. Placement of its mating partner on the bag body decides whether the whole system works — or just looks like it does.
Step 1: Transfer the Position from the Flap
Close the flap the same way it sits in real use. Don’t estimate — align the centerline and hold the edge distance within ±1–2 mm.
Lay a clear vinyl strip (1.0–1.5 in wide) over the bag body where the mating magnet will land. Press or tap with firm pressure over the installed flap magnet. The impression transfers to the vinyl. You get a clean, reliable center mark on the bag body.
For most tote and handbag builds, that center lands 19–25 mm down from the top edge. Keep it centered to within ±1 mm across the width.
Step 2: Mark It, Then Verify Before You Cut
Once you have the transferred impression, mark the center with a fine-tip marker. Use a small 3 mm cross (+) — not a large dot or circle. Smaller marks keep your cut controlled.
Acceptable error targets:
– Centerline: < 1 mm
– Vertical position: < 2 mm
On wider bags (top width over 40 cm), use two magnet pairs. Place each one 50 mm in from the side edges and 25 mm down from the top. Keep pair-to-pair spacing error under ±2 mm.
Before cutting anything: hold both magnet halves against the outside and inside marks. Check that they snap together with a clean, solid connection. Visible offset over 2 mm? Reposition before moving on.
Step 3: Confirm Polarity — Twice
Bring the mating magnet close to the installed flap magnet. You should feel attraction, not repulsion. It pushes away? Rotate 180° and re-test.
Mark the correct outward-facing side with a dot or line before insertion. Then run this check again after placing the magnet in position — but before final seating. In small-batch production, this double-check drops polarity errors to near 0%.
Step 4: Reinforce the Bag Body Panel
The custom bag body takes more stress than the flap. Back the marked position with a 38 mm square of heavy fusible interfacing (≥ 200 g/m²).
On thick body leather (2.0–2.5 mm):
– Skive a shallow recess 0.3–0.6 mm deep over an area just larger than your magnet diameter
– Use a carving or skiving knife — not a full-through punch die
– Leave ≥ 0.5 mm of outer leather above the magnet. Go thinner than that and the magnet contour prints through to the exterior
Step 5: Cut the Opening
Match your cut method to your magnet type:
-
Prong-style snap magnets — cut two slits, 6–8 mm long, spaced to match the prong centers. Cut them 10–20% shorter than the prong length so the leather grips tight. On ravel-prone materials, seal with seam sealant and let dry ≥ 5 minutes before inserting
-
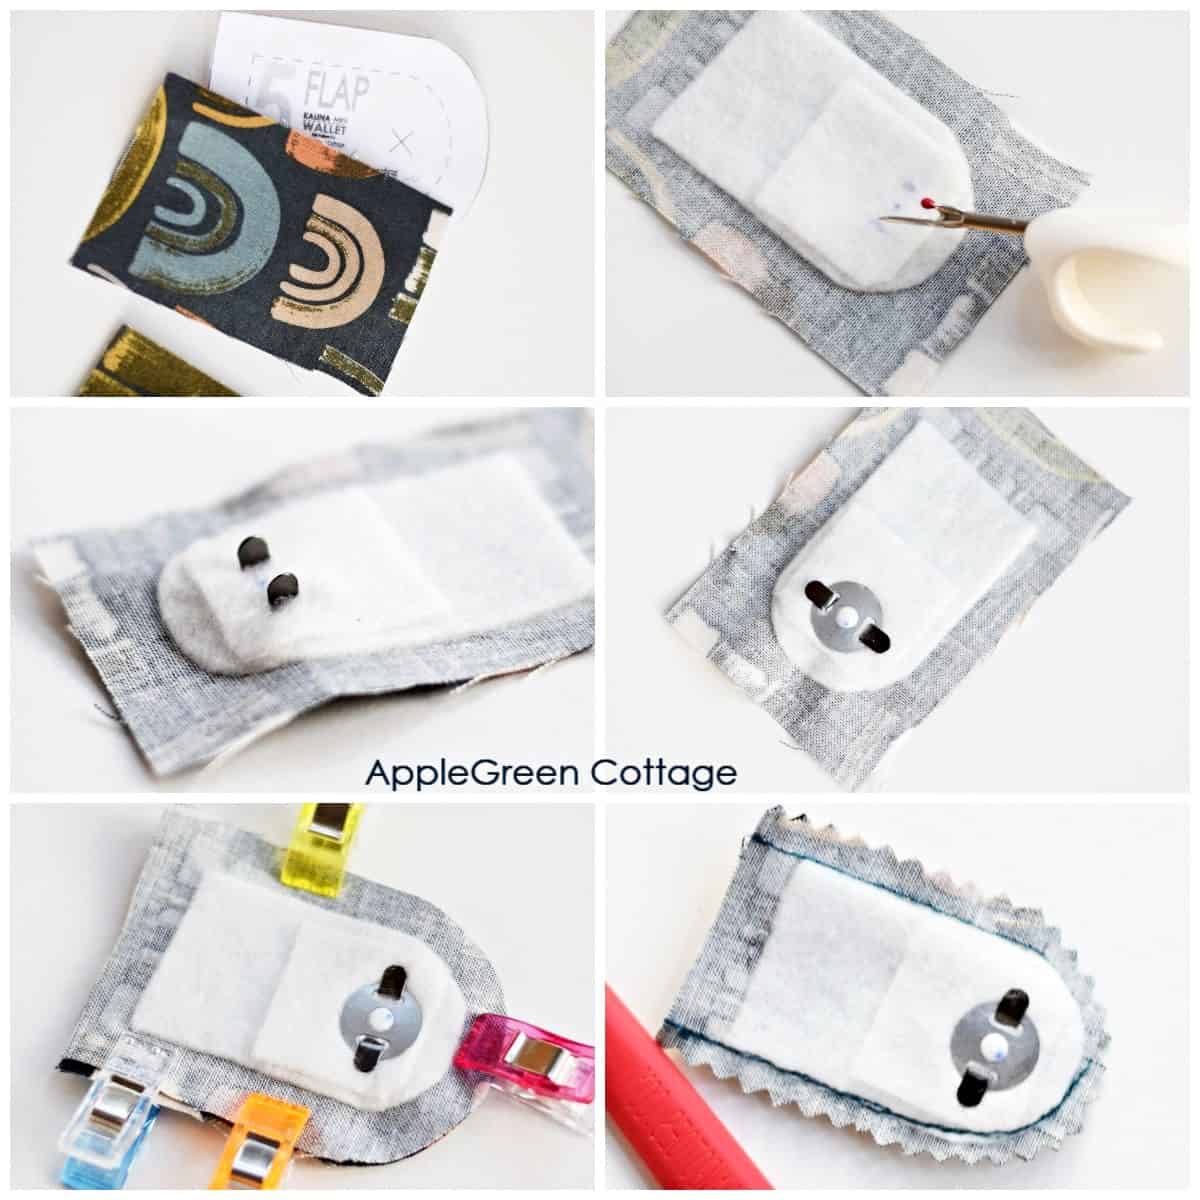
Sew-in disc magnets — cut a small X-slit just under the magnet base size (a 10–12 mm X for a 12–14 mm magnet)
-
Snap-in round magnets — use a hole punch that matches the magnet body diameter. Keep punch size ≤ flange diameter. Go larger and you get a loose fit
Step 6: Install and Secure
For prong magnets: Push prongs from right side to wrong side through all layers. Slide felt or fleece reinforcement squares (1–1.5 in) onto the prongs, then place the metal washer. Bend prongs outward at the base. Outward bending creates a flatter back and cuts down imprint risk on the outer face.
For sew-in disc magnets: Stitch a tight square pattern around the flange — at least 8–10 passes per side, with a stitch square of about 15–20 mm. Hand-stitching? Use waxed thread with saddle stitch at 3–4 mm spacing. Run two full passes around each corner.
Step 7: Prevent Contour Imprint
After bending the prongs, fuse a 20 × 25 mm fleece rectangle over the back of the snap area. This cushions the magnet from the outer layer.
The target: magnet top surface sits 0.2–0.5 mm below the inner surface of the outer leather. That gap stops the circular outline from pressing through — even after months of regular use.
Step 8: Close and Test
With both magnets installed, close the flap and check the snap feel. A well-aligned closure engages with a solid click within ≤ 3 mm of lateral offset.
Run 10–20 open-close cycles. Look for:
– No lateral shift when snapping shut
– No fabric catching on the closure edge
– Flap edge and bag top edge aligned within ≤ 2 mm
Check the exterior under angled light. See a circular outline? Add inner padding or deepen the recess a touch — without breaking through the outer surface.
Strength check: a well-installed ½–1 in purse magnet holds 1–3 kgf. Lift a bag filled with 1–2 kg by the flap. Closure holds without popping? You’re done.
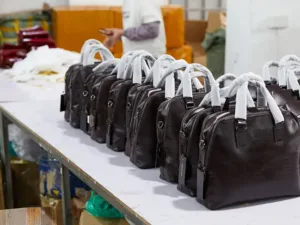
Production benchmarks to hit across a batch of 10–20 bags:
– Mating center positioning variance: ≤ 2 mm
– Polarity errors: 0 per batch
– Outer surface cut-through: 0%
– Visible magnet imprint after final press: < 10%
Conclusion
A hidden magnetic closure isn’t just a functional detail — it’s the quiet signature of a well-made bag. Get it right, and your silhouette stays clean, your leather stays unmarked, and your design stands apart from anything mass-produced.
Three fundamentals matter most when building a hidden magnetic closure for a minimalist leather bag:
-
Choose the right magnet for your leather weight
-
Lock in your placement geometry before you cut anything
-
Prototype multiple times before final assembly
Skip any one of these, and the flaw will show. It usually appears right on the front flap — the one spot where minimalism demands no mistakes.
Now it’s your turn to build. Pull out a scrap panel, grab your magnets, and run the alignment test before touching your final material. Test it more than once. The process rewards patience and punishes shortcuts.
Get the closure right, and it disappears into the bag. That invisibility is what makes it unforgettable.