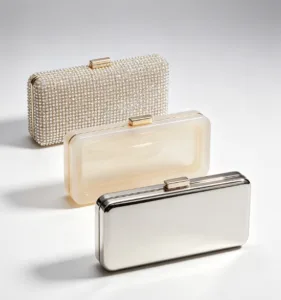
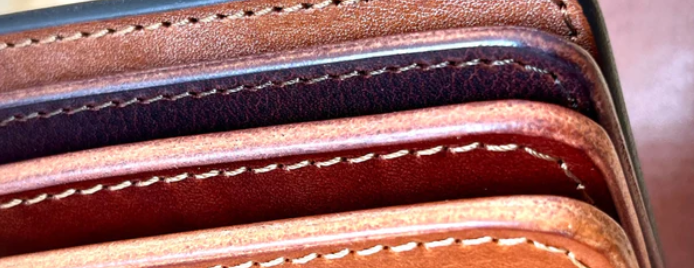
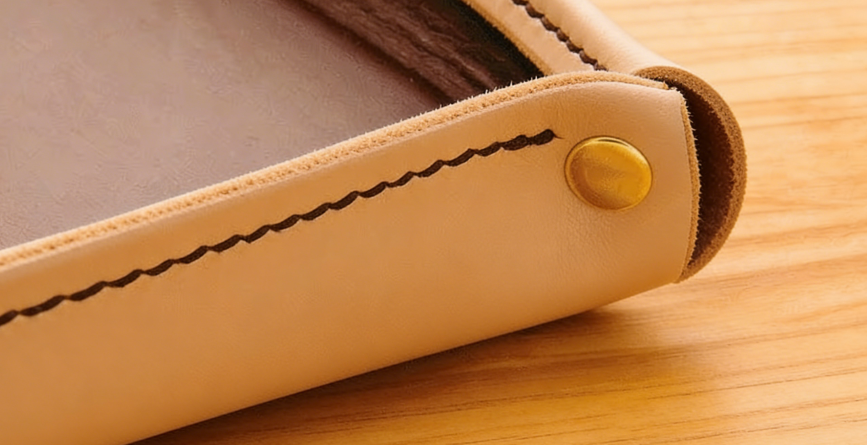
Pick up any well-made leather bag and run your thumb along the edge — that smooth, rounded finish isn’t an accident.
Rolled edges separate a handcrafted piece from something mass-produced. Getting them right takes real skill. It’s not just folding leather over and hoping for the best.
Leather bag edge finishing defines how professional your final piece looks and feels. This is true for your first project or your fiftieth.
This guide covers every stage of crafting clean rolled edges. You’ll go from the initial trim to your final finish choice. No more guessing — just edges worth showing off.
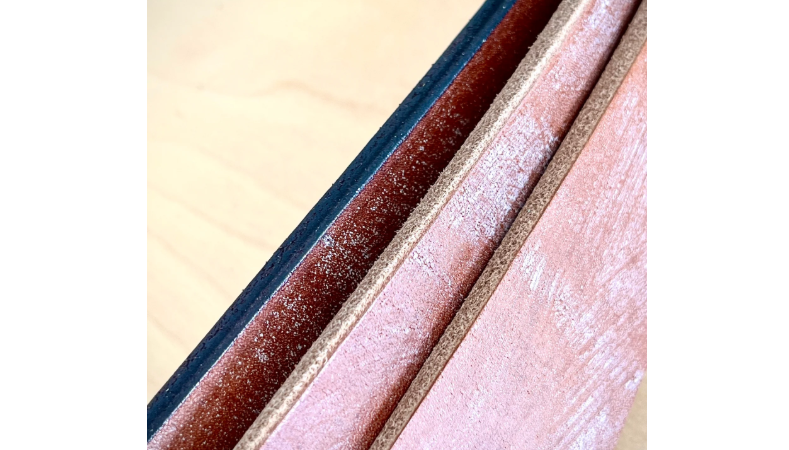
What Is a Rolled Edge on a Leather Bag
A rolled edge starts with a separate leather strip. You skive it down to ¾” or 1½” wide. Then it wraps over the raw edge of your main leather piece and gets sewn in place. This is not the same as folding the leather back on itself. You’re adding a dedicated strip, securing it with double-stick tape, rolling it tight, and stitching it down. For heavy-duty bags, you’d use a machine like a Durk. For thinner bags, a lighter Seiko works better.
That difference matters more than most beginners expect.
How It Compares to Other Edge Treatments
Other finishing methods each have their place. But none of them match the rolled edge on both strength and appearance:
| Edge Type | Method | What It Does |
|---|---|---|
| Rolled | Separate strip, skived and sewn | Doubled leather layer — real structural reinforcement |
| Burnished | Sand and rub raw edge | Surface polish only, no added strength |
| Painted | 2–3 coats of edge paint | Cosmetic seal, no reinforcement |
| Folded | Main leather folded inward | Hides raw edge, minimal strength gain |
Why It’s Worth the Extra Work
The rolled edge delivers two things other methods can’t combine:
- A firmer, more defined profile. That ¾” finished edge with two parallel stitches looks solid and clean. It holds its shape and resists distortion — even with regular, aggressive use.
- Real structural strength. Doubling the leather at the edge stops stretching and tearing. This matters most with chrome-tanned leathers. They’re butter-soft and prone to edge stretch. A 1½” skive rolled twice gives you a ¾” finished edge with twice the reinforcement of a single-layer treatment.
Professional brands use this technique across a wide range of products. On strap tops, a 1½ 2XX roll creates an edge that’s “super tight” and holds firm under tension. On lighter bags like the Sleep Nomad, a single rolled strip adds strength without extra bulk.
The method adapts to your leather type and the demands of the finished piece. That range is why it stays the benchmark for serious leather bag edge finishing.
Tools & Materials You Need Before You Start Bag Rolling
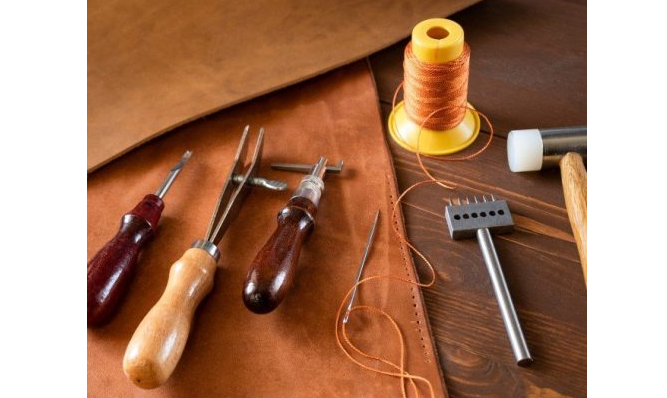
Good tools don’t just make this easier. They decide whether your edge holds for years or falls apart within months.
Here’s what belongs on your bench:
The Essentials
- Skiver — Your most-used tool. Look for adjustable depth (1–2mm). It strips 30–50% of the leather bulk before you fold. That’s what lets the edge sit flat and roll clean.
- Edge Beveler — Craftool Size 2 handles most bag leathers in the 1.5–2.5mm range. It cuts a 45° chamfer, about 0.5–1mm wide. That shape is what lets burnishing grip and seal the surface.
- Sandpaper (220–800 grit) — Start at 220 to remove glue and stray fibers. Move to 800 for a polished surface. Wet sanding at the finer grits gives you 50% smoother results.
- Rotary Cutter — A 45mm blade (Olfa RTY-2/G, around $10) cuts consistent strips with 0.1mm accuracy. Your rolled strip needs to sit flush, so that precision counts.
Consumables That Change the Outcome
- Gum Tragacanth — Mix 1:10 with water. It boosts burnishing friction by 60% compared to plain water. That difference separates a matte edge from a mirror finish.
- Beeswax — Melts at 62°C, fills edge pores to 0.1mm depth, and adds 30% more water resistance. Skip this and the bag won’t hold up to regular use.
- Neoprene-Based Leather Glue — You get 5–10kg/cm² bond strength after a 24-hour cure. PVA glue drops 50% of that strength under flex. Don’t use it.
Budget Expectations
A solid starter kit runs $100–150. That covers everything above at the entry level. With a full setup, each edge piece takes about 5 minutes instead of 15 with makeshift tools. Gum tragacanth paired with beeswax doubles edge wear resistance against ASTM benchmarks. That’s not a sales claim — it’s a measured result.
Step 1 — Trim and Clean the Bag Edge to a Flush, Even Line
A rolled edge is as good as the surface it starts from. Trim the raw edge flush before skiving or folding — even across the full length, with no bumps, dips, or stray fibers pulling the line off course.
Why this step can’t be rushed: Any irregularity gets locked in the moment you start skiving. A wave in your edge becomes a wave in your finished roll.
Here’s how to get it right:
- Trim with a rotary cutter, not scissors. A 45mm blade (like the Olfa RTY-2/G) gives you 0.1mm accuracy along the cut line. Scissors leave tiny wobbles. Those wobbles build up through every step that follows.
- Check flatness from a low angle. Eye along the edge close to the bench surface. Any deviation greater than 1/16 inch will catch the light and show itself clearly.
- Run a straightedge parallel to the cut. A yardstick works. Gaps between the ruler and leather mark your high spots. Mark them, trim them, check again.
One clean pass beats fixing a bad roll later.
Step 2 — Skiving the Edge: The Foundation of a Clean Roll
Skiving is where most beginners go wrong — and where experienced makers pull ahead of the pack.
The goal is straightforward: thin down the leather so it folds flat without bunching. The execution takes real precision, though. Get it wrong, you end up with a bumpy roll that no amount of burnishing will save. Get it right, the edge folds with almost no effort.
Hold your skiving knife at 45° to the leather surface. Push downward pressure toward the edge as you cut. Each stroke should cover no more than ¾ inch — that length keeps you in control. You’re thinning a ¾-inch-wide strip down to under ¼ inch thickness. Work in passes. Don’t drag through it in one go.
Here’s the part most guides skip: leave a 1/16–1/8 inch unskived strip on the backside. That untouched zone is your structural anchor. In the next step, you’ll roll the edge over. That strip holds the fold’s double-layer structure together. Cut it away, and the roll loses its shape and strength.
Dialing In the Right Depth
Skiving depth isn’t guesswork. It ties to your leather thickness:
| Leather Thickness | Target Skive Depth |
|---|---|
| 1–2 mm | 0.5–1 mm |
| 2–3 mm | 1–1.5 mm |
| 3–4 mm | 1.5–2 mm |
Use the screw adjustment on your skiver head to set this. Turning clockwise deepens the cut in 0.01-inch increments. Each pass should pull at least 0.030 inch of material. Your finish target after skiving is a surface roughness of Ra 0.1–0.3 µm — smooth enough that the folded leather sits flush with no ridge showing.
Two Problems to Watch For
Wavy edges come from uneven stroke speed. Keep each stroke under 2 seconds. Grip the knife with a firm hold, move at a steady pace, and don’t rush the pull.
Ragged tearing points to a dull blade or a steep angle. Sharpen to a mirror polish before you start. Still tearing mid-session? Drop your angle to 40° and hold it there until the cut runs clean again.
A sharp blade isn’t a bonus — it’s the line between a clean taper and a frayed mess that kills the roll before it even starts.
Step 3 — Sand and Bevel for a Smooth, Professional Base
Skiving leaves the edge thin — but not finished. Before you roll anything, the surface needs to be clean, flat, and shaped right. Sanding and beveling do that together.
Start with sandpaper, work through the grits. Open with 60 or 80 grit to knock down raised fibers or uneven patches left from skiving. Then step up to 100 grit to refine the surface. Don’t skip grits. Each pass prepares the surface for the next one. Going straight to fine grit over a rough edge just polishes the problem — it doesn’t fix it.
Keep your strokes consistent and your pressure even. Uneven sanding creates small dips. Those dips show up later, once the rolled edge catches light at an angle.
Once the surface is smooth, move to beveling. Size your beveler to 25% of your leather thickness. Work both the grain and flesh sides at 45°. This removes the hard 90-degree corner left from trimming. You’re left with a rounded profile — one that burnishing can grip and seal.
That step makes a real difference. A sharp corner pushes back against burnishing compound and leaves a visible ridge in the finished roll. A well-beveled edge lets the burnishing tool glide and compress the fibers at the same rate across the whole edge.
One checkpoint before moving on: run your fingernail across the edge. It should feel smooth and rounded — no catches, no rough spots. Anywhere it snags, go back with 100 grit and bevel that section again.
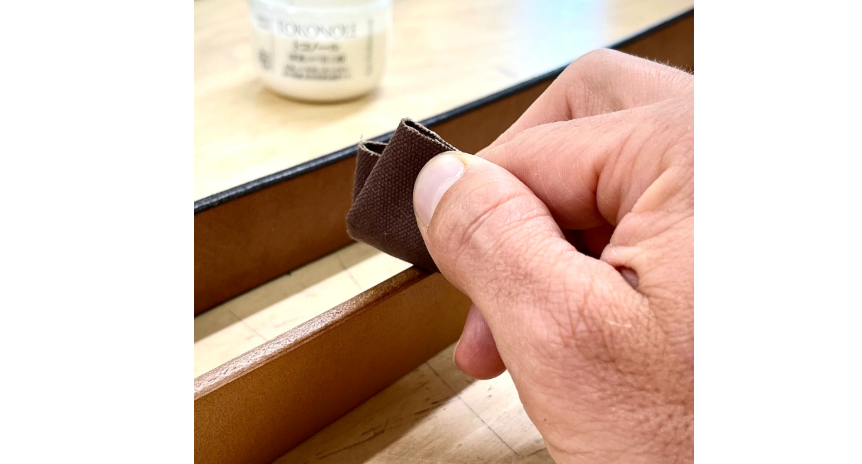
Step 4 — Fold and Roll the Edge: Core Technique Breakdown
Everything up to this point — the trimming, skiving, sanding, beveling — was preparation. This is where it pays off.
Folding and rolling the edge is the moment the piece either comes together or falls apart. Rushed pressure collapses the fold. Uneven speed creates a ridge that no finishing step can hide. The goal is a controlled, gradual roll that moves the leather into position without forcing it.
Start with your folding tool or bone folder held at a low angle. Don’t push straight down. Work at a 30° angle to the surface and guide the fold forward in short, overlapping passes — no more than 2 inches at a time. Each pass should overlap the last by about half. That overlap keeps the fold line consistent and prevents the edge from shifting as you move along.
Use firm, even downward pressure as you go. The unskived strip on the backside — that 1/16–1/8 inch strip you preserved in Step 2 — is doing structural work right now. It resists the fold just enough to hold the double-layer form in place. Respect it. Don’t overwork the fold past that anchor point.
Step 5 — Choose Your Finishing Method: Burnishing vs Painting vs Dyeing
Your leather type makes this decision — not personal preference.
Each method works on a different principle. Burnishing uses friction and heat to compress and slick the fibers. Painting seals the surface with layered coatings. Dyeing goes into the fiber itself, then you burnish over it. Match the method to your leather. Not the other way around.
Which Method Fits Your Leather
- Vegetable-tanned leather — Burnishing is the natural match. The fiber structure responds to friction and bonds into a smooth, shiny finish. Dye first for color, then burnish over it.
- Chrome-tanned leather — Burnishing won’t work here. Chrome-tan lacks the fiber friction needed to build heat and slick the surface. Edge paint is your one reliable option.
- Shell cordovan and tight leathers — Paint doesn’t absorb well into dense fiber. Go with burnishing where you can.
How Each Method Works
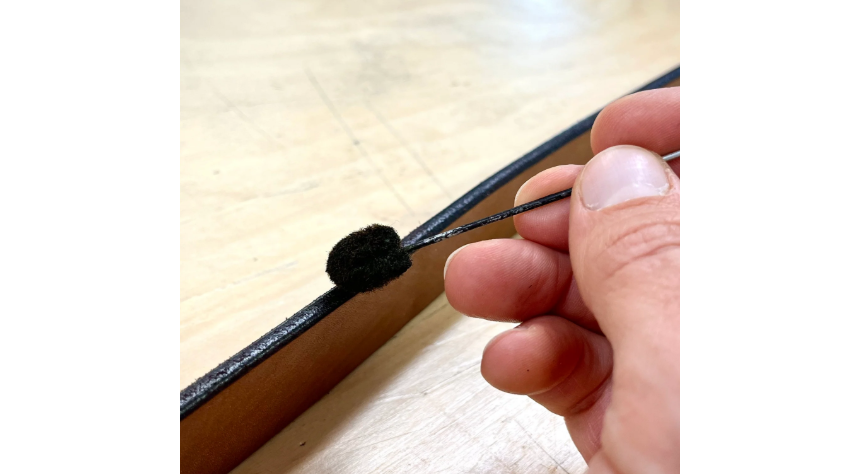
Burnishing (veg-tan edges):
1. Put dye on first if you’re changing the color — let it soak deep into the fibers
2. Coat the edge with gum tragacanth or tokonole
3. Friction-burnish with a wood stick or cotton rag at high speed — the heat is what slicks the fibers
4. Do a final pass with a canvas scrap to bring up the shine
Time per edge: under 5 minutes. The finish is shiny and natural, showing the leather’s texture. It won’t fill cracks or crevices. It will soften with wear over time. That’s not a flaw — it’s just what burnishing does.
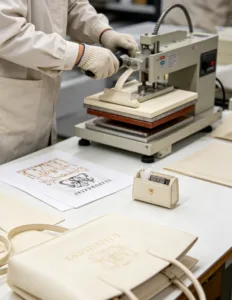
Edge Painting (works on all leather types):
1. Put down 2–3 thin base coats with a brush or sea sponge — dry 10–20 minutes per layer
2. Sand with 400–600 grit after the base cures (around 30 minutes)
3. Add 2–3 top coats, drying 10–20 minutes each
Total process time: 1–2 hours. Use a sea sponge with a light dabbing motion to avoid streaks. Painting gives you full, opaque coverage and fills surface gaps. The tradeoff: it can peel or crack on items that flex a lot, and it runs 2–3 times slower than burnishing.
Dyeing + Burnishing (veg-tan needing color):
Put dye on with a dauber, let it soak into the edge, then wipe the excess. Dye goes deep — permanent color, not a surface coat. It’s see-through rather than solid, so the leather texture stays visible. Bleed and uneven absorption are real risks, especially on edges. Seal with a thin layer of resolene to lock the color before you burnish. Best for lower-flex items like bag bodies and structured panels.
Side-by-Side Comparison
| Feature | Burnishing | Edge Painting | Dyeing + Burnish |
|---|---|---|---|
| Speed | Fastest (~2–5 min) | Slow (10–30 min) | Medium (5–10 min) |
| Durability | Fades with wear | High, may peel on flex | Long-lasting, natural |
| Finish | Shiny, shows texture | Glossy, opaque | Deep color, slick |
| Best Leather | Veg-tan | Chrome-tan, tight leathers | Veg-tan needing color |
| Fills Gaps | No | Yes | Partial |
Using a heat gun to speed up drying between coats? Hold it 6–8 inches from the edge at a low setting — 200–300°F max. Sweep at an even pace for 10–20 seconds per section. Go past 350°F and the leather warps. Test on scrap first.
Pick the method your leather calls for. A burnished chrome-tan edge won’t hold. A painted veg-tan edge on a structured bag is overkill. Get the match right, and the finish takes care of itself.
Conclusion
Rolled edges aren’t just a finishing detail — they’re the signature of a bag built with intention.
From the first clean trim to the final burnish or paint layer, every step builds on the last. Skip the skiving, and your roll buckles. Rush the sanding, and no amount of dye will save you. Get each stage right, and you end up with an edge that’s smooth, durable, and looks completely professional.
The difference between a leather bag that looks handmade and one that looks crafted often comes down to this — how the edges are handled.
You now understand the full leather bag edge finishing process. The best next step is simple: grab a scrap piece of leather and practice the fold-and-roll technique. Do this before you commit to your actual project. Skill lives in the hands, not just the instructions.
Do it once, do it right. You’ll never cut corners again.