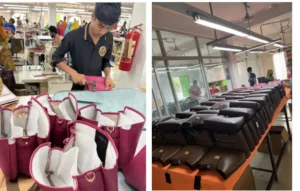
Starting a bag business? Or improving your current production? Your pattern quality controls everything. It affects material use, production speed, and product consistency.
Pattern making turns creative bag designs into exact blueprints. Your manufacturing team can execute these blueprints with precision. But many manufacturers face challenges. They struggle with getting dimensions right, calculating seam allowances, and turning flat patterns into 3D structures.
This guide covers pattern making basics for bag manufacturing. You’ll learn about drafting tools first. Then we move to box corners and hardware integration. Professional pattern makers use a smart approach. They break complex designs into simple geometric shapes. They calculate exact seam allowances. They build grading systems that keep design quality across all sizes.
You’ll gain a clear system for pattern development. This system cuts down sample rounds. It reduces fabric waste. Your bags will flow easily from prototype to bag production line.
Step-by-Step Bag Pattern Drafting Guide
Pattern drafting follows a clear order. Each step builds on the one before. The method stays the same for a simple tote or a complex backpack.
Setting Up Your Draft Foundation
Start with three basic parts. Draw a vertical line down your pattern paper. Add horizontal lines crossing it at key measurement points. Check every corner with a square ruler. All angles must hit 90 degrees. This frame guides your entire pattern.
The 10-Step Drafting Sequence
Step 1: Mark Your Primary Vertical
Place point A near the top left corner of fresh pattern paper. Draw a straight line downward. This length equals your bag’s main height measurement. Mark the bottom point as B. This line serves as your center reference and grainline marker.
Step 2: Establish Horizontal Width
Measure down from point A to your bag’s widest section point. Mark this as point D on line AB. Draw a horizontal line from D. The length equals half your bag width + ease allowance. Standard ease runs 2.5cm (1″) for woven fabrics, doubled for stretch materials. Cut this ease measurement in half before adding it to your half-width. Mark the endpoint as E.
Step 3: Complete Your Rectangle
Square up from point F through E. Match the length to your center back measurement. Mark the top as point G. Label line FG as your secondary grainline. Connect G to C with a ruler. You now have your basic pattern box.
Step 4: Add Depth Markers
Take your bag depth measurement and add 0.5cm (1/4″) for movement ease. Measure this distance down from A toward B. Mark as point H. Extend a horizontal line from H until it crosses your front line. Mark that crossing as point I.
Step 5: Draft Connection Points
Use your strap or handle attachment measurement. Pivot from point T until the measurement crosses the perpendicular from point L. Draw this connecting line. Mark the end as V. Connection lines sometimes overlap on complex patterns. That’s normal. You’ll separate pieces during tracing.
Step 6: Divide Your Depth Zones
Square up from point A1 to meet your top edge. Take your depth measurement and divide by 5. Mark this fraction up from A1 as point A2. Find the middle point between W and A1. Call it A3. Draw straight down from A3 until you hit the bottom line. Mark this crossing as A4.
Step 7: Shape Your Side Panels
The line from A3 to A4 works like a dart at first. Split the width: 1/3 goes to the back panel, 2/3 to the front. Position these divisions on either side of A2. Connect the endpoints to A3. These form your shaped side seams.
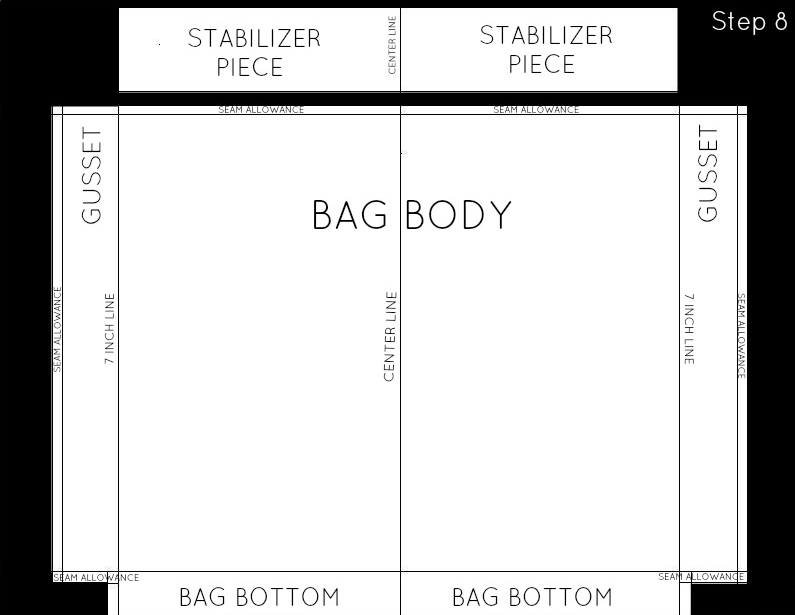
Step 8: Transfer to Clean Paper
Lay fresh pattern paper over your draft. Trace the back pattern piece first. Include all reference lines. Leave at least 5cm space between pieces. Trace your front pattern piece. This clean copy becomes your master pattern.
Step 9: Add Seam Allowances
Add seam allowances after tracing is complete. Standard width: 1cm (3/8″) for bag construction. Mark this measurement on side seams, center lines, and connection edges. Keep one copy without seam allowances. You’ll need it for future adjustments or size changes.
Step 10: Mark Technical Details
Place drill holes 1–1.5cm (3/8″–1/2″) from any dart points or corners where hardware mounts. Add notches at matching points where panels connect. Draw grainline arrows pointing toward pattern top. Label each piece with its position name and cutting quantity.
Pattern Modification Techniques
The slash-and-spread method adds volume without hard math. Draw cut lines on your pattern where you want expansion. Cut along these lines. Spread the pieces apart by your desired amount. Tape paper strips in the gaps. Redraw smooth curves connecting the separated sections. For major volume changes, make multiple parallel slashes spaced 2-3cm apart.
Conclusion
Pattern making basics for bag manufacturing turn your production from guesswork into precision work. You’ve explored the full journey. You understand basic geometric principles. You know how to select the right drafting tools. You can calculate seam allowances. You create 3D shapes with box corners. You prepare production-ready patterns through prototype testing.
Amateur bag making differs from professional manufacturing in one key way: systematic pattern development. Break down complex designs into smaller parts. Plan for hardware integration from the start. Set up proper grading systems. You’re not just making one bag—you’re building a production system that scales.
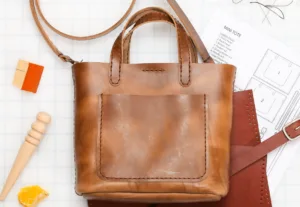
Your next step? Pick a simple tote or pouch design. Use these pattern making basics hands-on. Start with accurate measurements. Draft your first prototype pattern. Test it completely before cutting premium materials. Every master pattern maker started with a single line on paper.
The bags you picture are just a well-drafted pattern away from reality. Stop designing in your head—start drafting on your table.