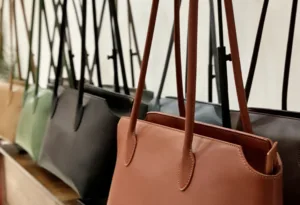
Ever touch a leather jacket and notice how some feel thick and strong while others feel soft or loose? That texture you feel is grain tightness—one of the best ways to judge leather quality. Most people miss this.
Buying a $2,000 briefcase or picking boots at your local store? Grain tightness gives you an edge. Most salespeople don’t understand this themselves.
The fiber density under the surface controls everything. It shapes how your leather handles stress. It affects how the material ages over years. And it explains the price you pay.
You’re about to learn the complete system for checking any leather product’s real quality. This covers the structure that makes tight grain patterns. You’ll learn the visual checks that pros use. These skills turn you from a hopeful shopper into someone who spots premium work from across the room.
What is Grain Tightness in Leather?
Grain tightness measures how close the outer fiber layer packs together on leather’s surface. Think of a tight-weave fabric versus a loose weave—leather works the same way under a microscope.
The grain layer sits at the very top of the hide. Fibers compress close here? Tanners call that tight grain. Fibers spread apart? That’s loose or open grain.
How to Spot Tight Grain
Look at the surface pattern. Tight grain shows small, close-spaced wrinkles and pores. The pattern stays consistent across the whole piece. Press the leather and bend it. Tight grain stays smooth and firm. No baggy areas. No excess wrinkling.
Cut edges tell the real story. Slice through tight-grain leather. Check the cross-section. You’ll see short, packed fibers right under the surface. Loose grain? Long, fuzzy, separated fibers instead.
The Structure Behind Quality
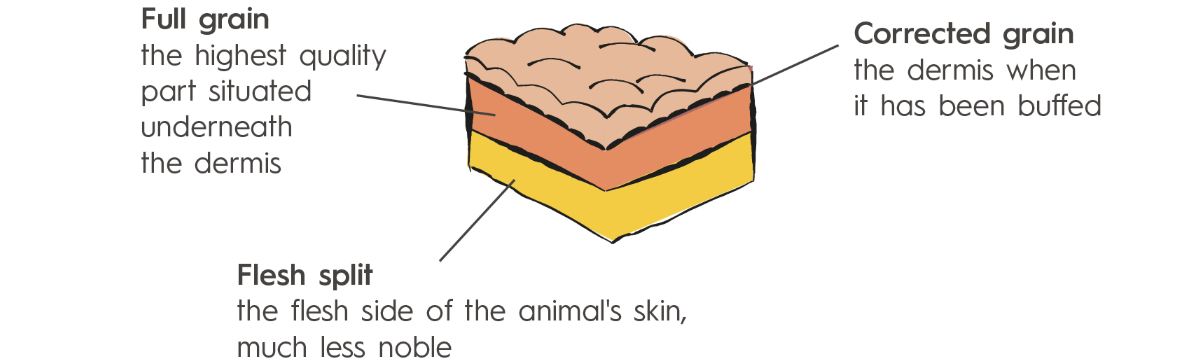
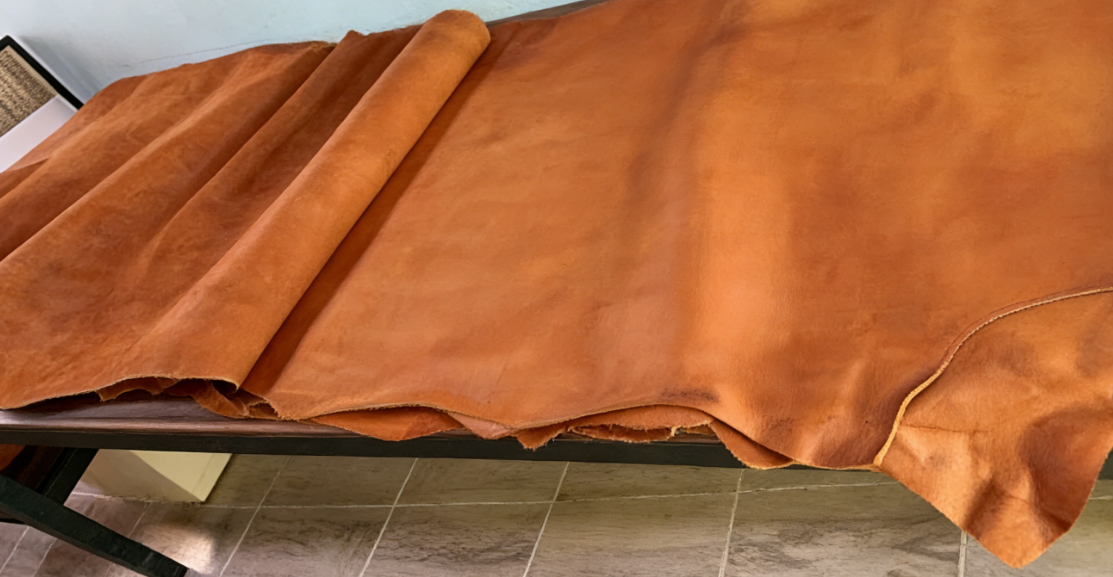
Full-grain leather keeps the top hide layer intact. Raw cowhide runs 6-10mm thick before splitting. The top split—your full-grain or top-grain leather—holds the most packed fiber layer.
Craftsmen can split full-grain down to just 1.2-1.6mm. It still maintains serious strength. That close grain packing does the work. Heavy-duty uses prove this. Belts use 3.18-4.78mm leather. Gun belts need 3.96-4.78mm. Saddle parts require 5.57-6.36mm. All of them rely on tight grain to carry weight and stress.
Leather Anatomy: How Fiber Structure Determines Grain Tightness
Collagen fibers form the foundation of every leather hide. How they pack together controls grain tightness at the surface. Denser bundles create tighter grain that you can see and feel.
Fiber Density Creates the Difference
CT scans reveal the internal structure. Back sections show 30-40% higher solid volume fraction than flank or belly areas. More collagen in each cubic millimeter means stronger material. That density shows up as tighter grain patterns at the surface.
Back leather beats other areas in every test:
– Highest tensile strength (back > flank > belly)
– Lower extensibility (stretches less under load)
– Fewer voids and pores in the fiber network
The back region has more branched, continuous fiber networks. Flank and belly areas have more gaps. Those gaps create loose, baggy grain that wrinkles fast.
Individual Fiber Bundle Mechanics
A single collagen bundle from premium back leather measures about 0.15-0.17mm thick. Testing shows strong performance:
- Breaking force: 258N
- Stress tolerance: 13.6 MPa
- Elastic modulus: 304 MPa
- Strain at failure: 7.9%
Individual bundles stretch just 5-10% before breaking. Yet whole leather sheets can elongate 20-30%. Loosely-woven networks let bundles unfold and reorient. Tighter grain leather keeps bundles straighter from the start. Less slack means less stretch.
The Grain Layer Gradient
Leather changes from surface to flesh side. The grain layer sits at the top with maximum fiber density. Move deeper toward the flesh, and fibers spread apart. This gradient creates natural stiffness at the surface.
Microscopy confirms the grain layer shows:
– Smaller weave angle variation (more consistent pattern)
– Higher packing density (less space between bundles)
– Greater local stiffness (resists deformation)
Calfskin shows this clearly. With 1.1mm thickness, it has an elastic modulus around 7.6 N/mm². Compare that to sheepskin at 0.6mm with 4.4 N/mm². Calfskin’s more interlaced, compact network creates tighter grain. Sheepskin’s open structure feels stretchier and looser.
How Processing Changes Fiber Structure
Mechanical milling breaks up that tight structure. Tests prove the impact:
- Non-milled leather viscosity: 2.37 × 10¹¹ Poise
- Milled leather viscosity: 8.58 × 10¹⁰ Poise (64% drop)
Electron microscopes show the damage. Non-milled leather maintains rigid, ordered fibers. Milled leather looks disordered and loosened. Milling cuts stiffness by a lot while having little effect on tensile strength. The grain becomes softer but also looser. More drape, less structure.
Premium leathers avoid heavy milling. They keep the natural tight-packed fiber geometry that came from the animal’s back.
Full-Grain vs Top-Grain vs Corrected-Grain: Grain Tightness Comparison
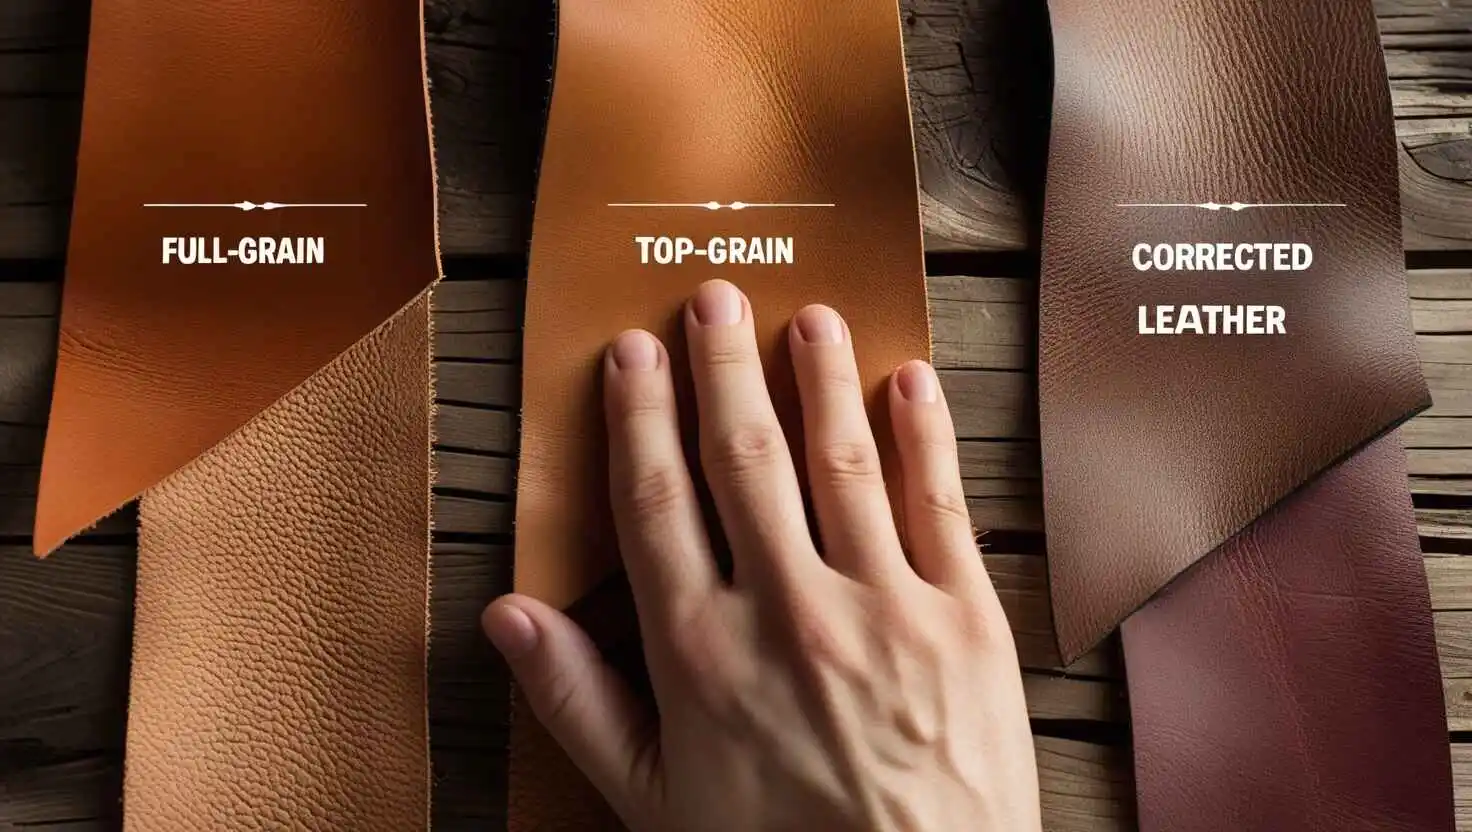
Grain tightness drops in a clear order across leather types. Full-grain sits at the top. Top-grain falls in the middle. Corrected-grain ranks lowest. The difference comes down to how much of the original fiber network gets kept or removed.
Full-Grain: Maximum Fiber Density
Full-grain leather keeps the outer grain layer 100% intact. No sanding. No buffing. No surface correction. You get the entire natural fiber network just as it grew on the animal.
Look close and you’ll spot natural hair follicles and pores. Those marks prove the fibers stayed untouched. They’re the densest and most durable you can find. This outermost “shield” layer gives you top fiber density, strength, and scratch resistance. No other type can match it.
Other leathers remove part of that protective layer during processing. That’s why they can’t compete.
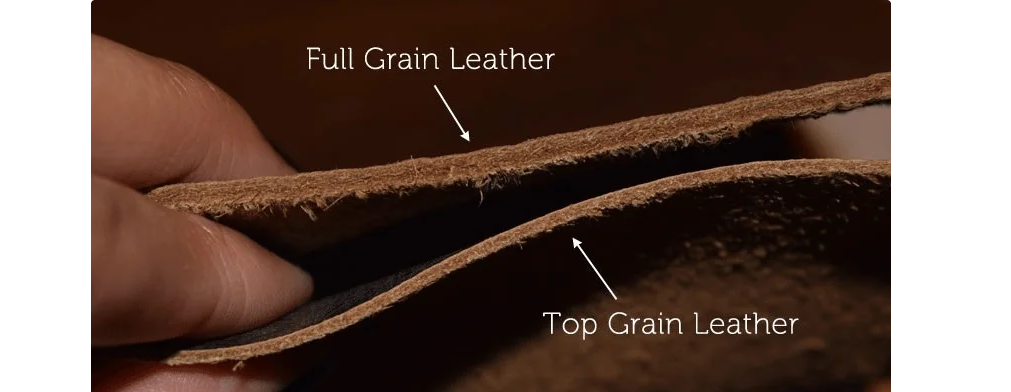
Top-Grain: Medium Tightness After Sanding
Top-grain starts from the same top section of hide. Tanners sand or buff the surface. This removes scars and blemishes. It also removes a large chunk of the outer, tough fiber bundles.
The cross-section gets thinner. Surface fiber density drops. You lose some of that tight grain that full-grain keeps.
Most top-grain gets pigmented finishes and fake grain patterns pressed in. The coating hides the original pores. It blocks some air flow too. Scratch resistance drops below full-grain. Those tough surface fibers are gone.
Top-grain still beats split leather for strength. But it can’t match full-grain’s natural tightness.
Corrected-Grain: Lowest Natural Grain Integrity
Corrected-grain goes through the toughest processing. Tanners sand or polish the surface hard. Then they add thick coatings and press in fake patterns.
Heavy sanding creates nubuck. More grain gets removed. The surface turns fuzzy and open. Light sanding makes “slightly corrected” leather like some Chromexcel. Either way, the process strips away part of the original tight grain.
Thick pigmented coatings hide or cover up natural pores. The surface turns more synthetic. It breathes less than full-grain or quality top-grain.
Industry sources confirm corrected-grain has “less strength and durability than either Top or Full Grain“. Material gets removed. Heavy finishing weakens it. Corrected-grain shows the most altered and loosest natural grain at the surface. All three types compared, this one ranks last.
The ranking holds true: full-grain keeps unbroken, super-dense grain with visible natural pores. Top-grain removes the outer tough fibers but keeps decent density. Corrected-grain changes the original structure a lot. It swaps tight grain for fake finish.
Visual and Tactile Inspection: Identifying Tight vs Loose Grain
You can easily judge leather quality by looking and feeling—tight, smooth, and dense grain feels solid and refined, like a well-woven fabric, while loose, open, and soft grain feels more casual and porous, like a loosely knitted cloth.
Step-by-Step Inspection Process
- Select a clean, representative area of at least 20 × 20mm. Avoid worn or damaged spots.
- Set up proper lighting. Start with diffuse light for overall viewing. Then use low-angle lighting to highlight surface relief and grain depth.
- Macro scan from 20-30cm distance. Look for overall pattern regularity and dominant spacing between lines or pores. Flag any areas that look open or blotchy as possible loose grain.
- Micro scan from 10cm distance. Estimate the distance between adjacent grain features. Classify as tight-leaning if most gaps measure 0.5-1.0mm or less. Mark as loose-leaning if gaps exceed 1-2mm.
- Do the count-per-centimeter check. Mark a 1cm span and count distinct lines or pores crossing it. Use the thresholds: 12-20+ indicates tight, 8 or fewer indicates loose.
- Cross-check at least 3 different spots on the leather piece. Repeat all visual and tactile tests. If any spot reads as loose, the overall classification drops. Premium leather shows uniform tightness across the entire surface.
This inspection system works in showrooms, workshops, or your own quality control process. Practice builds speed. You’ll identify grain tightness in seconds after checking a few dozen samples.
Conclusion
Leather grain tightness gives you real power in buying quality leather goods. Tighter grain means denser fibers. You get better durability. Plus, that rich patina develops over decades. Shopping for a leather jacket, handbag, or upholstery? Those visual cues and touch feedback we covered help you spot quality that most buyers miss.
Next time you shop, spend thirty seconds checking the grain pattern. Run your fingers across the surface. Ask what type of leather it is. These simple steps make the difference. You’ll treasure the purchase for life instead of regretting it in months. For belts, boots, and saddles, grain tightness matters even more—it decides if the item performs or fails.
You now know about custom leather grain tightness and quality. No more guessing. You’re making smart choices that respect your budget and standards. Go find that perfect leather piece that will age like fine wine.