What Your Clutch Bag Closure Does (And Why It’s Not Just Hardware)
A clutch bag closure handles four jobs at once — and most buyers focus on just one of them.
Security comes first. The contents of a typical clutch (phone, keys, cards, lipstick) can top $300 in value. High-security options like zipper closure evening bags, turn lock closure handbags, and tuck locks create a mechanical seal. That seal holds firm against accidental opening. Magnetic snap closures open faster, but the pull-out resistance is lower — usually 0.5–2.5 kgf. That can be a problem when you tuck a loaded bag under your arm.
Ease of use matters just as much. A magnetic snap takes 1–2 actions to open. A zipper needs 2–3. A turn lock requires 3–4. For evening use, anything beyond three actions starts to feel like a hassle.
Structural support is where bag construction and hardware overlap. On a metal frame clutch bag, the frame clasp isn’t just decorative — it holds the shell shape together. On soft clutch styles, the zipper and top binding work like a horizontal beam. They keep the bag mouth straight even under load.
Visual language is the fourth function. A custom-engraved turn lock with a 2–4 cm² visible face signals luxury before anyone opens the bag. Color consistency plays a role here too. Premium manufacturers keep plating color deviation to ΔE < 1.0 across all bag hardware types. That tight tolerance keeps the finish looking uniform and polished.
Step 1 — Define the Occasion and Security Level First
Occasion drives everything. Before you open a hardware catalog or spec sheet, you need a clear use case. That use case points you to a security tier. The tier cuts your closure options down fast.
The five primary use scenarios each carry a distinct security profile:
Evening & Formal Events — The bag spends most of its life in the owner’s hand or on a table. The real risk is items sliding out, not theft. You need a closure that holds at opening angles under 30°. Skip anything built for crowded commutes. Turn locks and flap-with-magnetic-snap combos work well here. A single magnetic snap rated at 0.5–1.0 kgf is enough for a standard evening clutch.
Weddings & Gift Sets — Usage is low. Most owners carry this bag fewer than five times per year. Clean appearance and low defect rates at volume matter most here — not heavy-duty security mechanics. A 10–14 mm snap button or a small magnetic snap keeps costs controlled. It also keeps the gifting presentation intact.
Promotional Giveaways — Budget runs $1–5 USD per unit FOB. Hardware costs should stay under 15% of that. Security is the lowest priority. A light single zipper or basic magnetic snap is the standard choice here.
The rule is simple: higher item value and more frequent movement require a higher security tier. An evening clutch holding three cards and a lipstick is a completely different brief than a travel document pouch or a daily commuter wristlet. The contents and how often the bag moves determine how much closure strength you actually need.
Lock in the occasion first. That one decision cuts at least half your closure options before any aesthetic conversation starts.
Step 2 — Match the Closure to Your Clutch Bag Shape and Structure
Bag shape isn’t just about looks — it’s a structural constraint. The shape of your bag directly limits which closures will actually work.
A magnetic snap that works great on a soft envelope clutch will fight against the rigid geometry of a box clutch. A spring-loaded frame clasp that holds a box clutch shut with satisfying tension has nothing to grip on a gathered pouch. So before you pick any hardware, figure out which of these three structural categories your bag falls into.
Envelope Clutch → Magnetic Snap or Turn Lock
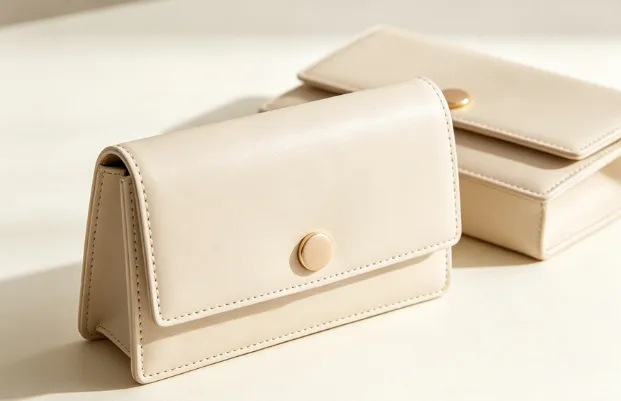
The envelope clutch is the most common clutch format. It runs 250–320 mm wide with a flap height of 60–90 mm. For soft-construction flaps — 1–2 fabric layers plus a thin lining — a single magnetic snap at 12–18 mm diameter with 1.5–3.0 kgf pull resistance is the right fit.
Width matters here. For bags narrower than 260 mm, one centered snap does the job. For bags 280 mm and wider, a single snap lets the flap edges lift. Use a dual-snap setup to keep that edge lift under 3–5 mm.
Got a stiffened flap with an inner board of ≥ 1.5 mm? Switch to a turn lock closure. The rigid backing gives the lock mechanism something solid to seat against. Turn locks need precise hole tolerances — ±0.1 mm. In return, you get real tamper resistance. Opening torque runs 0.3–0.6 N·m. That’s enough to stop the flap from swinging open on its own when you hold the bag upright.
Box Clutch → Frame Clasp or Push Lock
A metal frame clutch bag works on a completely different principle from a flap-based design. The closure doesn’t sit on top of the structure — it is part of the structure. The frame holds the shell alignment. The clasp finishes it.
For box clutches in the 160–220 mm width range, a spring-frame clasp is the natural match. The internal spring leaf — 0.3–0.6 mm thick — creates that tactile snap that makes a rigid clutch feel premium. For narrower shells in the 20–50 mm range, use 1–2 push locks spread across the width. Metal push locks hold a male-to-female tolerance of ±0.05–0.10 mm. That’s tighter than plastic equivalents, which run ±0.10–0.20 mm.
One installation detail that often gets missed: the latch mechanism needs at least 5 mm of clearance behind the shell wall for the cam travel. The safe working spec is 8 mm. Skip this step and you’ll hit assembly interference on your first sample.
Pouch Clutch → Zipper or Drawstring
Soft pouch construction needs a linear closure — one that moves with the bag mouth as the contents shift. Zippers are the go-to choice. Size selection is simple:
-
#3 for small soft clutches
-
#5 for mid-size
-
#8 for larger travel-oriented pouches
Leave 10–15 mm of return length at each end. This stops the pull tab from stressing the side seams.
Drawstrings suit style-forward designs where the gathered opening is part of the look. Use a 3–6 mm cord through metal eyelets with a 6–10 mm inner diameter. Keep the channel fabric height at 25–40 mm. That range holds the cord in place under tension and stops it from pulling through.
Quick-Reference: Bag Shape × Recommended Closure
|
Bag Shape |
Structure |
Recommended Closure |
Key Spec |
|---|---|---|---|
|
Envelope (soft flap) |
1–2 layers + thin lining |
Magnetic snap |
Single ≤260 mm wide; dual ≥280 mm; reinforce mount area with 0.3–0.6 mm interlining |
|
Envelope (stiff flap) |
Inner board ≥1.5 mm |
Turn lock |
Hole tolerance ±0.1 mm; lock post dia. 5–7 mm |
|
Box clutch |
Full rigid shell |
Frame clasp / push lock |
Cam clearance ≥5 mm; metal fit tolerance ±0.05–0.10 mm |
|
Pouch clutch |
Soft, no board |
Zipper (#3/#5/#8) |
10–15 mm return at each end; reinforce mount point with 0.5–1.0 mm backing |
Step 3 — Understand Your Material Before Choosing Hardware
Material thickness decides which closure holds — and which one splits at the seam within three months.
Hardware selection doesn’t happen in a vacuum. The closure you pick must match the material stack you’re building. Count every layer: outer shell, interlining, foam padding, and lining. Miss one, and even the right closure will underperform.
Leather: Watch Your Rivet Points
Full-grain leather runs 1.6–2.2 mm per layer. Stack two layers at a hardware mounting point and you’re already at 3–4 mm. That thickness causes trouble with direct rivet attachment. Localized pressure impressions of 0.1–0.2 mm form over time. Once pull force passes 80–100 N, the hole edge tears.
The fix is a backing plate. Use a copper, iron, or stainless steel reinforcement plate — 0.3–0.8 mm thick, with a face area at least 1.5–2× the rivet head diameter. At high-stress points like turn lock posts or strap anchors, single-point loads can hit 70–120 N. A dual-rivet-plus-backing-plate setup cuts unit stress by 30–50%.
One more detail worth adding: place a 0.5–1 mm fiber or PU interlayer between the leather and any metal contact surface. It absorbs 20–30% of hard-contact pressure. That drop in pressure cuts long-term cracking risk around the mounting zone by a solid margin.
Canvas and PU: Stabilize Before You Sew
Canvas (300–600 g/m²) and PU synthetic leather (0.8–1.4 mm) are lighter and more forgiving than full-grain leather. But they bring their own compatibility problems.
For magnetic snap closures on PU, the surface coating is the weak point. Standard needle spacing damages it. Use a round-tip needle and increase stitch spacing to 4–5 mm. Each snap baseplate needs at least 8–12 stitches using 20–40 tex thread. That’s the minimum to handle 30–50 N of shear force from regular daily use.
For zippers on canvas, a material thickness ≥ 1 mm means the seam fold at the zipper tape can stack up to 3–4 mm. Leave at least 7–8 mm of seam width to stop fabric from catching in the zipper teeth. On PU, the softer body causes zipper tape rippling. Add a 0.3–0.5 mm woven interlining along the zipper edge. That reduces wave deformation by 40–60%.
A standard PU clutch build — 0.8–1.2 mm PU outer + 0.2–0.4 mm polyester lining + 1–2 mm foam interlayer — pairs well with sewn magnetic snaps and zippers. No rivet backing needed. But the magnetic snap area still needs a localized fabric interlining patch to stop distortion under load.
Hard Shell: Frame Fit Tolerance Is Non-Negotiable
ABS, PC, and ABS/PC composite shells run 1.0–2.5 mm thick, with reinforced zones up to 3 mm. For a metal frame clasp on a hard shell, the frame channel width should exceed shell thickness by no more than 0.1–0.3 mm. A gap beyond 0.4 mm lets the latch mechanism shift during repeated use. That shift causes 0.5 mm or more of misalignment and makes the closure unreliable.
For push-lock and bar-lock installations on hard shells, mount the fastener screws or rivets over structural rib zones where shell thickness is confirmed at ≥ 2.0 mm. Thinner local walls need a 0.5–1.0 mm interior metal plate to add shear resistance. Single push locks on a metal frame clutch bag can take 150–250 N of pull force during normal use. Use at least two locking points to bring per-lock load down to 75–125 N. Latch engagement depth into the frame should reach ≥ 3–4 mm to hold closure under vibration and repeated impact.
How Material Thickness Affects Magnetic Snap Selection
This is the most under-specified variable in clutch bag construction. Most builders overlook it entirely.
Magnetic field strength drops fast as it passes through material layers. The number you need is total barrier thickness — outer shell + lining + any foam or interlining, combined across both sides of the closure point.
Here’s a practical sizing guide:
|
Total Barrier Thickness |
Recommended Snap Diameter |
Rated Pull Force |
|---|---|---|
|
≤ 4 mm (both sides combined) |
14–16 mm |
1.5–3.0 kgf |
|
4–10 mm |
18–20 mm |
3.0–5.0 kgf |
|
> 10 mm |
20–25 mm |
5.0–8.0 kgf |
A rough working rule: each extra 1 mm of total barrier thickness cuts effective snap pull force by 5–10%. Above 8–10 mm, that loss speeds up — expect drops of 30–40% or more. Take a real example: a thick leather outer (1.8 mm) + 0.3 mm lining + 1 mm foam padding puts your single-side stack at 3.1 mm. Both sides combined: 6.2 mm. A standard 14 mm snap won’t hold at that thickness. Step up to 18–20 mm.
Lining Material Has a Direct Impact on Closure Stability
The clutch bag lining isn’t just interior finishing. It’s part of the hardware mounting system.
Soft outer + rigid inner interlining is the most reliable combo for snap-based closures. A PU outer (1.0 mm) backed by a 0.6–0.8 mm non-woven stiffener raises local rigidity at the snap mount by 40–60%. That keeps the snap face flat and the alignment steady.
Rigid outer + soft lining — think thick leather with a thin polyester lining — is the combo that causes the most problems. No stiff interlayer at the snap zone means the leather face flexes under load. The snap center shifts by 1–2 mm. That misalignment ruins the closing feel and wears out both snap parts faster. Fix it with a 0.5–1.0 mm EVA or paperboard insert behind the snap mount. It keeps center deviation under 0.5 mm.
For zipper-lined builds, stitching a zipper straight onto soft lining alone creates 2–3 mm of tape ripple under tension. Back the zipper tape with a 0.3–0.5 mm woven interlining. Ripple drops below 1 mm, and the draw feels much smoother.
Recommended lining specs by closure type:
-
Magnetic snap closure clutch: High-density polyester twill (120–200 g/m²) with hard interlining at the snap zone. Total thickness at the snap mount should land at 2.5–3.5 mm for a stable, flat seating surface.
-
Turn lock or push lock (frame clasp clutch bag): Combined lining and interlining thickness ≥ 3 mm. Place a 20–30 mm × 20–30 mm reinforced mounting pad at each lock point to spread shear loads above 100 N.
The 7 Main Clutch Bag Closure Types: Honest Pros, Cons & Best-Fit Scenarios
Seven closure types. Very different performance profiles. One comparison guide to sort them out.
Each closure below is rated across four dimensions: security (1–5), opening speed, installation difficulty (1–5), and cost index (1–5). Use these ratings as a filter, not a final answer — the right choice depends on your specific bag construction, target market, and production budget.
1. Zipper Closure (Coil / Metal / Invisible)
The zipper is the industry security benchmark — and for good reason.
-
Security: 4–5/5. The strongest all-around closure for a clutch bag. A zipper closure seals contents well against accidental opening.
-
Opening speed: 0.5–1.5 seconds single-handed. Locking zipper pulls add 1–2 seconds.
-
Installation difficulty: 2–3/5 depending on type. Coil zippers are the most forgiving. Invisible zippers need tight seam tolerances and more labor time.
-
Cost index: 1–4/5. Nylon coil (#3/#5) is the most affordable option on the market. Metal teeth — brass or aluminum — push cost to 3–4/5 but give a clearly more premium feel in the hand.
Which zipper type fits which brief:
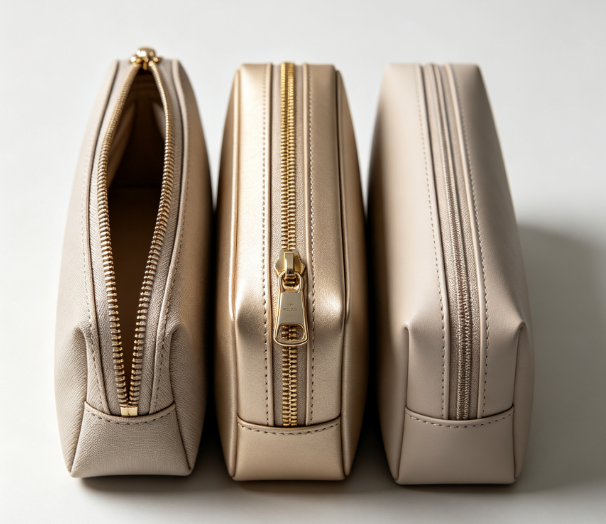
– Coil zipper — flexible, works on curved bag mouths, can be waterproofed. Best for functional or travel-oriented clutch styles.
– Metal zipper — harder bite, higher abrasion resistance. The go-to for hard-shell evening bags and luxury positioning.
– Invisible zipper — teeth hidden by the seam. Creates a clean, garment-integrated look. Common on formal occasion clutches where the zipper shouldn’t compete with the fabric.
Best-fit scenario: Any clutch where security is the top concern — travel document pouches, everyday wristlets, or bags carrying items valued above $200.
2. Magnetic Snap Closure
Fast, clean, and almost effortless to use — but not built for high-security applications.
-
Security: 2–3/5. Holds contents against accidental spillage. Offers limited resistance to deliberate access.
-
Opening speed: 0.3–1 second. The fastest closure you can operate without looking. Great for high-frequency open-close use like cocktail parties.
-
Installation difficulty: 2–3/5. Two-piece system — punch, insert, fold. No special tooling needed.
-
Cost index: 2–3/5. Mid-range hardware cost with no complex structural components.
Key spec to get right: Pull force range for a standard magnetic snap closure clutch is 0.5–3.0 kgf. For a light evening clutch (phone, cards, lipstick), 1.0–1.5 kgf is enough. Go below that and the flap drifts open on its own. Go above it and single-handed access becomes awkward.
On card demagnetization: This comes up in almost every client conversation. Industry testing shows that standard ferrite or rare-earth snaps do not damage bank cards under normal use. The risk only appears when a card stays in direct contact with the snap for 24–72 hours straight — a rare scenario in real use.
Best-fit scenario: Flap-style evening bags, soft envelope clutches with lightweight contents, and any design where a clean exterior with no visible hardware is the priority.
3. Turn Lock Closure
The turn lock is the closest thing the clutch category has to a signature hardware piece.
-
Security: 3–4/5. More resistant to accidental opening than a magnetic snap. It needs deliberate visual alignment and a rotational action to release.
-
Opening speed: 1–2 seconds. The rotation step slows access a little but also stops unintentional opening.
-
Installation difficulty: 3–4/5. Standard turn lock closure handbag hardware is a four-piece system: front body, front backing plate, rear tongue, rear backing plate. Each piece needs precise hole placement. Tolerance spec is ±0.1 mm — tighter than most other closure types.
-
Cost index: 3–4/5. More components, more labor, higher per-unit hardware cost.
Visual impact: A well-designed turn lock with 2–4 cm² of visible face is one of the strongest brand-signaling elements in clutch design. Premium manufacturers often use this surface for logo engraving or custom motifs. It works as both hardware and identity marker.
Best-fit scenario: Structured evening bags, box clutches, and high-end gifting collections where the lock is meant to be noticed. A strong fit for bags carrying higher-value items that need both security and a bold visual statement.
4. Tuck Lock / Press Lock
Similar security profile to the turn lock — but it operates differently and looks different on the bag.
-
Security: 3–4/5. On par with the turn lock. Harder to trigger by accident than a magnetic snap.
-
Opening speed: 0.8–1.5 seconds. Opens via a press or upward-push action. Better suited to blind operation than a turn lock.
-
Installation difficulty: 3–4/5. Multi-piece structure that needs precise positioning.
-
Cost index: 3–4/5. Often custom-designed, which adds to unit cost.
How it compares to the turn lock: The turn lock requires a rotational motion — slower by design, harder to trigger by accident. The press lock uses a hidden activation point — faster to operate in the dark, but slightly more exposed to accidental release if the button sits flush with the surface. For evening use, both perform well. Pick based on the interaction you want users to have with the bag.
Where the press lock stands out: The front panel. A tuck lock face can carry large-format logos, geometric cutouts, and sculptural forms in ways most other closures cannot. It’s the right choice when the closure needs to be the visual centerpiece — what the industry calls a “Statement Clutch” design.
Best-fit scenario: Structured hard-shell clutches and rigid-flap evening bags where bold hardware design is part of the brief. Works very well in bright gold, brushed gold, or black nickel finishes.
5. Kiss-Lock / Metal Frame Clasp
No other closure carries this much atmospheric weight.
-
Security: 3–4/5. Held shut by spring tension and ball-socket engagement. Not easy to pull open — but not sealed like a zipper.
-
Opening speed: 0.8–2 seconds. Needs both hands or a firm single-hand squeeze, then releases with an audible click.
-
Installation difficulty: 4–5/5. The most complex installation of any standard clutch closure. The bag shell must be embedded into the metal frame channel using adhesive, stitching, or rivets. Frame curvature, fabric thickness, and edge finish must all match with precision.
-
Cost index: 3–4/5. Frame hardware cost plus above-average installation labor.
On sizing: Metal frame clutch bag hardware is specified by outer frame width — 15 cm, 18 cm, 20 cm are the most common. The usable opening runs 10–20 mm narrower than the outer dimension, depending on frame bend geometry and end cap structure. Your design calls for a net opening of 18 cm? Spec an 18–20 cm frame to account for this.
Aesthetic territory: The kiss-lock has its own place in vintage and formal design. Decorative options — engraved frames, crystal ball clasps, pearl closures — make this the default choice for minaudières and Old Hollywood-inspired evening bags. It reads as ceremonial, not casual.
Best-fit scenario: Minaudières, structured evening pouches, and formal occasion bags where the frame itself is a design feature. Not the right call for high-production-volume projects unless the factory has confirmed metal frame installation experience.
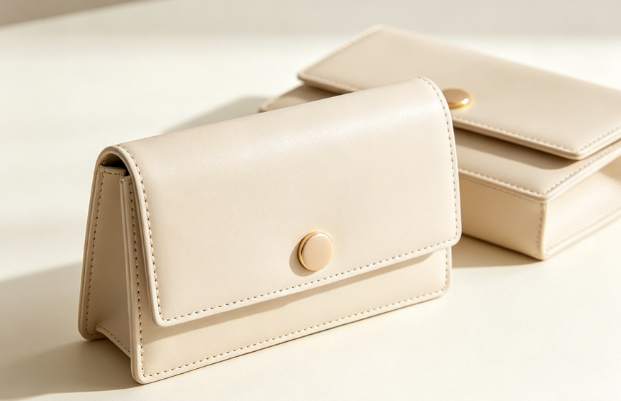
6. Snap Button Closure
The snap button is the utility player of clutch hardware — dependable, low-profile, and cost-effective.
-
Security: 1–2/5. Low resistance to accidental opening. Treat it as a secondary or decorative closure, not a primary security mechanism.
-
Opening speed: 0.5–1 second. Comparable to a magnetic snap.
-
Installation difficulty: 1–2/5. Press-fit or rivet-set. Minimal tooling needed.
-
Cost index: 1–2/5. Among the most affordable bag hardware types available. Standard snap button bag closure hardware in 10–14 mm diameter is the default for budget gifting and promotional applications.
Where it fits: Wedding favor clutches, promotional giveaway bags, and low-frequency-use gift sets where clean appearance and fast production matter more than security. At FOB price points of $1–5 per unit, snap button hardware keeps hardware costs well under the 15% threshold.
Best-fit scenario: High-volume gifting applications, seasonal promotional bags, and any project where cost control is the main brief and the bag will be used fewer than five times per year.
7. Drawstring Closure
The drawstring is a style decision as much as a functional one.
-
Security: 2/5. Gathered fabric can be pulled open with little effort. It works as a closure mainly through visual deterrence and the time needed to untie or pull open.
-
Opening speed: 2–4 seconds. The slowest closure type on this list for regular access.
-
Installation difficulty: 2/5. Channel construction is straightforward. Cord tension and eyelet placement must be set right to avoid cord pull-through.
-
Cost index: 1–2/5. Low hardware cost. The main cost driver is cord and eyelet quality.
Construction spec that matters: Use 3–6 mm cord through metal eyelets with a 6–10 mm inner diameter. Keep channel fabric height at 25–40 mm. Below 25 mm, the cord pulls through under load. Above 40 mm, the gathered opening loses its silhouette.
Best-fit scenario: Style-forward soft pouches and boho-aesthetic evening bags where the gathered opening is part of the visual concept. Not suited to any application needing reliable one-hand access or high-security contents.
Closure Comparison at a Glance
|
Closure Type |
Security (1–5) |
Open Speed |
Install Difficulty |
Cost Index |
Best Bag Style |
|---|---|---|---|---|---|
|
Zipper (coil) |
4/5 |
0.5–1.5 sec |
2/5 |
1–2/5 |
Envelope, pouch, travel |
|
Zipper (metal) |
5/5 |
0.5–1.5 sec |
3/5 |
3–4/5 |
Hard-shell evening, luxury |
|
Zipper (invisible) |
3–4/5 |
0.5–1.5 sec |
3–4/5 |
2–3/5 |
Formal, garment-matched |
|
Magnetic snap |
2–3/5 |
0.3–1 sec |
2–3/5 |
2–3/5 |
Soft envelope, flap style |
|
Turn lock |
3–4/5 |
1–2 sec |
3–4/5 |
3–4/5 |
Box clutch, structured evening |
|
Tuck / press lock |
3–4/5 |
0.8–1.5 sec |
3–4/5 |
3–4/5 |
Hard-shell, statement design |
|
Kiss-lock / frame |
3–4/5 |
0.8–2 sec |
4–5/5 |
3–4/5 |
Minaudière, vintage evening |
|
Snap button |
1–2/5 |
0.5–1 sec |
1–2/5 |
1–2/5 |
Gift sets, promotional |
|
Drawstring |
2/5 |
2–4 sec |
2/5 |
1–2/5 |
Soft pouch, boho style |
The security ratings use a consistent 1–5 scale. A score of 1 means the closure offers minimal resistance to opening. A 3 gives solid everyday protection against contents falling out. A 5 is a travel-grade seal that needs a deliberate action to release. Use this scale to match your closure choice to the actual risk profile of your bag and its intended contents.
How to Balance Security, Aesthetics, and Cost in Custom Production
Three things pull against each other in every custom clutch project: security, aesthetics, and cost. You rarely get all three at full strength. The skill is knowing where to hold the line — and where to trade one off against another without the buyer noticing.
The most practical mindset here: don’t buy security through expensive hardware. Build it into the design.
The Substitution That Saves the Most
Swapping a turn lock or press lock for a high-quality magnetic snap is the single most effective way to cut costs in clutch production. You keep the flap silhouette. You keep the premium exterior finish. What you lose is a mechanical locking step — which most evening clutch use cases don’t need.
The real cost of a mechanical lock isn’t the hardware price. It’s the labor. Turn locks and press locks need precise hole cutting, hardware alignment, base plate fixing, and repeated adjustment. Each extra step adds time on the line, raises rework risk, and compresses your margin. A magnetic snap closure skips most of that process.
Where Hidden Costs Live
|
Cost Driver |
Magnetic Snap |
Turn Lock / Press Lock |
|---|---|---|
|
Hardware unit cost |
Low–Mid |
Mid–High |
|
Hole tolerance required |
±0.3 mm |
±0.1 mm |
|
Assembly steps |
3–4 |
6–8 |
|
Rework risk |
Low |
Medium–High |
Zipper length follows the same logic. Longer zippers cost more in material and in sewing time — and the price doesn’t scale in a straight line. Request quotes in 5 cm increments (15 cm, 20 cm, 25 cm). This gives suppliers a clean tier structure to price against. Try to standardize across SKUs to one or two zipper lengths. Mixed lengths break up your cutting flow and complicate inventory.
Custom Hardware vs. Stock Hardware: The MOQ Trade-Off
Logo-engraved turn locks and custom zipper pulls look sharp. But they come with tooling fees, dedicated production runs, and minimum order quantities that can make small orders unworkable.
A more scalable approach for mid-volume projects:
-
Stock hardware + surface customization (laser engraving, plating color) — lower MOQ, faster lead time, easier to reorder
-
Fully custom tooled hardware — this only makes sense once your order volume can absorb the mold cost. It needs dedicated supplier negotiation on how to spread the tooling fee across units.
Ask suppliers to break out every cost line: tooling fee / hardware unit price / engraving fee / assembly fee / packaging fee. A single bundled total hides where the real cost is sitting.
The Decision Sequence
-
Define the actual risk level — theft prevention, accidental opening, transit protection, or visual security only
-
Split the bag into “must-secure zones” and “visual-only zones”
-
Cut mechanical lock complexity first. Use a magnetic snap and structured flap where the use case allows
-
Lock in one or two zipper length standards. Quote in 5 cm steps
-
Split hardware customization into two tracks: low-MOQ surface treatments and high-MOQ tooled components. Price each one separately
Hardware Finish Selection: Matching Your Closure to the Overall Design Language
Hardware finish is the last decision most buyers make — and the one that either ties the whole bag together or quietly works against it.
The closure you’ve chosen already handles structural and security logic. The finish layer carries the design language. Get the two aligned, and the hardware blends into the overall aesthetic in the right way. Miss that alignment, and even a well-specified turn lock or magnetic snap reads as an afterthought.
Four Finishes, Four Distinct Signals
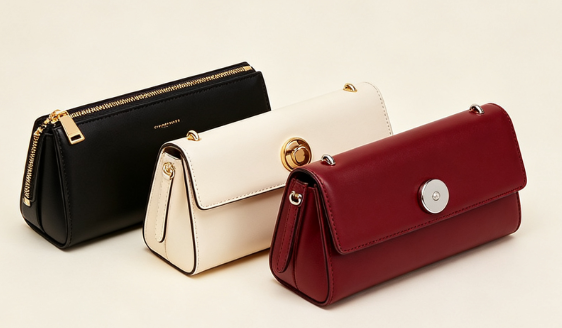
Gold (PVD gold / warm brass / brushed gold) reads warm and formal. It pairs well with dark leather in black or deep burgundy — high contrast that puts the closure front and center. Pull it back to matte or brushed gold and it softens into everyday luxury. That works well against neutral tones like cream or camel.
Silver (polished chrome / brushed nickel) runs cool and modern. High-gloss chrome on a black or white bag creates a sharp, jewelry-like finish. Brushed nickel tones that down into something quieter. That’s the right call for minimalist designs where the silhouette matters more than the hardware.
Black nickel / gunmetal sits between cool and neutral. It reduces the visual weight of the closure against dark bags — black, charcoal, deep navy. That’s the whole point in minimal or architectural designs. The hardware registers without competing with the bag form.
Antique bronze carries the most historical character of any finish. It belongs with vegetable-tanned or distressed leather, visible stitching, and flap constructions that already have period detail. Large-format turn locks in antique bronze on a deep brown flap act as a design era marker. That’s why this finish dominates messenger bag and doctor bag aesthetics.
The Decision Sequence: Before Your Sample Is Cut
-
Fix three design parameters first: style direction (formal / casual / vintage / minimal), overall color temperature (warm or cool), and gloss level of the outer material
-
Match color temperature between hardware and bag body — warm bag body (brown, ivory, burgundy) → gold, bronze, warm nickel; cool bag body (grey, black, cold white, navy) → silver chrome, black nickel, cold black
-
Choose one primary finish for all major hardware (closure, main hardware, adjustment buckles) — this should cover ≥ 70% of visible metal area. Secondary accent finishes (logo pieces, interior hardware) stay ≤ 30% and must share the same warm/cool base
-
Limit the bag to two metal colors maximum. More than two creates visual noise, not complexity
Statement vs. Blend: Setting Hardware Presence
Every design brief comes down to this contrast call:
-
High-contrast statement: bright gold lock on a black bag, polished chrome on deep navy — the closure gets noticed and frames the design
-
Low-contrast blend: black nickel on charcoal, antique bronze on dark brown — the hardware steps back and the bag form takes over
Neither is wrong. Both are deliberate. The problem shows up when the choice happens by default rather than by intention.
Plating Quality: What to Check Before Mass Production
Finish consistency matters more in multi-SKU or multi-unit orders than in single samples. A turn lock that looks correct on its own can read off if the plating batch shifts between production runs.
Pre-production and incoming inspection checkpoints:
-
Color deviation: compare under natural light or D65 standard light source — target ΔE ≤ 1.0–1.5 across the same batch
-
Gloss uniformity: lock face, edges, and underside should read consistent — a visible “bright face, grey edge” pattern points to uneven plating bath immersion
-
Paired hardware (left/right snap halves, dual zipper pulls): both pieces must share the same reflective tone — one pull reading gold while the other reads yellow is a rejection trigger
-
Corner and recess coverage: check the lock tongue, pivot holes, and inner bend angles with a 10× loupe — exposed base metal, pinholes, or grit mean undercoating
Open/close cycle test before approving hardware:
– Evening and occasional-use clutches: ≥ 500 open/close cycles with no visible plating lift, base metal exposure, or color shift
– Higher-frequency daily bags: raise the threshold to 1,000–2,000 cycles as a supplier quality benchmark
To assess a supplier’s plating capability, ask for three things: a physical color swatch set showing all four primary finishes (gold, silver, black nickel, antique bronze) under actual light, a salt spray test report (minimum 48h exposure rating for evening bags), and adhesion test records such as cross-cut tape test or pendulum impact. A supplier who delivers all three has plating quality control built into their process — not bolted on as an afterthought for your order.
Manufacturing & Installation Checklist for Custom Clutch Bag Closures
Bad installation ruins good hardware. Even a well-specified turn lock or magnetic snap will fail early if you skip steps or do them out of order.
Standard installation sequence — for magnetic snaps, press snaps, frame clasps, and four-part fasteners:
-
Mark center points first. For magnetic snaps, center your mark about 3.8 cm (1.5 inches) from the flap edge. Mark the correct face before you cut anything.
-
Punch holes to fit the hardware foot. Keep holes tight to the foot size. Oversized holes cause snap rotation, loosening, and fabric tears over time.
-
Insert feet through fabric and reinforcement layers together. Check orientation before you press. Misaligned snap halves pull the closure off-center.
-
Fold or rivet feet flat. No sharp points left exposed. The hardware face should sit flush — no lift at the edges.
-
Back every mounting point with reinforcement. Use a fusible interlining patch, non-woven stiffener, or metal backing plate behind each snap or lock post. This step is not optional. It’s what stops the fabric from failing before the hardware does.
The five most common installation mistakes: off-center marking, oversized punch holes, missing reinforcement, reversed orientation, and feet that aren’t fully pressed down. Magnetic snaps are easy to get wrong on the left-right axis. A small alignment error causes the flap to close at an angle.
Pre-shipment QC checkpoints:
-
Closure feel: Open and close each unit. The action should feel smooth, firm, and consistent. No drift, no sticking, no shift in position.
-
Plating integrity: Check for flaking, exposed base metal, or color differences. Inspect under D65 light. Target ΔE ≤ 1.5 within the same batch.
-
Corrosion resistance: For humid-climate markets, confirm anti-rust treatment. Check for oxidation spots during incoming hardware inspection.
-
Cycle durability: Run repeated open-close cycles. For evening bags, 500 cycles is a solid baseline before you approve hardware for mass production.
-
Pull resistance at mount points: Hand-test the fabric around each hardware mount. Puckering, thread separation, or fabric distortion means the reinforcement isn’t large enough.
Documents to request from any supplier before production starts:
|
Document |
What It Should Confirm |
|---|---|
|
Hardware spec sheet |
Material, thickness, plating color/grade, corrosion resistance rating |
|
Test reports |
Closure durability cycles, pull force, plating adhesion, salt spray results |
|
Sample sign-off records |
Development sample → confirmed sample → pre-production sample |
|
BOM + installation card |
Hardware SKU, mounting position, reinforcement material, assembly sequence |
|
Tolerance sheet |
Key dimension specs with Pass/Fail criteria — not left to factory judgment |
Hard criteria for supplier evaluation:
-
Can they develop custom hardware to your specs — foot length, body dimensions, plating color, and matching tooling?
-
Do they run incoming, in-process, and final inspection across appearance, dimensions, function, and plating?
-
Do they use AQL 2.5 sampling as a standard practice — not just for your order?
-
Can they hand over the full document package above as a baseline, without you having to ask?
A supplier who says yes to all four has quality control built into how they work. One who stalls on any of them is showing you exactly where the gaps are — before production even starts.
Quick-Reference Guide: Which Closure Is Right for Your Custom Clutch?
Five use cases. One decision. Match your project brief to the right closure before you spec a single sample.
|
Use Case |
Top Priority |
Recommended Closure |
Avoid |
|---|---|---|---|
|
Evening / Formal |
Aesthetics → size → security |
Kiss-lock frame or magnetic snap + flap (1–2 kgf) |
Exposed large zippers, plastic press snaps |
|
Daily Commuter |
Security → durability → looks |
#5 zipper (main) + magnetic snap or snap button (flap) |
Single magnetic snap alone |
|
Wedding / Bridesmaid Gift |
Visual consistency → low frequency use |
Kiss-lock + decorative detail, or turn lock + flap |
Heavy-duty zippers |
|
Travel / Document Pouch |
Security → organization |
Full-perimeter #5 or #8 zipper + inner snap/magnetic snap |
Magnetic snap as sole closure |
|
Promotional Giveaway |
Unit cost → brand visibility |
Magnetic snap or snap button + simple flap |
Complex multi-piece hardware |
Hardware budget as a share of total unit cost:
– Economy promotional bags: keep closure hardware under 5–10% of total unit cost
– Mid-range gifting and retail: 8–15% is the workable range
– Premium evening and corporate gift lines: 10–20% works when the hardware carries brand identity — think engraved turn locks or logo frame clasps
Your brief doesn’t fit one row? Use this filter sequence: use case first → material stack second → budget third → visual priority last. This order stops a common mistake. Teams often pick hardware that looks great on a mood board, then find it fails on the production line. Run the filter first, then commit to a direction.
FAQ: Custom Clutch Bag Closure Questions Buyers Ask
These questions come up on almost every custom clutch project — whether you’re buying for the first time or you’re a sourcing manager finalizing a new collection.
Will a magnetic snap demagnetize credit cards?
Modern EMV chip cards are not damaged by standard bag magnets. The real risk is with the magnetic stripe, not the chip. Industry testing shows that standard handbag magnets (400–800 gauss at surface) cause no measurable stripe damage after 500–1,000 open/close cycles at a normal use distance of 1–3 cm. Stripe damage becomes a concern only if a card stays pressed against the magnet plate for 24 hours or more without a break. For everyday use, a magnetic snap closure clutch is safer than an open-top bag and quicker to access than a zipper closure evening bag.
Which closure works best on thick leather?
Two closures perform well when your total flap stack (outer leather + lining + reinforcement) reaches 3.0 mm or above:
-
Turn lock closure — handles 3–4 mm total thickness with a stable backing plate
-
Screw-base magnetic snap — clamps through a punched hole and manages up to 4 mm total
Standard prong-style snap buttons are rated for 2.0–2.5 mm total stack or less. Use them on thicker leather and the closing force drops. You also get a higher risk of fabric tearing at the mount point.
Before sending specs to your factory, measure the finished flap thickness across all layers. Then ask which hardware model is rated for that panel thickness range. Get the data sheet — it should confirm thread size, panel thickness range, and recommended hole diameter.
How many open/close cycles should I expect from each closure type?
Standard fashion-grade benchmarks:
|
Closure Type |
Cycle Life |
|---|---|
|
Coil or metal zipper (fashion grade) |
5,000–10,000 cycles |
|
Branded zipper (YKK, SBS) |
20,000+ cycles |
|
Magnetic snap |
10,000–20,000 cycles |
|
Snap button / press stud |
5,000–10,000 cycles |
|
Turn lock (entry-level) |
5,000–8,000 cycles |
|
Turn lock (premium brass) |
10,000+ cycles |
For daily-use bags, ask the factory to confirm the cycle test result for the specific hardware model before you place an order.
What MOQ should I expect for custom hardware?
-
Stock hardware (no logo): 200–500 pcs per model/color
-
Custom plating (rose gold, gunmetal, etc.): 500–1,000 pcs per finish
-
Logo engraving on closure: 300–500 pcs; some suppliers require 1,000 pcs
-
Full custom mold (unique turn lock or frame clasp): 1,000–3,000 pcs plus a mold fee of USD 200–800 depending on complexity
Can closures carry a custom logo?
Yes — most manufacturers put logos on the closure face, zipper pull, or front plaque. Common methods include:
-
Laser engraving — sharp detail, best for small text on brass or stainless steel
-
Chemical etching with color fill — good for adding contrast
-
Embossed cast logos on a custom lock face — requires a mold
To get an accurate quote, send a vector file (AI, EPS, or PDF), target dimensions in millimeters, your finish preference (matte or gloss), and the exact placement position.
What information does a factory need to spec the closure correctly?
Your tech pack should cover at least these points:
-
Bag use case and expected contents
-
Bag dimensions and opening width
-
Closure type
-
Full material stack at the closure area (outer thickness, lining, reinforcement)
-
Required security level
Also add a dedicated closure page to your tech pack. Include a front view and a cross-section at the flap. Mark exact positioning from edges, call out hardware color and size, set placement tolerances (±1 mm), and attach any logo file.
How do I verify closure quality before shipment?
Start by requesting close-up photos of closures on units pulled at random from the production batch. Ask for a video showing opening and closing on at least 10 bags — this confirms alignment and smooth action.
On your sample set, check that the centerline deviation across the flap stays within 2 mm. Test the opening force by hand — a magnetic snap or press snap should release at around 3–6 kgf of fingertip pressure. Open and close each closure 10–20 times and confirm there is no loosening or cracking.
For larger orders, a third-party inspection report is worth the cost. It should cover closure strength, plating integrity, rust spots, and sharp edges.