
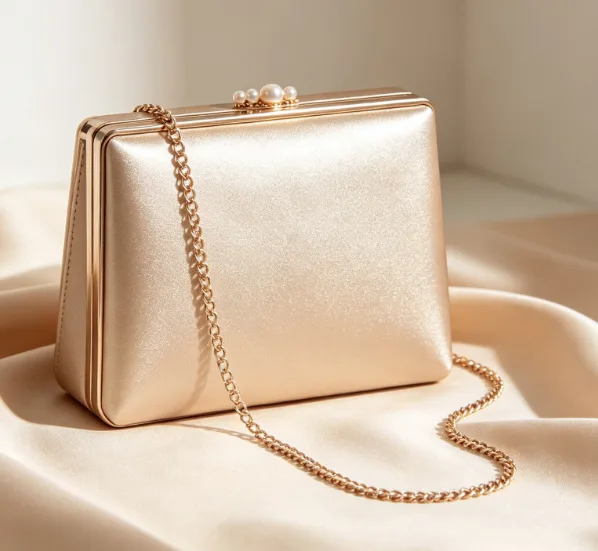
Phase 1: Market Research & Evening Clutch Bag Trend Analysis
Evening clutch bags punch well above their size in the global handbag market. This is a USD 72–80 billion industry. Evening clutches take up 5–10% of premium and luxury assortments. That’s a small slice — but it drives strong margins and brand visibility.
Before any design brief opens, run a structured research sprint across five areas:
1. Segment by occasion and price. Map your targets: weddings/formal events, night-out, and red-carpet/influencer. Then anchor each to a price band — accessible (USD 50–150), premium (USD 150–500), or luxury (USD 500–2,000+).
2. Audit 2–3 runway seasons. Track how often major houses use hand-held or mini silhouettes versus crossbody styles. Count material frequency — suede, leather, satin, exotic effects. Also note embellishment presence: fringe, charms, pearls, bows.
3. Benchmark retail assortments. Pull evening clutch SKU counts from 20–30 key retailers. Record material, color distribution, and price spread. For 2025, the data points to a clear material mix:
– Suede: 30–40%
– Smooth leather: 20–30%
– Satin/shimmer: 15–25%
– Fringe or woven textures: 10–20%
4. Score trend intensity. Rate each micro-trend from 1–5 across three signals: runway presence, retail SKU share, and celebrity usage. The six micro-trends most relevant to evening clutch development right now are:
– Suede clutches
– East–West long clutches
– Bracelet/bangle bags
– Fringe/tassel styles
– Mini top-handle doctor bags
– Charm-heavy personalized bags
5. Pull consumer insights from social data. Evening bag posts show a spec detail most brands overlook. Clutches need an internal width of at least 18–20 cm and 4–5 cm depth to fit a modern smartphone. Keep weight at or below 400 g for all-evening comfort.
The 2025 Trend Signals Worth Acting On
Three directions have strong runway, retail, and cultural backing. These are worth committing to:
-
Suede in earthy tones — chocolate, soft gray, warm chestnut — leads material momentum for 2025 and into 2026. Multiple trend sources flag it as the top dressy fabric shift away from smooth leather.
-
East–West long clutches — a width-to-height ratio of 2.5–3.5:1 — are moving from day use into evening wear. They’re high-utility pieces with wide consumer appeal.
-
Bracelet/bangle bags made a strong debut in 2025. Their rigid circular handles read as jewelry. The compact size and sculptural shape make them natural statement pieces for evening events.
On color, the 2025 palette has moved away from high-contrast brights. Build your assortment around these ranges:
– Neutrals (beige, mocha, off-white, chestnut): 35–45%
– Soft pinks and pastels: 15–25%
– Metallics (gold, silver, champagne): 15–20% — strong for party and red-carpet positioning
– Black: still relevant, but no longer a primary focus
Use this research to shape your silhouette allocation:
– Classic envelope and box clutches: 30–40%
– East–West styles: 20–25%
– Mini top-handles: 15–20%
– Bracelet bags: 10–15%
– Novelty textured shapes: 10–15%
Phase 2: Collection Planning & Evening Clutch Bag Assortment Strategy
Collection planning is where trend research turns into actual purchase decisions. The numbers here matter more than most brands expect.
The US online evening bag market tracks over 3,168 active SKUs, with an opportunity score of 46/100. That’s a medium-high gap. There’s real room to stand out — but your assortment needs to be built with precision.
Portfolio Split: How to Balance Risk Across the Range
For a focused evening clutch capsule, a well-tested portfolio split looks like this:
-
Evening clutches: 30–40% of total clutch SKUs
-
Bridal clutches: 20–30%
-
Versatile wristlet clutches: 20–30%
-
Premium leather clutches: 10–20%
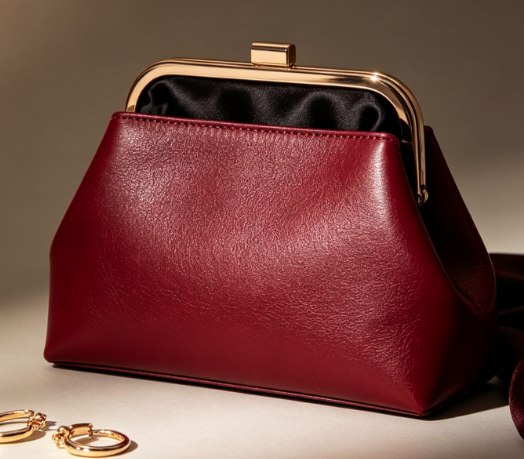
Break down your evening clutch segment further:
-
50–60% classic styles — envelope, box, soft minaudière
-
20–25% embellished statement styles — rhinestones, sequins, fringe
-
15–20% multi-occasion minimal styles — clean satin, smooth vegan leather
-
5–10% experimental/trend-driven — micro, sculptural, novelty shapes
SKU Count by Price Tier
For a single-season evening capsule, aim for 16–25 SKUs total:
|
Tier |
Price Range |
SKU Count |
Key Materials |
|---|---|---|---|
|
Entry |
USD 20–30 |
5–8 SKUs |
Core satin, PU, metallics |
|
Mid |
USD 30–60 |
8–12 SKUs |
Embellished, branded metal hardware |
|
Premium |
USD 60–150 |
3–5 SKUs |
Leather, crystal mesh, specialty fabrics |
Amazon volume data confirms the sweet spot. Best-sellers cluster between USD 19.99–49.99. The sharpest peaks land at USD 24.99–32.99.
Color & Occasion Allocation
Color is not a styling decision — it’s a sales volume decision. Build your color ratio around this framework:
-
Black: 35–45% of units — highest sell-through across all regions
-
Metallics (gold/silver/rose gold): 20–25% — wedding and party staple
-
Nudes/champagne/blush: 15–20% — bridal and prom focus
-
Bold colors (red, emerald, cobalt): 10–15% — statement accent SKUs
-
Seasonal/trend colors: 5–10% — limited runs to test demand
Map each color group to a clear occasion:
-
Formal evening/black-tie: 40–50% of SKUs — structured box, crystal, metallic hardware
-
Wedding/bridal guest: 20–30% — satin, pearl, softer palettes
-
Party/cocktail: 20–25% — glitter, fringe, bolder colors
-
Day-to-night crossover: 10–15% — minimalist clutches with detachable chain
Size Standards & Hardware Specs
Lock your standard commercial spec before production starts. Most volume SKUs should target ~22 cm W × 11 cm H × 4 cm D. That’s wide enough to hold a modern smartphone and compact enough to read as a true evening piece.
Assortment size split by units:
-
Small (≤18 cm): 20–25% — jewel box, micro styles
-
Standard (19–23 cm): 50–60% — main commercial size
-
Oversized (24–28 cm): 15–25% — envelope and day-to-night hybrids
On hardware: plan 60–70% of SKUs with a detachable chain (metal or matching PU). The remaining 30–40% stay pure handheld for formal positioning. Detachable chains show up in 70% of B2B buyer specs — it’s no longer optional for mid-market and above.
Standardize around two chain finishes — gold and gunmetal cover most occasions. Use them across at least 70% of your SKUs. That cuts MOQ complexity and keeps hardware sourcing tight.
Material Mix Targets
|
Material |
% of Units |
Positioning |
|---|---|---|
|
Vegan PU / synthetic leather |
40–50% |
Value, versatility, vegan demand |
|
Satin / duchess / faille |
20–30% |
Formal, bridal, prom |
|
Metallic / glitter / crystal mesh |
10–20% |
Statement SKUs |
|
Genuine leather / suede |
10–15% |
Premium segment |
|
Novelty (acrylic, beaded, woven) |
5–10% |
Trend/PR pieces |
Lock 3–4 core materials for volume production. Assign each material to at least 3 SKUs. This lets you hit MOQ pricing thresholds and keeps your supply chain easy to manage.
KPI Targets to Plan Against
Set your Phase 2 performance benchmarks before sampling starts:
-
Sell-through goal: ≥60–70% on core black/metallic SKUs; ≥50–60% on bridal and party styles
-
Return rate target: <5–7%, controlled through consistent sizing and secure closures
-
Assortment refresh rate: update 30–40% of evening SKUs each major season; carry forward 60–70% of proven performers
Phase 3: Design Concept, Brand Identity & Tech Pack Development
A tech pack is the single document that separates a brand that can scale from one that stays stuck in sampling loops. Once your assortment direction is locked, translate every design decision into factory-ready specifications — clear, complete, and with zero room for guesswork.
For evening clutch bag development, this phase covers three parallel workstreams: finalizing the design concept, locking brand identity elements, and building a production-ready tech pack.
Build the Technical Flats First
Start from your approved mood board and assortment plan. Convert each concept into clean black-and-white flat sketches — front and back views, straight-on. No perspective drawings. Make sure every structural detail is visible: frame seams, closure positions, interior divisions, embellishment placement, and hardware attachment points.
For each style, add callout annotations. Call out zipper length, chain attachment method, frame dimensions, lining depth, and magnetic snap placement. These details are not optional. Factories will fill in anything you leave blank — and that costs you extra rounds of sampling.
Use Adobe Illustrator for all technical flats. It’s the industry standard for vector-based technical drawings. You can also make fast edits as specifications change.
What a Complete Evening Clutch Tech Pack Covers
Each style needs a structured document set — 7–12 pages per style in PDF, AI, or Excel format:
|
Section |
Pages |
|---|---|
|
Cover / product summary |
1 page |
|
Technical flats (front, back, details) |
1–3 pages |
|
Measurement spec + tolerances |
1–3 pages |
|
Bill of Materials (BOM) |
1–2 pages |
|
Construction & hardware notes |
1–3 pages |
|
Colorways & embellishment artwork |
1–2 pages |
|
Labels, packaging, branding |
1–2 pages |
|
Revision log |
1 page |
Assign each style a unique code — a 3–4 digit number plus product type (e.g., “302-CLUTCH”) — and name each page by function. Keep image files compressed. Files over 20–25 MB are often too large for factory email systems.
Lock Brand Identity Specs Into the Document
Brand identity elements belong in the tech pack itself — not in a separate email, not assumed. For evening clutch collections, define all of the following before sampling starts:
-
Logo usage: primary logo file plus 1–2 alternate lockups for small hardware engravings or embossed labels. State the minimum size in mm.
-
Color system: map your full palette to Pantone codes. Each colorway must reference a specific Pantone or lab dip code — not a name like “champagne gold.”
-
Hardware finish codes: match metal tones (gold, gunmetal, antique brass) to supplier finish references. Inconsistent hardware finish is the most common brand dilution point in clutch bag OEM production.
-
Branded trim specs: woven label dimensions (width × height in mm), fold type, thread color, and logo orientation. Also state hangtag dimensions, paper GSM, and print finish (matte vs. gloss).
BOM: Specify Every Component by Code, Not Description
The Bill of Materials for an evening clutch needs to go beyond fabric type. For each style, document:
-
Outer material: composition percentage, surface finish (e.g., suede-effect PU, duchess satin), and any treatment (anti-fray coating, metallic lamination)
-
Lining: fabric type, weight in GSM, color code
-
Frame hardware: metal type, finish code, dimensions in mm, attachment method
-
Closure: zipper length in cm, slider type, finish; or magnetic snap diameter and pull strength rating
-
Chain strap: link size, length, finish code, attachment ring diameter
-
Embellishments: bead type, size in mm, thread color, stitch count per unit
-
Packaging: polybag size (e.g., 30×40 cm, 40–50 microns), tissue paper weight, box dimensions
Flag MOQ impact at this stage. Specialty fabrics often carry MOQs of 500–1,000 meters. Embellishment trims may need 500–1,000 pieces per colorway. Factor this into your style count decisions before sampling starts.
The Pre-Sampling Checklist
Before any sample request goes out, run a final check:
-
All pages numbered, dated, and consolidated into one file per style
-
Every colorway has a confirmed Pantone or lab dip reference
-
BOM lists supplier item codes wherever available
-
Artwork is embedded at print-ready resolution with fonts outlined
-
Target FOB price range is noted (e.g., USD 12–18 for mid-tier embellished clutch)
-
Revision log is current: version number (v1.0), date, and change summary
A complete tech pack cuts out the most expensive phase in clutch bag manufacturing — the miscommunication cycle. Factories that get a solid tech pack produce first samples that are 60–70% closer to the approved design. That means fewer rounds, lower sampling costs, and a faster path to production.
Phase 4: Material & Hardware Selection for Evening Clutch Bags
Material and hardware decisions lock in your production costs — and this is where most quality failures start. Get these specs wrong, and good design won’t save you on the production floor.
Every material choice here ties back to two fixed parameters: a finished bag footprint of 18–26 cm W × 9–14 cm H × 3–6 cm D, and a maximum working load of 1.0 kg. These numbers control every thickness spec, hardware rating, and structural layer decision that follows.
Outer Material: Match Fabric to Structure and Price Tier
|
Material |
GSM / Thickness |
Best For |
Key Spec to Lock |
|---|---|---|---|
|
Satin / Silk |
120–180 g/m² |
High-volume evening, USD 20–120 retail |
Martindale ≥ 15,000 rubs |
|
Velvet |
220–320 g/m² |
Mid/high-end, fall–winter |
Avoid rigid interfacing on pile panels |
|
Leather (soft pouch) |
1.0–1.2 mm |
Premium day-to-night |
Supple grades for easier molding |
|
Leather (box clutch) |
1.4–1.6 mm shell |
Structured premium styles |
Or 0.9–1.1 mm laminated to board |
|
Vegan / PU |
0.8–1.2 mm |
Mid-price volume |
Minimum 0.9 mm for stitch strength |
|
Beaded / Rhinestone overlay |
70–100% front panel coverage |
Statement occasion pieces |
Adds 80–250 g per bag; glass crystal adds 30–60% more weight than plastic |
|
Patent / Metallic PU |
Topcoat 0.10–0.20 mm |
Formal statement SKUs |
No sharp folds under 5 mm radius; specify color fastness ≥ grade 3–4 dry rub |
Most brands miss this on satin: anything under 120 g/m² needs fusible woven interfacing on all stress areas. Skip it, and seam slippage becomes a factory floor problem — not something QC catches at the end.
Structural Layers: Board, Interlining, and Lining
The outer fabric is just one part of the full material stack. Internal layers decide whether a bag holds its shape through a full evening.
-
Board for box/minaudière shells: grey board or fiberboard at 1.5–2.5 mm. Use 1.5–1.8 mm for small minaudières. Go above 2.0 mm for rectangular clutches ≥ 24 cm wide.
-
Interlining for textile outers: fusible woven interfacing at 30–80 g/m² on all stress zones. This applies to satin and silk panels across the board.
-
Lining: minimum 70 g/m² — polyester taffeta (60–90 g/m²) or poly-cotton twill (100–150 g/m²). Anything lighter tears at pocket seams with regular use.
Hardware: Base Metal by Price Tier
Zinc alloy (Zamak) covers 80–90% of fashion handbag hardware across the market. It’s the right choice for mass and mid-market clutches carrying up to 1.0 kg. Solid brass makes sense for high-end box clutches where color stability needs to hold past five years. Stainless steel is a narrow-use option — best for thin chain straps where link thickness drops below 2.0 mm but pull resistance can’t be compromised.
Hardware Load Specs for Detachable Chains
On a detachable chain strap, the minimum breaking load per connector must exceed 3× the working load. Spec to 3–5 kg safe working load per end attachment. Chain wire diameter should fall between 1.2–2.0 mm. Go thicker than 2.0 mm and the strap reads as a day bag, not an evening piece.
For kiss-lock frames: set frame length at bag mouth minus 1.0 mm to stop fabric puckering. Keep magnet pull force within 0.5–1.5 kg — stronger force distorts satin and silk panels.
Plating Thickness: The Spec Most Brands Skip
|
Quality Level |
Plating Thickness |
Expected Lifespan |
|---|---|---|
|
Budget / mid-range |
0.10–0.20 µm |
Tarnish within 1–2 seasons |
|
Better quality |
0.20–0.50 µm |
Improved scratch and color retention |
|
Premium |
≥ 0.50 µm (up to 1.0 µm) |
Multiple years under normal evening wear |
Ask your supplier for the full plating system: base metal + intermediate layers + final finish + thickness in µm. A clear spec like zinc alloy + copper + nickel + light gold, 0.3 µm cuts out any room for substitution on their end.
Aesthetic Matching: Hardware Finish to Fabric
-
Satin / silk: light gold or silver only. Keep hardware at a fine scale — heavy chains above 2.0 mm wire overpower delicate textiles.
-
Velvet: antique brass or gunmetal work well. Matte finishes hide minor scratches from event use.
-
Patent leather: polished hardware only. Scratches stand out against a high-gloss surface.
-
Beaded / crystal minaudière: use solid brass or high-quality zinc alloy frames with polished plating. Hardware and frame together account for 30–80 g of total bag weight.
Phase 5: Sampling Process & Craft Optimization for Evening Clutch Bags
The first physical prototype reveals every gap your tech pack couldn’t catch on paper. This is where approved patterns meet real materials — and where most craft problems either get fixed or get locked into production.
From Paper Model to Production Pattern
Don’t cut a single piece of your actual outer fabric yet. First, convert the approved paper model into a production-ready pattern. You need to adjust for three variables: material thickness, fabric flexibility, and seam allowances. Skip this step and you’ll cut expensive satin or leather against specs built for a flat paper mock-up — not a finished shell with structural layers.
Once you cut the materials, inspect them right away. Check for surface flaws and irregularities. Add stabilization where the material needs it. An evening clutch shell is small. Any distortion in the outer panel shows up clearly on the finished piece.
Build the sample in a set sequence that protects the shape. The order of operations matters. It’s what keeps edges clean, openings aligned, and hardware placement accurate.
The Sample Inspection Checklist
Run these checks on every first prototype before anything else moves forward:
-
Dimensions and proportions: Measure against the approved spec sheet. Flag any deviation in length, height, depth, edge turn, and closure position.
-
Surface and symmetry: Check finish consistency, edge appearance, and how hardware sits on the bag body.
-
Construction integrity: Test stitch lines, seam strength, corner formation, and all attachment points.
-
Hardware function: Cycle the clasp, zipper, magnetic snap, or chain attachment at least 20 times. Confirm smooth operation — not just first-use function.
-
Load test: Fill the clutch with typical evening contents. Check for shape collapse.
Evening clutches are small, shallow, and sensitive to surface finish. Your pass/fail criteria should focus on shape retention, closure smoothness, and decorative alignment — not carry capacity.
Craft Optimization: Surface Decoration Comes First
Plan and position all decorative elements before final stitching starts — not after. Fringe, appliqué, glitter panels, and metallic accents all need to line up with the bag’s center line and edge symmetry from the very first sample build.
Here’s a practical example. On a fringed leather clutch, cut and slit 4 in × 12 in leather strips. Position them so the fringe start line lands at the bag’s center point. Use double-sided tape to hold placement before stitching. Then run a two-step securing stitch to lock the decorative section in place. This stops flapping and sets the visual finish at the same time.
This approach handles two things in one sample pass: it confirms durability and checks aesthetic alignment together.
The Iteration Workflow
-
Cut sample materials from finalized patterns after paper approval
-
Assemble one full prototype using the intended outer material, lining, stabilizer, and hardware stack
-
Measure against spec and mark all deviations
-
Stress-test clasp and zipper cycles, chain anchor pull, seam tension, and corner durability
-
Record craft issues — wrinkling, puckering, uneven fringe, misaligned trim, exposed stitch lines
-
Re-sample by revising the changed sections only. This cuts development time and reduces material waste
Sampling Outputs That Unlock Production
Before approving any mass production run, confirm these six outputs are documented and signed off:
-
Approved production pattern
-
Final material stack with confirmed GSM and thickness
-
Confirmed seam allowances
-
Hardware placement map
-
Measurement tolerance notes
-
QC checkpoints for the production floor
These documents make up the handoff package. A factory that receives all six can replicate the approved sample without extra clarification rounds.
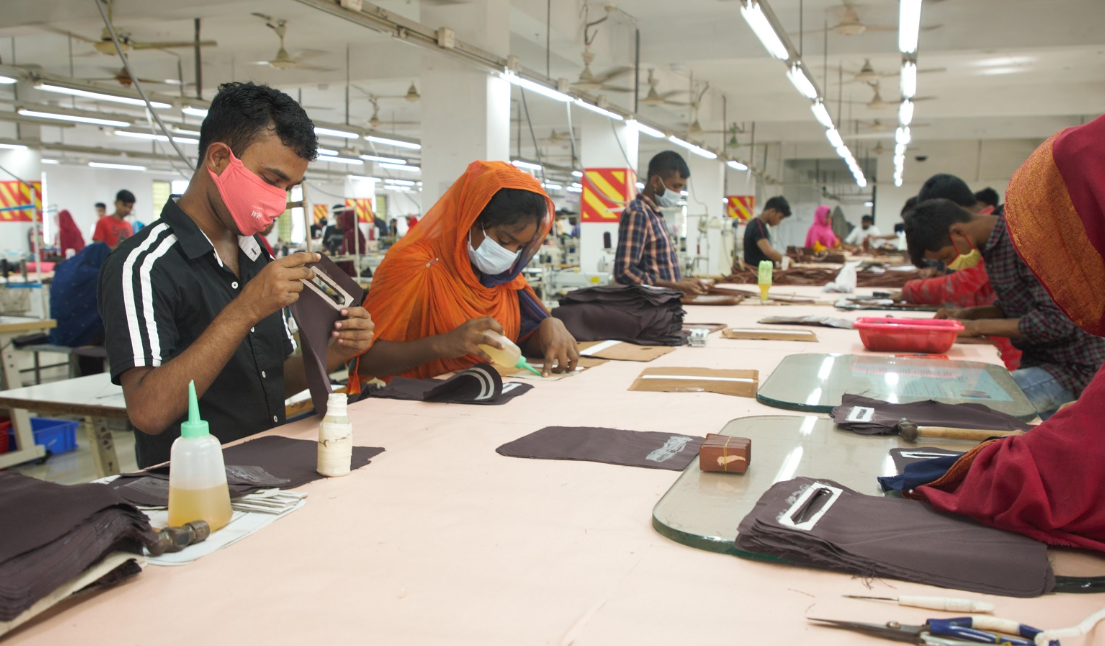
Phase 7: Costing, Margin Planning & Pricing Architecture
No structured cost model means beautiful bags that lose money at scale. That’s the trap brands fall into with evening clutch collections.
Before finalizing any retail price, build your cost baseline from the bottom up. List every component separately — outer material, lining, frame hardware, chain, embellishments, closures, and packaging. Your goal is to cover 80–90% of total unit cost in line-item form. Grouped estimates hide margin leaks. Those leaks show up later in production, and by then they’re harder to fix.
Target Margin by Tier
Set your gross margin targets for each price tier before sampling starts:
|
Tier |
Retail Range |
Target Gross Margin |
|---|---|---|
|
Entry |
USD 20–40 |
18–25% |
|
Core/Mid |
USD 50–120 |
30–40% |
|
Premium/Halo |
USD 300–800+ |
50–70%+ |
Pricing Architecture: List, Band, and Floor
For each SKU, define three price points:
-
List price — your published baseline
-
Target band — list price minus 5–6%
-
Floor price — minimum acceptable at list minus 10–15%
Any deal below floor margin needs a sign-off. Skip this guardrail and volume discounts will eat into your pocket margin across the full assortment — SKU by SKU, deal by deal.
The Metric That Matters Most
Track net price realization — realized price divided by list price. Healthy collections hold ≥85–90% on core SKUs.
Your average realized price running below the cost floor is a serious signal. Run a PCVM analysis (Price, Cost, Volume, Mix decomposition). It breaks down how much of the margin gap comes from discounting versus mix shifts or volume changes. More useful, it tells you which lever to pull first — so you’re not guessing.
Phase 8: Production Quality Control & Compliance for Evening Clutch Bags
Quality failures in evening clutch production trace back to gaps at specific checkpoints — not random defects. A structured QC package fixes this. It covers four control stages: material inspection, in-line stitching checks, final random inspection, and pre-shipment compliance review.
Reliable handbag factories follow ISO 9001:2015. This standard covers design, sourcing, manufacturing, inspection, packaging, and storage. Batch pass/fail decisions use AQL acceptance limits — the defined maximum defect count before a lot gets rejected.
What to Inspect at Each Stage
Pre-production material checks:
– Test fabric or leather thickness, strength, and hand feel against the approved sample
– Check trims and hardware — zippers, magnetic snaps, clasps, decorative frames — for color consistency, surface finish, and structural integrity
– Make sure all materials are labeled and matched to the latest revision
In-line workmanship checks:
– Measure all dimensions against the approved sample
– Check stitch spacing, curve symmetry, and reinforcement at stress points
– Flag loose threads, glue marks, frayed binding, scratches, and logo misalignment on the spot — don’t let these pass to the next stage
Function testing:
– Cycle zippers and magnetic snaps multiple times. Confirm smooth operation and reliable closure each time
– Pull-test chain attachments and strap hardware for load-bearing strength
Pre-Shipment & Compliance
Before release, confirm that quantity, specification, and packing all match the order. Check final goods for surface defects, hardware function, and cosmetic consistency. Any mismatch at this stage means delays — so get it right here.
For U.S.-bound shipments, evening clutch bags can fall under lead and phthalate restrictions. You also need to meet labeling rules under 19 CFR Part 134 for country-of-origin marking. Testing documentation may apply too, depending on the materials used.
The QC File Package to Request
Ask every supplier for these documents before you approve shipment:
-
Approved sample archive with revision history
-
AQL inspection report per lot
-
Defect photo log covering stitching, hardware, and surface issues
-
Pre-shipment inspection report
-
Compliance file for labeling, testing, and origin marking
-
Packaging verification sheet confirming no scratches, dents, or crushing during pack-out
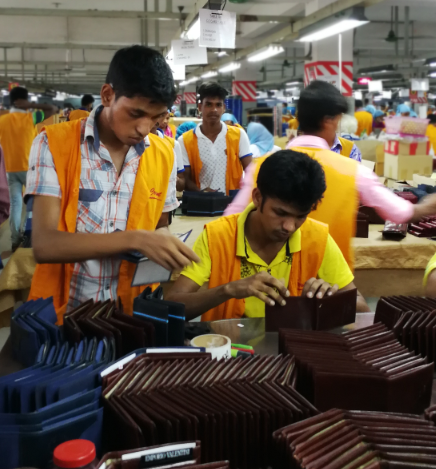
Suppliers with BSCI or SEDEX certification bring ethical and sustainability accountability on top of standard product QC. For brands selling into premium retail channels, this certification is worth asking for.
Phase 9: Launch Strategy, Wholesale Channel & Retail Merchandising
Getting to production approval is the hard part. A bad launch, though, can still kill a well-developed collection. The window is short. The margin for error is narrow.
Set a tight launch execution target: get 80–90% of retail locations stocked, merchandised, and staff-trained within the first 7 days. Aim for >95% OTIF (on-time, in-full) on all launch purchase orders.
Inventory & Wholesale Channel Setup
For fashion and seasonal items, set your opening inventory at 30–45 days of supply. Hold 15–30% of seasonal open-to-buy back for in-season reorders. Before launch, cut the bottom 10–20% of SKUs — too many options dilutes shelf impact.
On wholesale terms: standard retailer margin runs 50–60% off MSRP. A $100 bag usually wholesales at $40–50. Boutique opening orders start at $300–1,000 or 12–24 units per SKU. Payment terms run Net 30–60 days. Budget 3–10% return allowance and 2–8% markdown support for key accounts. Before you commit, check that your gross margin stays ≥40–50% after the wholesale discount.
Retail Merchandising Standards
Move product from stockroom to selling floor within 24–48 hours of delivery. Target eye-level placement for 70–80% of facings. Hero SKUs should take up 50–75% of any feature table or endcap space.
Deploy brand ambassadors in your top 10–20% of volume doors during the first 2–4 weeks. Push for 98–100% planogram compliance in those accounts. Your conversion target among engaged shoppers is 15–30%.
KPIs to Track From Day One
-
Launch month sell-through: ≥40–60%
-
End-of-season sell-through: ≥70–80%
-
Out-of-stock rate: below 5% across store-SKU combinations
-
Planogram compliance: ≥95% overall
Sell-through drops below 30–40% at mid-season? Activate 20–30% price reductions and move product to secondary placements. Keep off-price channels for the bottom 10–20% of SKUs only — that protects brand equity on your core range.
Phase 10: OEM/ODM Collaboration Model for Evening Clutch Bag Development
Pick the wrong factory model and you lose 30–40 days before a single sample gets cut.
You have two paths. OEM means you provide the design and the factory builds to your spec. ODM means the factory already has designs ready — you rebrand and customize. For evening clutch collections, most experienced brands run a hybrid: ODM structure, OEM surface.
OEM vs. ODM: What Each Model Delivers
|
Model |
Best For |
MOQ |
Development Time |
|---|---|---|---|
|
OEM full custom |
Exclusive silhouettes, brand IP control |
200–500 pcs/style (PU); 100–300 pcs (leather) |
40–60 days total |
|
ODM ready-design |
Speed-to-market, lower upfront cost |
100–200 pcs/style |
25–45 days total |
|
Hybrid (80% ODM / 20% OEM) |
Partial exclusivity + controlled MOQ |
150–300 pcs |
30–50 days |
ODM cuts concept-to-delivery time by 20–40% compared to full OEM. The tradeoff is exclusivity. To protect your SKUs, negotiate 6–24 month category exclusivity on specific styles.
Cost Benchmarks (FOB China)
-
PU/synthetic embellished clutch: US$4–7/pc (ODM) | US$6–10/pc (OEM custom)
-
Genuine leather clutch: US$12–18/pc (ODM) | US$15–25/pc (OEM exclusive)
-
Sample cost per style: US$50–150. You get a partial refund above the 300–500 pcs bulk threshold
-
Additional colorways: US$20–40 per color sample
-
New frame tooling: US$300–800 per mold + 15–22 days lead time
The 10-Step Collaboration Workflow
1. Vendor shortlisting — Target 3–5 factories. Look for 10–15+ years of evening clutch specialization. Check for documented BSCI, ISO 9001, or Sedex compliance.
2. Design exchange (Day 0–7) — For ODM, request the full catalog. Ask for dimensions (18–25 cm L × 8–12 cm H × 3–6 cm D), frame type, MOQ, and pricing. For OEM, send complete tech packs. Include tolerances (e.g., length 20 cm ± 0.3 cm), weight targets (≤350 g for embellished metal-frame styles), and hardware finish specs (nickel-free gold, 48–72 hr salt-spray resistance).
3. Costing and MOQ negotiation (Day 7–14) — Request tiered pricing at 100/300/500/1,000 pcs. Factor in material upgrade costs — premium trims add around US$1–3/pc.
4. Frame and hardware development — Exclusive molds need a minimum annual volume commitment of 2,000 pcs/year per frame. Sort out shared vs. exclusive mold ownership in writing before tooling starts. Get this agreed early — disputes here stall production.
5. Prototype and fit testing (Day 14–35) — Build 1–3 prototypes per style. Two key pass criteria to hit: bead loss rate <2% after the shake test, and opening/closing cycle test ≥300 cycles without frame deformation.
6. AQL agreement — Set major defect AQL at 2.5 and minor at 4.0. Lock down the critical defect thresholds too: lock failure rate <0.5% and visible embellishment loss <2% before line rework kicks in.
7. Branding and packaging — Logo metal plates: 15–35 mm width, 0.5–1.0 mm thickness. Dust bags: 80–120 g/m² non-woven fabric at US$0.15–0.40/pc. Gift boxes for evening clutches: internal length 22–25 cm, priced at US$0.50–1.20 based on board grade and print spec.
8. Inline inspection — Run first-article inspection at 5–10% of batch volume. Ask for photographic or video QC reports. These should cover embellishment coverage and stitch density (4–6 stitches/cm on visible seams).
9. Logistics and replenishment — Start with 300–1,000 pcs per SKU for the launch lot. Reorders take 20–30 days. That timeline drops if the factory holds 10–20% buffer stock on key fabrics going into wedding, holiday, and prom season cycles.
10. Performance review — Track three KPIs each season: on-time delivery ≥95%, post-arrival defect rate ≤2%, and design refresh of ≥5–10 new clutch SKUs per season through OEM or ODM channels.
FAQ: Common Questions About Evening Clutch Bag Collection Development
What occasions are evening clutch bags designed for?
Evening clutch bags suit formal, appearance-focused events. Think black-tie galas, red-carpet nights, formal dinners, cocktail parties, elegant weddings, opera, and theater. These settings call for something compact and hand-held — a clutch fits right in.
What should a capsule evening clutch line include?
A six-SKU capsule gives you solid coverage. Here’s what to include:
– 1–2 embellished statement styles
– One satin or velvet core style
– One metallic neutral
– One detachable-strap convertible
– One seasonal texture — beaded or woven
How do you match clutch style to outfit?
Your outfit tells you what the clutch should do. Bold, embellished outfit? Go with a simpler clutch. Clean, understated outfit? Let the clutch be the statement piece. Got a voluminous silhouette? Skip the miniature styles. An envelope or pouch shape balances fuller proportions far better.
What color strategy works across seasons?
Start with metallics and neutrals as your base — they carry year-round. From there, rotate by season:
– Spring: pastels
– Summer: brights
– Fall: rich, deep tones
– Winter: metallics again, especially for gifting
How should clutches be stored between seasons?
Use a dust bag or soft cloth pouch. Stuff it with tissue paper to hold the shape. Skip plastic storage — it traps moisture and warps the bag’s form over time.