Ever wonder why some luxury handbag suppliers keep their shape for decades while others sag within months? The secret often lies in those small metal studs on the bottom—bag feet. These hardware pieces protect your investment from wear, moisture, and damage. But they need precise installation to work right.
A millimeter off-center ruins both function and looks. Protective hardware becomes an eyesore instead.
You might be a leather craftsperson refining your technique. Or a DIY enthusiast upgrading a beloved bag. Maybe you’re just curious about quality bag construction. Learning how bag feet are added through precision installation turns amateur projects into professional-grade results.
This guide covers every critical detail. You’ll learn to select the right installation method for your bag’s material. Plus, you’ll avoid the dreaded “crooked foot syndrome.” We walk you through what separates flawless installations from frustrating failures.
Required Materials and Tools for Bag Feet Installation
Installing leather bag feet needs the right hardware, tools, and support materials. These parts work together to create a secure, long-lasting hold.
Hardware Selection by Type
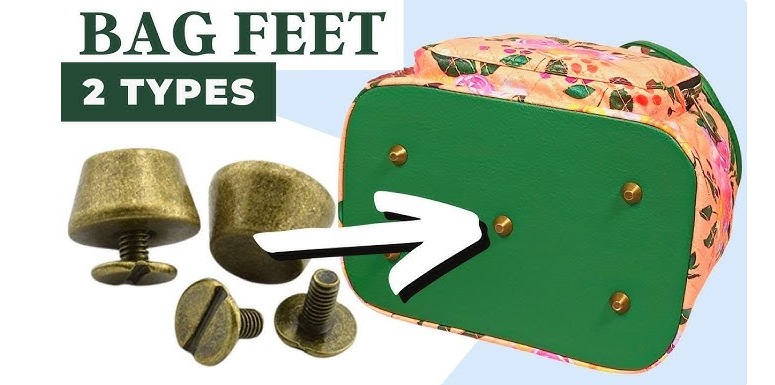
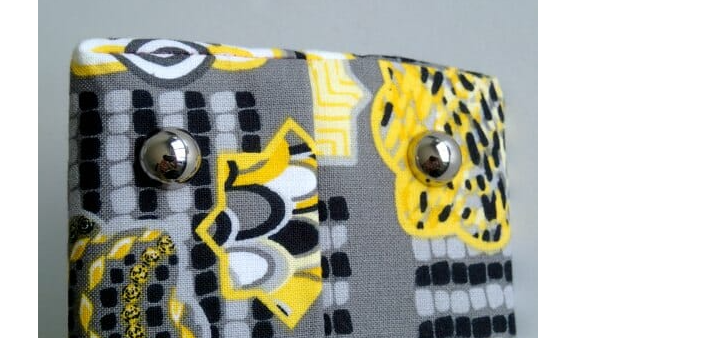
Prong-style feet cost less and work well for light to custom medium-weight bags. Long prongs pierce through your bag’s base from the right side to the wrong side. Add a washer on the inside. Then bend the prongs away from the center point. You can find them in dome and bucket shapes. Finishes include silver, gold, antique brass, or matte black. Match them to your bag’s existing hardware. Most prong feet include washers. Buy extras if yours don’t. This adds security.
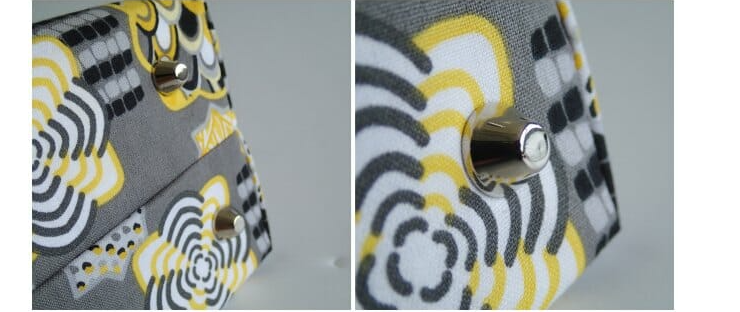
Screw-in feet attach stronger. They work better for heavier bags or pieces you use often. The threaded screw goes through a round pilot hole from inside the bag. The decorative foot screws onto it from the outside. Tighten until snug. Don’t over-torque. This can strip threads or damage material.
Essential Tools
Your tool kit depends on the hardware type you choose:
- Hole punchers or rotary punches create clean pilot holes for prong-style feet
- Precision knives, awls, stilettos, or X-acto blades work for tough materials like thick leather
- Screwdrivers (match screw-in foot thread type)
- Fabric markers or tailor’s chalk for accurate placement marks
- Rulers or measuring tapes for even spacing calculations
- Small scissors or seam rippers for hole enlargement adjustments
Supporting Materials
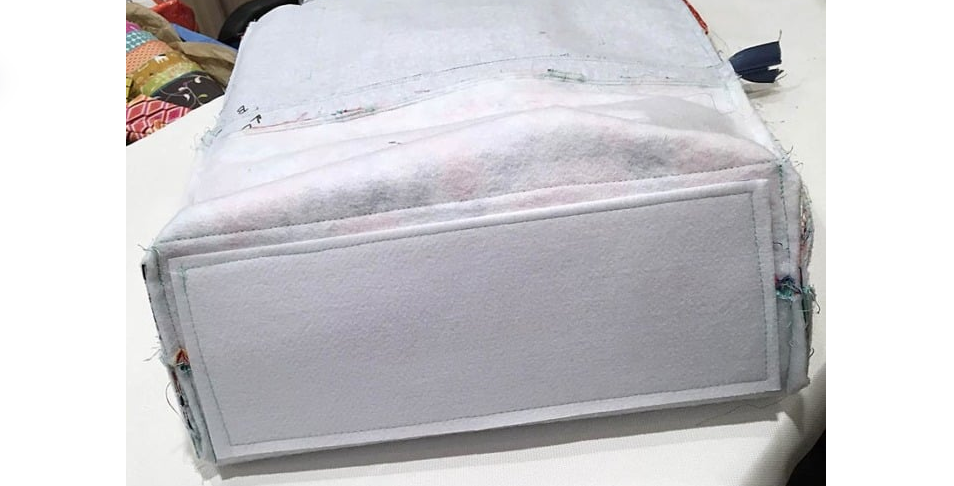
Base stabilizers stop sagging and spread weight across the base. Cut foam core, Plastic Canvas, cardboard, Pellon Peltex, or Soft & Stable to match your bag’s bottom size. These run 1/8″ to 1/4″ thick. Install this reinforcement between your outer fabric and lining before adding feet.
Adhesives secure components during installation:
– Fray check seals woven fabric edges around holes
– Multi-surface glue bonds prongs after bending. This makes them permanent.
– Basting tape or spray adhesive holds base stabilizers in position
Protective padding like fleece or duck tape covers sharp prong ends inside the bag. This prevents lining damage or snagging.
Preparing the Bag Bottom Structure
The bag’s bottom structure decides how well your feet stay in place. A weak or poorly formed base causes loose feet, uneven weight spread, and early failure—no matter how you install the hardware.
| Bag Type | Key Preparation Steps Before Adding Feet | Structural Rationale | Critical Points for Feet Placement |
|---|---|---|---|
| Block Bottom Bags |
|
|
|
| Flat Bottom Pouches |
|
|
|
| PP Woven Bags |
|
|
|
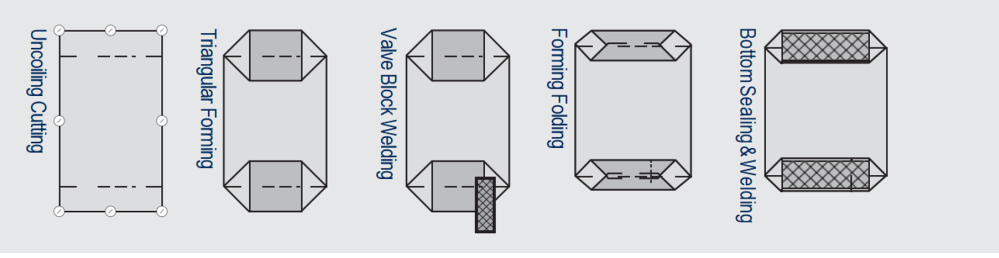
| Plastic Panel Bags with Welded Square Bottoms |
|
|
|
Add your base stabilizer now if you’re using one. Cut foam core, Plastic Canvas, or Peltex to match bottom size. Secure it between outer fabric and lining with basting spray. This stops shifting while you install feet.
Marking Foot Placement Positions with Precision
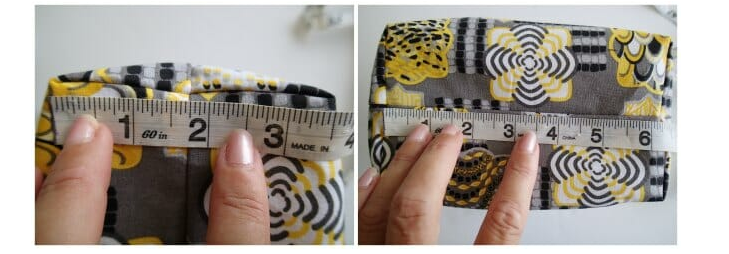
Accurate measurements are essential for a bag to stand level. Improper bag feet placement causes wobbling and uneven weight. Professionals in bag hardware installation stay within 3mm of error, while amateurs can be 10–15mm off. Start by folding the bag bottom lengthwise and widthwise to mark the center lines—these create a reference grid. Use the 60-40 rule: place corner feet 60% inward from each edge to prevent tearing and ensure stability.
Mark positions with a sharp awl or fine-tip fabric marker. On leather, press the awl to make a small indent; on fabric, use disappearing ink markers. Check symmetry by measuring diagonals—they should match within 2mm. Place the bag on a flat surface and ensure all four marks touch. Adjust as needed for precise bag hardware installation, just like a professional custom bag supplier would do.
Installing Prong-Style Bag Feet Step-by-Step
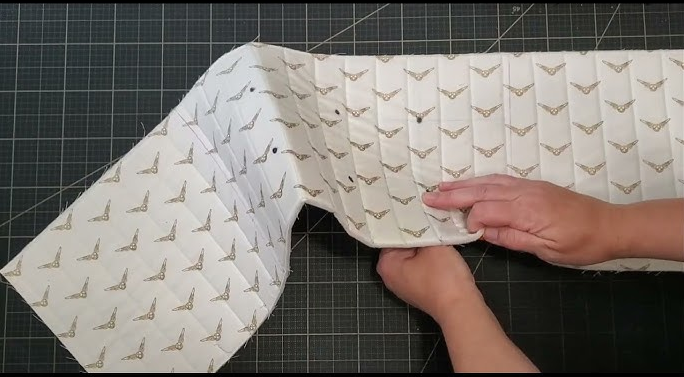
Prong-style feet need careful layering to stay secure. Start by positioning a stabilizer insert—foam core, Peltex, or Plastic Canvas—inside the bag lining. For boxed corners, trim edges at 45 degrees so it fits tightly. Make sure it lies flat with no buckles. You can add a thin fleece layer on top for extra padding and to cushion the prongs against the fabric.
Create pilot holes one foot at a time using an awl, seam ripper, or X-acto knife. Small prongs need a single narrow slit; larger prongs may need two parallel slits. Keep slits tight to prevent fraying, and dab fray check on loose-weave fabrics. Insert the prongs from the outside so the foot base sits flush. Inside, slide a scrap stabilizer or fleece over the prongs, then secure with a washer. Bend prongs outward with needle-nose pliers and dab glue to lock everything. Cover the setup with duct tape or a fleece square to protect the lining. Test immediately: place the bag on a flat surface, press each foot, and adjust any that sit higher. Repeat for all feet to ensure a stable, professional finish—just like a custom bag supplier would do.
Installing Screw-In Bag Feet Step-by-Step
Screw-in feet give a stronger, permanent hold than prong-style hardware. The threaded connection resists twisting and supports heavier bags. Start by punching pilot holes that match the screw diameter, one at a time, on a solid surface to prevent fabric shifting.
Install from interior to exterior: push the screw through, hand-thread the decorative foot, then tighten with a screwdriver until firm. Check alignment with a stabilizer so all screws fit smoothly. Cover interior heads with duct tape or fleece to protect the lining. This ensures stable, professional bag hardware installation, just like a custom bag supplier would do.
Comparing Installation Methods: Prong vs Screw vs Compression
Attaching bag feet is like choosing how to anchor a tiny furniture leg: prong-style feet bend like clips, gripping through tension and a washer—quick and easy, perfect for bags under 15 pounds, but the grip can loosen over time.
Screw-in feet work like threaded bolts, holding heavier leather or canvas firmly, with pressure focused at the screw point; this takes a bit more skill and care to avoid stripping threads.
Compression-pressed feet are like factory-level clamps, using hydraulic force to lock the metal ring permanently—strong enough for commercial bags over 50 pounds, but needing precise tools and high skill. For any custom bag supplier, choosing the right method balances skill level, bag weight, and long-term stability, ensuring professional bag hardware installation every time.
Force Retention Comparison
| Installation Type | Peak Force | Steady-State Force | Force Loss | Contact Distribution |
|---|---|---|---|---|
| Prong-style | Manual tension (varies) | 40-60% of initial after 30 days | 40-60% | Concentrated at prong tips |
| Screw-in (full threads) | 103.9 ± 33.2 N | 68.6 ± 36.4 N | 34% at 150 seconds | Localized near insertion |
| Screw-in (partial threading) | 88.7 ± 38.6 N | 37.2 ± 26.8 N | 58% at 150 seconds | Localized near insertion |
| Compression (large system) | 660+ kPa peak pressure | Minimal loss (permanent crimp) | <5% over equipment lifetime | Uniform across 6-point hex pattern |
Pick prong-style for light bags needing fast, simple setup. Go with screw-in feet for medium loads that need removable parts and decent durability. Use compression pressing for heavy-duty commercial bags. The equipment cost pays off with maximum attachment strength.
Conclusion
Adding bag feet with precision turns a basic bag into a pro-level product that lasts. You can pick prong-style feet for quick setup, screw-in types for extra security, or compression methods for heavy-duty strength. Success comes down to three things: accurate marking, the right tools, and taking your time.
Learning these installation techniques boosts both looks and durability. A well-installed bag foot protects your work from surface damage. Plus, it makes your entire project look more professional. Even small alignment mistakes can hurt stability. So measure carefully and position with care.
Ready to practice? Start with scrap material to nail your technique. This lets you test before touching your final project. You’ll gain confidence and find which method works best for your workflow and materials. Your bags need the stability and professional finish that good feet provide. Now you know how to deliver it.