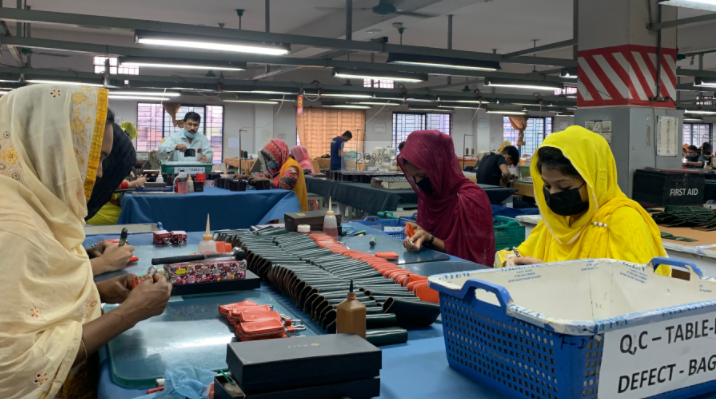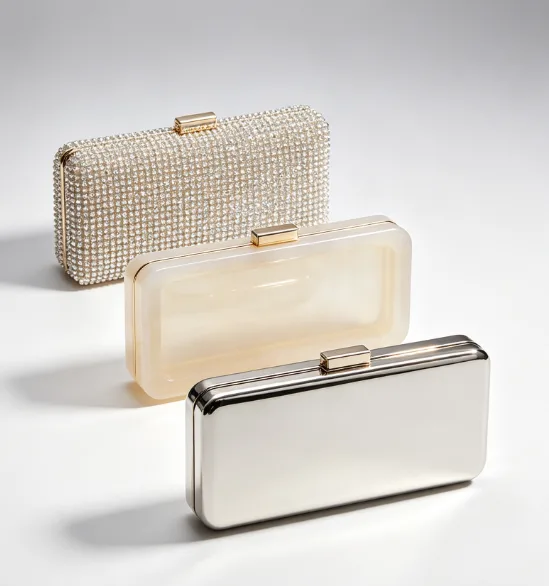
Why Custom Clutch Bag Orders Go Wrong (And What It Costs You)
Most clutch bag customization failures share the same root cause: assumptions treated as agreements.
The financial damage hits harder than most buyers expect. Take a first-time buyer ordering 2,000 PU evening bags at $4.50 each. They can lose 30–50% of their entire budget in a single order — through rejected batches, discounted clearance, or wasted freight. That’s not a worst-case scenario. That’s a recurring pattern.
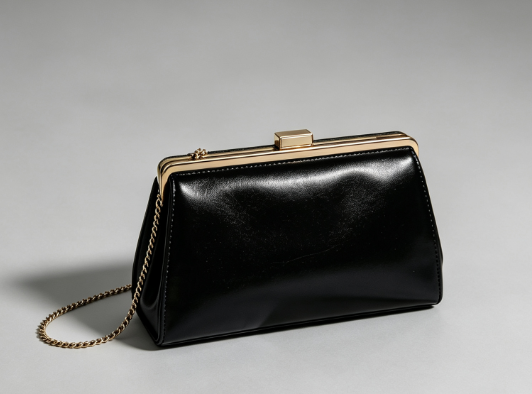
Three loss categories keep coming up:
-
Color rejection: No Pantone reference and no physical sample means color deviation between screen and production can reach ΔE 3–5 — visible to the naked eye. Complaint rates run 10–20% per batch.
-
Missed deadlines: Custom production plus sea freight runs 20–45 days. That clock starts after deposit and design approval — not after you wire the money.
-
Quality failures: At 4 SPI stitching (below the recommended 6–8), stress points break under real use. One brand found that 8–12% of units had seam or lining defects. They found out after their launch event had already started.
First-time buyers carry the highest risk. Experienced buyers keep failure rates below 5%. No structured preparation? That number jumps to 15–25%.
The 12 mistakes ahead close that gap.
Mistake #1: Not Defining the Use Case and Target User Before Ordering
Pick a material, lock in a size, request a quote — none of that matters yet. First, answer one question: Who is using this bag, and what for?
Skip this step and every decision after it goes wrong. Material, dimensions, hardware, and budget all follow the use case. Get that wrong at the start, and no amount of supplier back-and-forth will fix it.
The specs shift a lot across four common scenarios:
|
Use Case |
Typical Unit Cost |
Key Material |
Durability Need |
|---|---|---|---|
|
Wedding favor |
US$3–8 |
PU / satin |
1–10 uses |
|
Retail product line |
US$8–25+ |
Quality PU / genuine leather |
100+ uses |
|
Promotional gift |
US$1–4 |
Non-woven / polyester |
<20 uses |
|
Brand merchandise |
US$5–18 |
Nylon / canvas / leather |
20–80 uses |
Say a buyer skips this step and applies retail-grade specs to a wedding favor order. The unit cost jumps from US$6 to US$20+ — tripling the entire gift budget in one go. The opposite is just as painful: promotional-grade construction on a retail line pushes return rates up fast.
Before placing any bulk clutch bag order, write a short “Bag Brief.” Cover four things:
-
Capacity — What does it need to hold? (e.g., 6.5″ phone + short wallet + keys + lipstick = minimum internal length 18 cm)
-
Occasion — How often will it be used? A wedding clutch used five times a year needs very different specs than a bag carried every day
-
Durability — One-time gift? Aim for 500–1,000 zipper cycles. Retail product? You need 5,000–10,000
-
Style positioning — Entry / mid-range / premium? This directly limits your material options and the hardware finishes that work
No lengthy document needed. A 100–150 word brief — answered straight — stops the most costly clutch bag customization mistakes before you request a single sample.
Mistake #2: Choosing the Wrong Material for Your Custom Clutch Bag
Material selection kills more custom clutch bag orders than any other single decision. Not because buyers pick bad materials — but because they pick without data.
Writing “PU leather” in your brief tells a supplier almost nothing. Thickness, hydrolysis resistance, surface coating durability — none of that is spelled out. So what arrives can be 0.8 mm PU that collapses under its own weight. Your design needed at least 1.0 mm to hold its shape.
Here’s how the main clutch bag material selection options compare side by side:
|
Material |
Weight (25×12 cm shell) |
Durability (Martindale) |
Approx. Material Cost/Bag |
|---|---|---|---|
|
Full-grain genuine leather |
270–330 g |
>20,000 cycles |
$20–40 |
|
PU faux leather (1.0–1.2 mm) |
200–260 g |
5,000–15,000 cycles |
$3–6 |
|
Canvas / polyester (600D–900D) |
80–120 g |
>30,000 cycles |
$2–4 |
|
Resin-beaded (acrylic/glass) |
400–600 g+ |
High scratch resistance; bead loss risk |
$15–30 (labor-heavy) |
|
Eco cork / recycled nylon |
Similar to thick PU |
Moderate; coating quality critical |
+$1–3 vs. standard fabric |
Three material risks suppliers won’t bring up on their own:
-
PU hydrolysis: Standard PU stored above 40°C at 70%+ humidity for 6–12 months starts peeling and turning tacky. Your supplier writes “premium PU” — no hydrolysis resistance grade, no yellowing test hours. That gives you zero protection.
-
Beaded bag transit damage: Skip individual bubble wrap and reinforced carton padding, and bead loss rates on sea freight shipments hit 5–10%. The damage clusters at corners and flap edges.
-
Fabric dye batch variation: Across production runs, natural fiber and small-factory dyed fabrics can show ΔE 2.0–3.0 color shifts. That gap is visible to the naked eye — more so when the front panel and flap come from different dye lots.
The fix: Ask for physical swatches before you approve any material. For PU, lock in the thickness (≥1.0 mm for structured styles) and request hydrolysis test data in writing. For fabric, set a color tolerance of ΔE ≤1.5 and confirm all components — outer panel, binding, and strap — come from the same dye batch.
Mistake #3: Skipping Functionality Checks Because “It’s Just a Clutch”
Over 40–60% of low-star reviews for small bags on major fashion platforms share the same complaint: “My phone doesn’t fit.” That’s not a design problem. That’s a functionality check that never happened.
A clutch bag is still a bag. It needs to open, close, hold real items, and survive real use. Calling a product “simple” and skipping functional validation is one of the most costly assumptions you can make in custom evening bag production.
The Internal Space Problem
Outer dimensions mean nothing without usable internal clearance. A large smartphone — think iPhone Pro Max or a comparable Android — can measure up to 161 × 77 × 8.3 mm. Add a lipstick (Ø25 mm × 80 mm) and a cardholder (90 × 60 × 5 mm), and your minimum internal clear space requirements become:
-
Length: ≥ 175 mm
-
Height: ≥ 100 mm
-
Depth: ≥ 35–40 mm
A clutch with an inner cavity of 160 × 90 × 25 mm — common in samples that look great on paper — cannot hold a large phone lying flat. The user forces it in at an angle, stressing the seams. Fill the bag beyond 80% of volume, and the magnetic snap won’t close tight. That leads to accidental opening during use.
Hardware Failure Is More Predictable Than You Think
Thin zipper teeth under 3 mm and slider walls under 0.6 mm start deforming after just 200–300 open/close cycles under tension. Cheap zamak frame clasps with tongues thinner than 0.5 mm bend out of shape after 50–100 closures — even with a bag that’s only a little overstuffed.
Two quick checks catch this before bulk production:
-
Drop test: Load the clutch (phone + lipstick + keys) and drop from 90 cm onto a hard floor 3 times. Deformed zipper teeth or a weakened clasp = reject.
-
Torsion test: Twist the zipper pull 90° with around 5–7 N·cm torque. The pull snaps or deforms out of shape? The hardware grade is not suitable for production.
The Lining Issue Nobody Mentions Until It’s Too Late
No internal lining + dark PU + a white dress = visible color transfer after 1–3 uses. This is not a rare edge case. It’s a predictable outcome. Dry rub resistance below grade 3 on the gray scale makes it almost certain.
Test it on your sample: insert a 10 × 10 cm white cotton swatch, load the bag, and simulate 2 hours of use with light moisture. The staining grade falls below 4 on the ISO dry rub scale? A full fabric lining is non-negotiable — not optional.
The Functionality Worksheet Your Supplier Won’t Ask For
Before approving any sample for bulk production, require a signed functionality worksheet. It needs to cover five areas:
|
Check Point |
Pass Benchmark |
|---|---|
|
Internal capacity fit |
Largest target phone + lipstick + cardholder with ≥5 mm clearance |
|
Closure performance |
≤5 N closing force; ≤2 mm shape deformation when loaded |
|
Hardware cycle durability |
≥500 open/close cycles without tooth damage or clasp misalignment |
|
Strap tensile strength |
Chain minimum breaking load ≥30 kg; static hang test at 3–4 kg for 1 hour |
|
Lining & color fastness |
Dry and wet rub rating ≥4 grade |
Run at least three real-use scenarios on every development sample. Do a “night out” load test, an overstuffing stress test at 120% capacity, and a lining transfer test under simulated sweat conditions. Any scenario fails? Update the spec before production starts — not after your order of 500 units arrives at the warehouse.
Mistake #4: Providing Unclear or Incomplete Size Specifications
“Small clutch, for party use.” That five-word brief has caused more sampling disasters than almost anything else in custom evening bag production.
No L×H×W dimensions? The factory fills in the blanks from internal defaults. Their default “small evening bag” runs L 200–230 mm × H 110–130 mm × W 40–60 mm. Your mental image is probably closer to L 150 mm × H 80–90 mm × W 20–30 mm — a near phone-sized mini clutch. That gap means 50–80 mm of unwanted length and a wrong silhouette. New patterns, new hardware, and an extra US$50–150 per style in resampling costs follow. Add 7–14 days of delays before you see a corrected prototype.
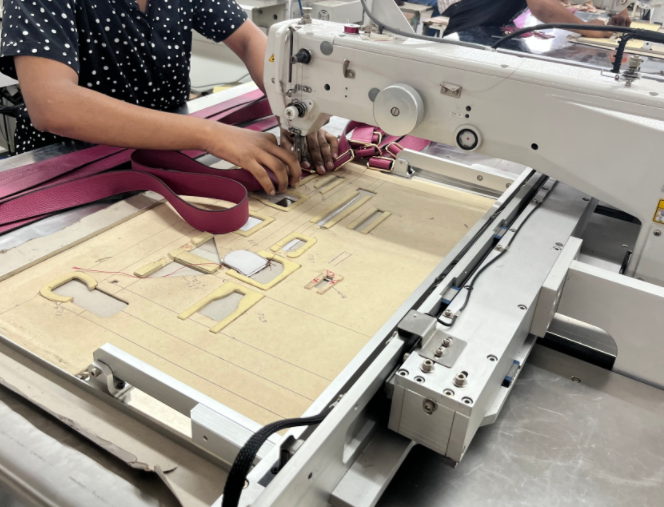
Incomplete size specs also push return rates up. SKUs listed without full dimensions generate 20–30% more size-related returns than those with complete L×H×W data. In fashion accessories, missing dimensions drive return rates 8–15% higher. Almost all of those returns come from buyers reporting “smaller/larger than expected.”
How to Write Size Specifications That Suppliers Can Use
Every clutch bag order brief needs six size fields — not one:
|
Field |
Example |
Why It Matters |
|---|---|---|
|
External dimensions |
L 230 × H 120 × W 40 mm |
Sets the overall silhouette and pattern |
|
Internal usable space |
L 205 × H 100 × W 25 mm |
Confirms real capacity after lining and structure |
|
Opening width |
200 mm net |
Critical for frame clasps and hard-shell styles |
|
Max device clearance |
iPhone 14 Plus (160 × 78 × 8 mm) |
Eliminates “phone doesn’t fit” complaints |
|
Reference load |
Phone + lipstick + 3–5 cards |
Gives suppliers a real-world benchmark |
|
Tolerance per dimension |
Soft bag outer ±5 mm; inner cavity −3 mm minimum |
Prevents acceptable drift from becoming a defect |
Express dimensions in the same sequence every time — L × H × W. Define each axis in writing too: L = length along the base, H = vertical height, W = side depth. Different factories use different axis conventions. One line of clarification cuts out an entire category of miscommunication.
Here are the standard tolerance ranges by construction type:
-
Soft bags / handmade leather goods: outer dimensions ±5 mm is acceptable. For very small styles (card cases, mini clutches), tighten to ±3 mm
-
Hard-shell / metal frame clutches: outer shell ±1–2 mm. Clasp hole placement and hinge positions ±0.5–1 mm
-
Structural components: any dimension ≤100 mm needs an explicit ±0.1–0.3 mm tolerance in your technical drawing
Skip the supplier’s “standard tolerance.” Put your numbers in writing. Send them with the RFQ, and ask the supplier to confirm the same figures on their order acknowledgment.
Mistake #5: Submitting Vague or Low-Quality Artwork and Branding Files
A blurry logo on a finished clutch batch is not a printing problem. It’s a file problem — one that started weeks before production began.
Artwork errors rank among the top causes of delayed print jobs. Each correction round pushes schedules back 1–3 business days. Suppliers who recreate a logo from scratch charge $45–125 per file. A wrong color mode that slips into bulk production means reprints.
The most common file mistakes in logo printing on clutch bags:
-
Low-resolution JPEG or screenshot (72–96 DPI at source) — the image breaks apart beyond 50–80 mm print width
-
RGB color mode instead of CMYK or Pantone — causes up to 10–20% color shift on bright tones
-
No print size or position specified — printers list this as a top-3 cause of artwork delays
-
Fonts not outlined — missing fonts auto-substitute, which changes letter shapes and spacing
The correct file standard for clutch bag customization:
|
Element |
Requirement |
|---|---|
|
File format |
Vector: AI, EPS, or PDF |
|
Raster fallback |
≥300 DPI at final print size |
|
Color mode |
CMYK for digital/DTF; Pantone PMS codes for screen print or emboss |
|
Logo position |
Exact mm spec (e.g., “70 mm wide, 20 mm below top seam”) |
|
Typography |
All text converted to outlines before export |
Also confirm the decoration method in writing. Foil stamping, embroidery, deboss, and screen print each need different file setups — so one standard file won’t cover all methods. Send a scaled mockup with every artwork submission. That way, placement gets approved by sight, not guesswork.
Mistake #6: Approving Bulk Production Based on Digital Mockups Alone
A digital mockup is a sales tool, not a production contract. Treating it as one is where bulk orders fall apart — and it happens more often than you’d think.
The core problem is physics. Your screen shows colors in RGB at 250–350 cd/m² brightness. That’s far more vivid than any real-world lighting environment. The clutch bag on a retail shelf or gift table gets seen under 300–500 lux of ambient light. Digital mockups look brighter and more saturated than the finished product ever will. Standard color deviation between screen RGB and production CMYK hits ΔE 5–10 on high-saturation tones — brand reds, oranges, and fluorescents. The industry acceptable tolerance is ΔE ≤ 2–3. You’re starting three to five times outside that range before production even begins.
Surface finish is the second blind spot. Matte versus gloss coating looks like a small difference on screen — maybe a 10% perceived shift. In real life, the reflectance gap between those two finishes is 30–50%. That difference decides whether your clutch reads as premium or cheap. No monitor captures that gap.
Get a physical sample before approving any bulk clutch bag order. Check these four points on the sample:
|
Check Point |
What to Verify on the Physical Sample |
|---|---|
|
Color accuracy |
Match against Pantone TCX/TPG swatch under standardized lighting; ΔE ≤ 2–3 |
|
Surface finish |
Confirm matte/gloss/metallic in hand, not on screen |
|
Logo clarity |
Minimum embroidery character height ≥ 4–5 mm; foil stamp edges crisp |
|
Structure and fill |
Padding thickness matches spec (e.g., 5 mm foam, not a 2 mm substitute) |
Sign and date one physical strike-off sample. Lock it as the production reference. The digital mockup still helps with visual alignment — but it never replaces a signed physical approval before bulk custom clutch bag production starts.
Mistake #7: Underestimating Production and Shipping Lead Times
A supplier quotes you “30 days production.” You add two weeks for shipping in your head. That math is missing at least 8–10 weeks of real timeline.
This is one of the most expensive miscalculations in custom evening bag production. The factory didn’t lie. The problem is that the “30 days” clock doesn’t start when you wire the deposit. It starts after design files are done, physical samples are approved, and all technical specs are locked in writing. Everything before that point is pre-production. It has its own timeline.
Here’s what a realistic door-to-door schedule looks like for a custom clutch bag order produced in China and shipped by sea to North America or Europe:
|
Phase |
Typical Duration |
|---|---|
|
Design confirmation (briefs, revisions, file sign-off) |
1–2 weeks |
|
First sample production |
1–2 weeks |
|
Sample review rounds (avg. 2–3 rounds) |
3–6 weeks total |
|
Bulk production (200–2,000 pcs, standard PU/leather) |
4–6 weeks |
|
QC inspection + any rework |
1–2 weeks |
|
Sea freight door-to-door |
6–8 weeks |
|
Total (realistic, standard season) |
~15–24 weeks (3.5–6 months) |
Air freight cuts the shipping leg to 1–2 weeks. Limiting sample rounds to one or two can shrink the total timeline to around 10–16 weeks. That’s only possible if you lock the design fast and no major changes come up mid-sample.
The three miscalculations that cause the most damage:
-
Misidentifying the production start date. Factories start the production countdown from the day final sample approval is confirmed and all technical documents are complete — not from deposit receipt. Size spec, material grade, or logo file still needs revision after you’ve paid? The clock hasn’t started yet.
-
Ignoring peak season delays. Chinese New Year shuts production down for 10–20 days, with a 1–2 week ramp-up after. Pre-Christmas demand (September–November) can stretch bulk production from 30 days to 40–60 days. Buyers who read only “30-day production” on a quote sheet miss these variables — and then miss their launch window.
-
Skipping the sample round buffer. Industry averages show 2–3 sample rounds for cross-border custom accessories. Each major revision — a structural change, material swap, or hardware update — resets the sampling cycle by 7–14 days per round. Three rounds adds up to 3–6 weeks of pre-production time. Most buyers never budget for that.
Have a Fixed Event Date? Work Backward — Not Forward
For time-sensitive orders, flip the planning logic. Start from your hard deadline and subtract:
-
Wedding favors (sea freight): Start supplier outreach at least 16–20 weeks before the wedding date. New design plus personalized elements? Plan for 20–24 weeks.
-
Christmas retail (sea freight): Get goods into the warehouse by late November at the latest. That means starting design and sampling by June–August. Buyers who start in October often see stock arrive in mid-to-late December — missing 30–50% of their selling window.
-
Trade show samples: Lock the design and start sampling at least 12–16 weeks before the show opens. Aim for full delivery 4–6 weeks ahead of the event.
What to Put in Your Contract
Skip verbal timelines. These four clauses cover the most common lead time disputes:
-
“Technical documentation completion date” — All specs, Pantone codes, logo files, and material confirmations due within 7–14 days of order placement. Late submission gets an equivalent delay added to the delivery date. No exceptions.
-
“Production start date definition” — Written as: “X working days from the date of final written sample approval and full deposit clearance.”
-
“Inspection window” — e.g., “Buyer to arrange third-party inspection no later than 7 days before scheduled ship date. Failure to do so constitutes waiver of third-party inspection rights.”
-
“Logistics buffer” — Sea freight timelines written as a range (e.g., 40–60 days door-to-door) with a stated ±7–14 day variance allowance built into the PO.
One habit that catches problems before they grow: add 1–2 weeks of buffer beyond the factory’s stated delivery date straight into your purchase order. That’s not distrust — it’s standard practice for experienced buyers. Port congestion, rework delays, and customs holds have a way of eating up every last day you thought you had.
Mistake #8: Skipping a Structured Quality Control Process
No Tech Pack. No AQL standard. No inspection checklist. That combination drives defect rates to 8–10% or higher on first-time OEM clutch bag orders. Factories with structured QC in place hold combined major and critical defects under 2–3% per lot. That gap isn’t luck — it’s process.
Skip a defined QC structure, and the same four problems show up in bulk custom evening bag production orders:
-
Loose stitching at stress points — stitching defects make up 30–40% of all soft-goods factory defects. This happens with no SPI standard or pull-test requirement in place.
-
Hardware corrosion — no salt-spray spec (minimum 48–72 hours) means corroded D-rings and pullers appear within 30–60 days in humid markets. That affects 5–10% of units.
-
Logo misplacement — no position tolerance means 5–8% of units exceed 5 mm offset. One documented case had 7% of a clutch batch rejected for this exact reason.
-
Color batch variation — no Pantone code and no ΔE limit allows shade differences between panels or production runs to exceed ΔE 2–3. That affects 10–15% of assembled bags in a visible way.
Build a Five-Stage QC Structure Before You Place the Order
|
QC Stage |
What to Cover |
|---|---|
|
Tech Pack sign-off |
Material thickness, hardware codes, logo placement tolerance (±2 mm), defect classification tied to AQL targets |
|
Incoming material check (IQC) |
AQL sampling on PU, fabric, and hardware; reject lots that fail thickness, color, or salt-spray tests |
|
First Article Inspection |
Pull 5–10 pcs from the first production run and inspect them before mass production moves forward |
|
In-process QC (IPQC) |
Check 10–20% of WIP at stitching and assembly stages for seam strength and hardware fit |
|
Pre-shipment AQL inspection |
General Level II sampling: 125 pcs for a 3,000-unit lot; reject if major defects exceed 6 units under AQL 2.5 |
For first-time orders from a new OEM clutch bag supplier, put third-party pre-shipment inspection in your budget. The cost runs US$250–300 per man-day. On an order worth US$20,000+, one failed shipment — returns, air re-ship, replacement production — costs five to ten times that figure.
Go with a hybrid model. The factory handles IPQC and final self-check. A third party covers pre-shipment AQL on the first two or three orders. Once defect rates hold below target across several runs, move to periodic audits.
Mistake #9: Not Confirming MOQ, Pricing Tiers, and Full Cost Breakdown Upfront
That quoted unit price of $7.00? Add tooling fees, custom packaging, and per-color surcharges. Your real cost per bag jumps to $8.63 — a 23% gap that wrecks margin forecasts before a single unit ships.
Skipping a full cost breakdown upfront is one of the most damaging mistakes in bulk clutch bag orders. It leads to unit cost miscalculations of 5–30% and total order budget deviations of 10–40%.
Hidden Costs to Confirm Line by Line
Most supplier quotes show one number. That number almost never includes everything. Before approving any quote, ask for each of these items broken out one by one:
|
Cost Item |
Typical Range |
What to Ask |
|---|---|---|
|
Extra color surcharge |
$50–200 per color |
Is there a separate setup fee per colorway? |
|
Custom hardware tooling |
$80–300 per mold |
Is this a one-time fee? Reused on reorders? |
|
Electroplating / finish upcharge |
$0.03–0.20 per piece |
Already in unit price, or billed as a separate line? |
|
Individual packaging (OPP bag, gift box, hang tag) |
$0.02–0.80 per unit |
What’s the MOQ on gift boxes? Most require 500–1,000 units minimum |
|
Print plates / emboss dies |
$50–150 per plate |
Per color, or per design? |
|
Sample fee |
$30–100 per style |
Refundable on orders ≥ 300 units? At 100% or 50%? |
|
Third-party inspection |
$150–300 per batch |
Buyer-arranged or included? |
How MOQ Works for Custom Clutch Bags
“500-unit MOQ” does not mean what most buyers assume. Most minimum order quantity clutch bag structures split into two layers:
-
Total order MOQ: e.g., 500 units across the entire order
-
Per-color MOQ: e.g., 100 units minimum per colorway
So ordering 3 colors requires 300 units minimum — not 500. But ordering 6 colors at 100 each also satisfies the total MOQ. Confirm both numbers directly with your supplier. Some factories allow style mixing (e.g., 200 + 150 + 150 units across three SKUs) to reach the total threshold.
For personalized clutch bags wholesale — laser engraving, embroidery, or custom logo plates — per-color and per-style MOQs tend to rise to 100–300 units per variant. This covers the fixed customization costs on the factory’s end.
Request a Tiered Pricing Table Before Committing
Always ask for at least four quantity brackets in writing:
|
Quantity |
Example Unit Price |
|---|---|
|
50–99 units |
$10.00 |
|
100–249 units |
$8.50 |
|
250–499 units |
$7.20 |
|
500+ units |
$6.50 |
The spread from lowest to highest tier runs 10–35% in most cases. Ordering 50 units when 100 units is a real budget option means overpaying on every single piece. Check your cash flow first, then pick the bracket that saves you the most per unit.
The Total Landed Cost Formula
Unit price × quantity is not your order cost. Use this structure instead:
Total Cost = (Unit price × qty) + tooling/mold fees + packaging + shipping + import duties − refundable sample fees
Here’s a real example: 300 units at $7.00, plus a $150 mold fee, $120 in gift boxes ($0.40 × 300), $220 for freight and customs, and a $60 sample fee refunded at this order size. Total landed cost = $2,590, or $8.63 per bag. Budget at $7.00 and you’re already $489 short before the order ships.
Get every line item confirmed in writing before placing the order. A complete quote is not optional — it’s the only way to build an accurate cost model for your clutch bag customization project.
Mistake #10: Choosing Suppliers Based on Price Alone
The cheapest quote rarely stays cheap. Add up defect handling, rework, emergency freight, and supplier switching costs — price-only selection raises your total cost of ownership by 15–35%. The data backs this up: 70–80% of “lowest-price” supplier decisions lead to significant hidden costs within 12–18 months.
Five Red Flags That Cheap Suppliers Share
Before you award an order on unit price alone, check for these warning signs:
|
Red Flag |
What It Signals |
|---|---|
|
Response time >24–48 hours |
2–3× higher risk of late delivery and miscommunication |
|
No BSCI, ISO 9001, or SEDEX certification |
Defect rates often 3–5% vs. <1% at audited factories |
|
Vague payment terms or no written INCOTERM |
Expect 3–10% in surprise surcharges post-PO |
|
Refuses to produce paid samples |
>2× probability of major spec deviation on first bulk run |
|
No dedicated clutch/evening bag production line |
20–40% higher return rates from hardware failure and deformation |
Use a Weighted Scorecard — Not Just a Price Column
Shortlist 5–8 suppliers. Score each one across six criteria before you look at quotes:
-
Quality/QC: 25%
-
Delivery reliability: 20%
-
Price: 20%
-
Communication speed: 15%
-
Category experience: 10%
-
Payment term transparency: 10%
A supplier quoting 5–10% above the lowest bid but scoring highest overall is almost always the stronger commercial choice. Here’s what to look for in top performers: ≥5 years producing clutch bags for export, an on-time delivery rate ≥95%, and a repeat customer rate ≥60–70%. Suppliers who hit all three markers tend to outperform low-price alternatives across a full order cycle — not just on the first shipment.
Mistake #11: Ignoring Packaging and Shipping Protection for Delicate Clutches
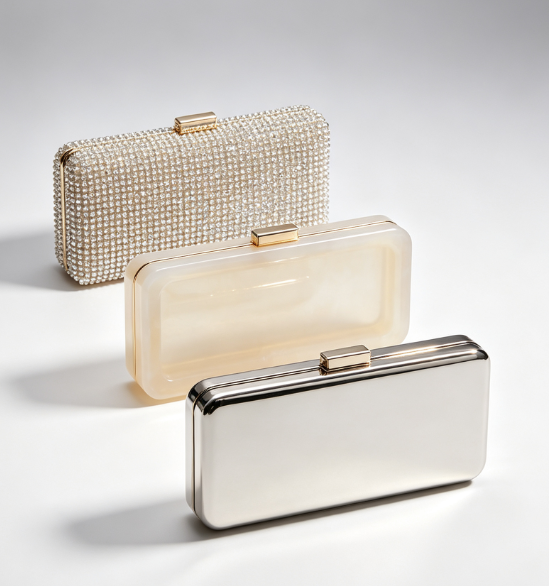
Beaded clutches, resin-frame minaudieres, and metal-finish evening bags all share one problem: they arrive damaged more than any other style in bulk shipments. And the cause is almost always a packaging decision made before the order left the factory.
The damage numbers are clear. Beaded bags in single-layer cartons with no foam support lose beads on 10–20% of units per shipment. Metal-finish bags stored together without separate sleeves show surface scratches on more than 50% of damaged units. Resin frames crack at the corners when the outer carton fits too tight — no buffer, no protection, no mention on the quote sheet.
Why These Styles Fail in Transit
Each bag type has its own weak point:
-
Beaded bags: Glass, acrylic, and rhinestone beads attach with point adhesive or thread stitching. A side impact sends force straight into the beads — not the bag body. A drop of just 3–5 feet onto a hard surface, with no foam underneath, causes mass bead separation.
-
Resin / acrylic hard-frame bags: The shell needs cushioning on all six sides to handle drop impacts. Skip that, and the corners crack. Resin interiors also fit with no room to spare. So the internal hardware and frame edges knock into each other during vibration — causing scratches and frame splits.
-
Metal-finish and chain-detail bags: Electroplated surfaces scratch from even the slightest friction. Loose metal chains inside a carton act as impact sources. They press into bag surfaces at every bump in transit.
The Four Packaging Mistakes That Cause Most of the Damage
1. Outer carton fits too tight around the gift box
Industry standard calls for the outer carton to be at least 6 inches (≈15 cm) larger per side than the inner box — that gives you 3 inches (7.5 cm) of buffer on every face. Some suppliers cut costs by sizing the outer carton to just barely fit the gift box. That removes all shock absorption in one step.
2. Multiple clutches packed into the same inner box or dust bag
Wrap and cushion each bag on its own. Metal clasps press into beaded surfaces. Chain straps tangle around embellishments. The damage happens inside the box during transit — no factory quality check will catch it after the fact.
3. Filling only the top and bottom of the carton
All six faces need cushioning. Use a “nest” fill — the bag floats inside the carton, with padding on every side. A bag that touches the carton wall gets pressure dents or shape deformation at that contact point.
4. Skipping the shake test before sealing
Pick up the carton and give it a slow shake before it ships. Any sound or movement inside means the fill is not enough. This is a 10-second check. It removes the single most common cause of transit damage: empty space inside the box.
The Packaging Structure That Works
For beaded, resin-frame, and metal clutches going into bulk shipment:
|
Layer |
Specification |
|---|---|
|
Individual dust bag |
Soft cotton or non-woven fabric; one bag per clutch, no exceptions |
|
Bubble wrap / foam wrap |
Minimum 3–5 layers; secure with tape on all faces |
|
Inner gift box |
2–3 cm larger than the bag on each side; snug fit with no movement |
|
Outer export carton |
6 inches larger than inner box per side; double-wall corrugated for sea freight |
|
Internal fill |
Foam board, air columns, or high-density paper — all six faces covered |
For beaded styles, add one more step: place a custom-cut soft foam panel flat against the beaded face. This spreads pressure across the surface. It stops force from concentrating on single bead points.
Shipping Method Changes the Requirements
-
FCL sea freight: Focus on compression resistance from stacking. Outer cartons must carry the full weight of boxes piled above them. Strap pallets tight, and keep clutches on the top layers — away from corners.
-
LCL sea freight: Handling happens more often, and cargo gets mixed. Put “Fragile” labels on the top and at least two sides. Add moisture-absorbing desiccant — 1.2 units per cubic foot of air space — to protect metal hardware and resin finishes.
-
Air freight / express courier: Smaller cartons cut down on internal void space. Keep the longest box dimension under 20 inches (50 cm). Seal with H-pattern tape on both top and bottom. Put “Fragile” labels on the largest face — not across a fold seam.
What to Confirm With Your Supplier Before the Order Ships
Ask for each packaging cost as its own line item in the quote:
-
Individual dust bag (included or add-on?)
-
Gift box unit cost, with or without logo printing
-
Bubble wrap and foam volume per bag (e.g., 1 m² bubble wrap + 4 foam panels per unit)
-
Export carton spec: single-wall or double-wall corrugated?
-
Confirmation that the double-box structure (inner gift box + outer export carton + 3-inch buffer) is included for fragile styles
One last check before you approve the shipment: make sure every metal chain and hardware piece has its own wrap and cannot shift around inside the bag during transit. Loose hardware acts as its own impact source — and it will always find the most delicate surface in the box.
Mistake #12: Failing to Define Tolerances and Design Change Rules Before Production
Production “micro-adjustments” are silent order killers. A supplier swaps your specified YKK #5 zipper for a local equivalent. A second dye batch gets mixed in when original fabric runs short. A cutter shaves 0.5 cm off the bag length to cut waste. None of these changes get flagged. None require your approval. The shipment arrives, and the damage is done.
No written tolerance and change control rules before production starts? You have no contractual ground to reject these deviations — even the visible ones.
The Three “Micro-Adjustments” That Cause the Most Disputes
Hardware substitution is the most common problem. A replacement zipper can look identical but have a different pull shape, weaker tooth engagement, or a lower cycle durability rating. Your contract says “metal zipper” — the supplier has violated nothing. Write in the brand and model instead. Use language like: “YKK #5 VISLON; any substitution requires written buyer approval.” Now that substitution is a breach, not a judgment call.
Fabric dye batch variation follows a predictable pattern. Original fabric stock runs short mid-production. Factories mix dye lots. The result: front and back panels show different shades under store lighting. Use the AATCC Gray Scale to evaluate color deviation — it’s the industry standard. Most buyer contracts set a minimum acceptance level of Grade 4 (ΔE 1.0–1.5). Anything below Grade 4 is a rejectable defect. No clause in your contract? “Different shades” stays an opinion, not a violation.
Dimensional drift starts at the cutting table — no alarm, no flag. A 0.5 cm reduction in bag length. A 1 cm expansion in the frame opening. For clutch bags, logo placement offsets beyond ±5 mm count as major visual defects. Frame opening changes throw off hardware fit. These are not rounding errors. They change how the finished bag looks and works.
What Your Contract Must Define Before Production Starts
|
Specification |
Minimum Required Clause |
|---|---|
|
Outer dimensions |
State tolerance per axis: soft bags ±5 mm; hard-frame bags ±1–2 mm |
|
Logo / embellishment position |
Offset limit ≤ ±5 mm from nominal; ≤ ±3 mm for premium styles |
|
Color deviation |
AATCC Gray Scale ≥ Grade 4; or ΔE ≤ 1.5 measured under D65 lighting |
|
Hardware brand/finish |
Specify brand, model, and surface finish; written approval required for any change |
|
Hardware dimensions |
Thickness/diameter tolerance ±0.1–0.2 mm; assembly-critical hole spacing ±0.05–0.10 mm |
Change Management: What Requires Re-Sampling vs. What Doesn’t
Not every production variation needs a new sample. Some do — no question. Mixing up these two categories is where expensive disputes start.
Changes that require a new signed sample before production continues:
– Any fabric substitution where weight shifts by more than ±5–10%, or fiber content changes at all
– Color adjustments that fall below Gray Scale Grade 4–5
– Hardware brand, model, or surface finish changes of any kind
– Logo size, position, or proportion changes beyond ±3–5 mm or ±2–3% of original scale
– Any structural change: added or removed seams, pockets, closures, or frame elements
Changes within acceptable production tolerance (no re-sample required, but must appear in the inspection report):
– Dimensions within your pre-agreed tolerance range
– Logo placement within the contracted ±5 mm limit
– Color variation at AATCC Grade 4–5 — within standard, but still documented
Build a Three-Tier Change Classification Into Your Contract
Use this structure to cut out ambiguity:
-
Class A changes — touch appearance, function, safety, or brand identity (color, material, hardware, logo, structure) → mandatory re-sample and written approval before production resumes
-
Class B changes — affect internal process or cost, with no visible impact on the finished bag → written notice and technical sign-off required; re-sample not mandatory
-
Class C changes — normal variation within pre-agreed production tolerances → handled through standard inspection; no extra approval needed
One enforcement rule makes this work: all Class A and Class B changes go through a formal written Engineering Change Order (ECO). Not a WeChat message. Not a verbal confirmation on a factory call. A signed document that updates the tech pack and the purchase order — before production moves forward.
Define your tolerances in the RFQ. Lock them in the purchase order. Require an ECO for anything outside those boundaries. That paper trail is what turns “the factory made a small change” from an acceptable excuse into a documented breach. It’s also your leverage when a shipment doesn’t match your signed sample.
Quick-Reference: Correct vs. Wrong Practices Comparison Table
Twelve mistakes. Four decision points. Use this table as a fast checklist before you send any RFQ, approve any sample, or sign any purchase order.
|
Decision Point |
✖ Wrong Practice |
✔ Right Practice |
|---|---|---|
|
File submission |
JPG/PNG under 300 DPI; RGB color mode |
AI/EPS/PDF vector or 300 DPI CMYK TIFF + Pantone codes |
|
Logo position |
Described in email text, no visual reference |
Exact mm coordinates marked on the artwork file |
|
Size specs |
“Small clutch, party use” |
L × H × W in mm, inner cavity dimensions, ±3–5 mm tolerance per axis |
|
Material brief |
“PU leather” |
“1.0–1.2 mm PU, hydrolysis-tested, CMYK color-matched to Pantone reference” |
|
Sample approval |
Digital mockup approved; production starts |
Physical strike-off signed, dated, and locked as production reference |
|
Lead time planning |
“30 days production” added to ship time |
Full phase breakdown: sampling + approval + production + QC + freight buffer |
|
Cost confirmation |
Unit price × quantity = budget |
Unit price + tooling + packaging + freight + duties − refundable sample fees |
|
Supplier selection |
Lowest quote wins |
Weighted scorecard: quality 25%, delivery 20%, price 20%, communication 15% |
Custom Clutch Bag Order Checklist: What to Confirm Before You Pay the Deposit
Every mistake in this guide shares one thing: it was preventable before the deposit went out. Use this checklist as your final gate. Any item below unconfirmed? Hold the payment.
10 things to lock in before you wire a single dollar:
-
Brief — Use case, target user, sales channel, target price, first-order quantity, delivery date, and destination market. Factories need these details to give you an exact quote and catch compliance issues early.
-
Style & structure — Bag type, closure mechanism, internal pockets, card slots, phone compartment, detachable strap options. Attach 1–3 clear reference images.
-
Dimensions — L × H × W in mm plus inner cavity size. Work backward from what the bag needs to hold. Don’t guess.
-
Materials — Nail down the outer fabric, lining, stiffener, and surface finish. Add durability requirements and a color standard — Pantone/PMS number or a physical swatch.
-
Logo files — Vector format only: AI, EPS, PDF, or SVG. Confirm the decoration method and any digitizing needs before the order moves forward.
-
Tech Pack — It must include the style code, dated drawings (front/back/side/bottom/interior), dimension tolerances, BOM, and packaging specs. No tech pack, no order.
-
Sample process — Confirm the rounds: proto sample → revised sales sample → PP sample. The PP sample is your production benchmark. For complex designs, budget for a pilot run of 50–200 units before full production starts.
-
MOQ & pricing — Get the first-order MOQ, per-color MOQ, tiered unit prices, tooling fees, sample fees, and packaging costs. Each item listed separately, no bundling.
-
Lead time start date — Put it in writing: “X working days from final written PP sample approval and cleared deposit.” Add a 3–5 business day buffer on top of what the factory quotes you.
-
QC, packaging & credentials — Agree on AQL standard, defect handling, and return policy. Confirm packaging contents: dust bag, hang tag, gift box, export carton. Ask for the business license, factory audit report, test reports, and customer references.
Pre-Payment Checklist (Print and Sign Off Before Every Order)
-
Use case, target user, sales channel, market, launch date, and first-order quantity defined
-
Bag style, structure, closure type, and hardware confirmed
-
Dimensions (L × H × W) and contents load list finalized
-
Material, lining, hardware finish, color standard, and substitution rules confirmed
-
Vector logo files submitted with decoration method specified
-
Tech Pack complete: drawings, BOM, tolerances, packaging requirements
-
Sample rounds confirmed: proto → revised sales sample → PP sample as production reference
-
MOQ, per-color MOQ, tiered pricing, and all additional fees itemized
-
Lead time start date, production window, and shipping buffer written into the PO
-
QC standard, AQL method, defect classification, and return terms agreed in writing
-
Packaging contents confirmed: dust bag, custom tags, gift box, export carton specs
-
Supplier credentials received: business license, audit report, test data, client references
-
All key terms confirmed in a signed PO or contract — not just a chat message
Work With a Custom Clutch Bag Manufacturer Who Gets It Right the First Time
All twelve mistakes in this guide share one thing: the right manufacturer spots them before they become your problem.
Finding that manufacturer starts with one question. Not “what’s your price?” — but “what’s your first sample pass rate?” Strong OEM clutch bag suppliers land at 85–95% on this metric. That means fewer revision rounds, faster timelines, and a production process that matches the sample you signed off on.
Ask suppliers this straight: In the last 12 months, what percentage of custom clutch bag projects passed the first sample without major changes? How many revision rounds on average?
A supplier who answers with real numbers is worth your time. One who can’t — or won’t — is already telling you something.
Three benchmarks to confirm before you commit to any OEM clutch bag supplier:
-
First sample turnaround: 10–21 days for standard PU or leather clutch styles; up to 30 days for complex metal frames or specialty fabrics
-
Bulk production window: 8–12 weeks is the industry standard for custom evening bag production
-
MOQ structure: 50–200 units per style per color is typical — ask for a full MOQ breakdown by style, color, material, hardware, and packaging so you can plan your full range at once
Your brief and tech pack do most of the work here. A manufacturer who gets it right the first time needs clear inputs to start from. The right one will tell you what’s missing before sampling begins — not after it goes wrong.