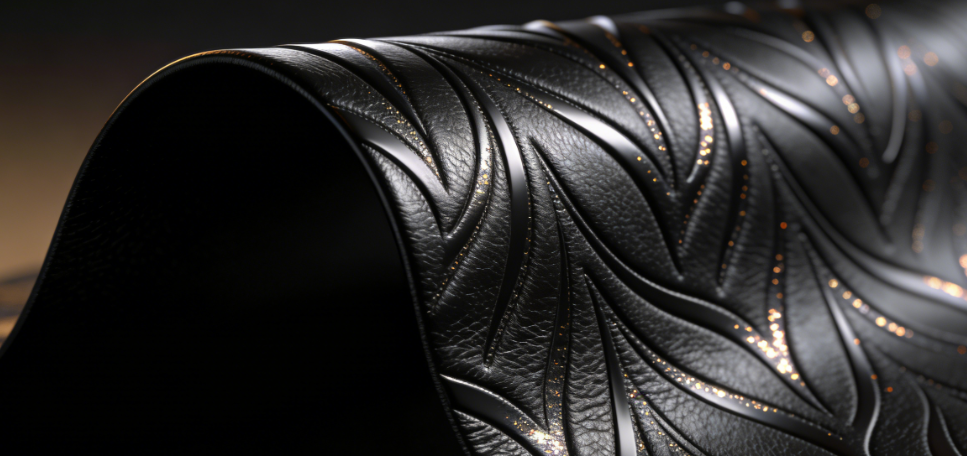
Run your fingers across a luxury leather handbag supplier. The logos and patterns don’t just sit flat—they rise, curve, and grab your attention with real depth. That’s 3D embossing at work. This technique turns flat leather, vinyl, or fabric into shaped art through precise pressure and material movement.
Maybe you design bags and want to boost your brand. Or you make bags and need new production methods. Or you just want to know how premium accessories get their unique look. Either way, learning how 3D embossing creates depth and shape opens up fresh creative options. This guide covers the science of how materials bend and reshape. You’ll see the real differences between cold and heat stamping. We share the engineering basics and hands-on methods that split amateur work from pro results. You’ll learn why some materials handle pressure well while others crack. You’ll find out how filler compounds boost the 3D effect. Plus, you’ll discover which equipment tweaks stop the most common embossing problems.
What is 3D Embossing and How is it Different from Standard Embossing?
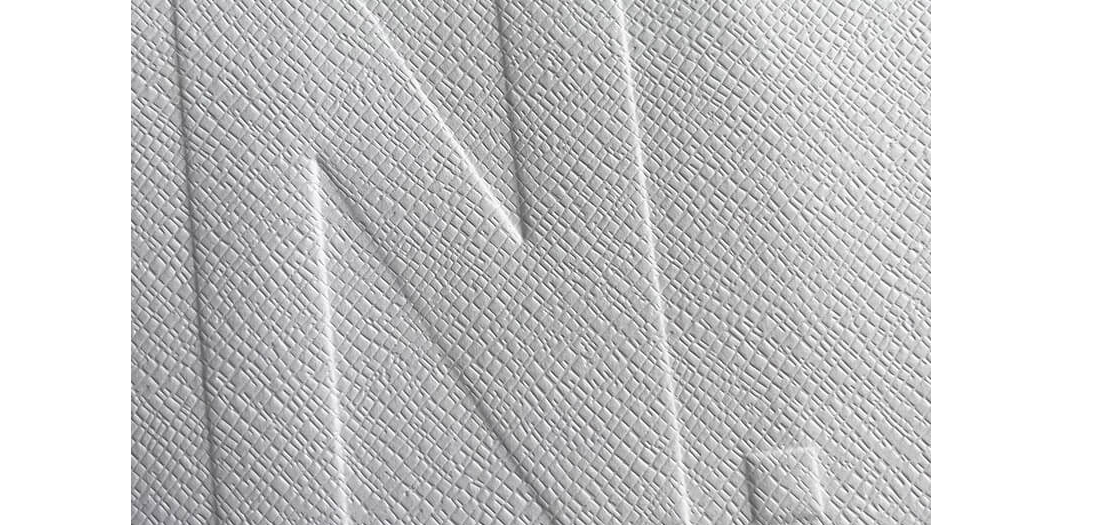
Standard Embossing
Standard embossing presses uniform height and depth onto the material surface. Every raised and recessed area is the same, creating a neat, clean look but a relatively flat effect. It’s ideal for bag linings, simple wallets, or large tote panels where uniform texture is sufficient.
3D Embossing
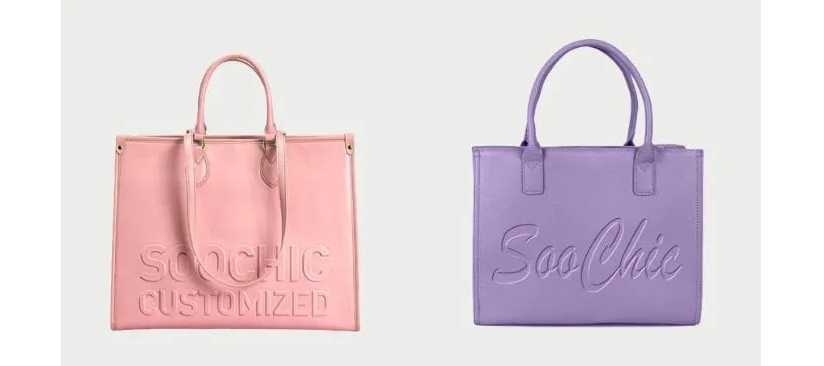
3D embossing creates multiple layers of depth within the same pattern. Some areas are higher, others lower, with smooth transitions in between. The result is a lifelike, sculpted surface that looks and feels more dimensional. It works best for a premium handbags supplier, logo embossing, card holders, and high-end accessories.
Impact on Visual and Tactile Effects
- Standard embossing: consistent touch, minimal light and shadow variation, simple style
- 3D embossing: noticeable height differences, dynamic shadows, highly tactile and visually striking
For example, a flower design can have petals, center, and stem at different heights, making it appear more realistic compared to a uniformly raised standard embossing.
Mold and Structure Differences
- Standard molds: only “raised” and “recessed” zones
- 3D molds: include multiple height levels and gradual slopes, allowing material to flow into shallow, medium, and deep areas for a sculpted effect
Equipment and Process Requirements
3D embossing molds are thicker and require higher pressure and precise machine setup. Without proper spacing or force, patterns may not transfer completely. Standard embossing is simpler and faster, suitable for high-volume production.
Practical Recommendations
- Efficiency and large-volume production: standard embossing, ideal for large tote panels, linings, or basic wallets
- Premium look, 3D logos, or high brand impact: 3D embossing, perfect for custom high-end handbags, card holders, and boutique accessories
For bag manufacturers aiming for luxury appeal and detailed branding, 3D embossing delivers depth and sophistication that standard embossing cannot achieve.
Material Preparation: Creating Optimal Embossing Conditions
Three variables control your embossing pattern quality: pressure, temperature, and time. Film speed adds a fourth control that manufacturers watch during production. Material behavior changes as these parameters shift. Flow stress drops as temperature rises. Flow stress increases as strain rates speed up. The change from elastic to plastic deformation makes predictions hard without computer modeling.
Understanding Material Compression and Recovery
Embossing depth links to material compression levels. Deeper die pressure means more fiber compaction under the tooling surface. Maximum embossing paths reach about 700 µm before total compression happens. Beyond this point, the material can’t compress more without damage.
Re-swelling behavior makes final quality control harder. After pressure release, compressed materials recover about 25% of their original thickness. This bounce-back affects impression sharpness and size accuracy. Engineers need to factor this in during die depth calculations.
Thickness varies across embossed zones:
- Uncompressed flanks: ~400 µm material thickness stays
- Compressed centers (pyramid tops): ~335 µm thickness remains
- Flank transition areas: highest compression happens here
Different materials respond in different ways under the same pressure. Cardboard A-330 shows lower compression than B-325 and C-320 types. This creates higher ratios between embossing depth and final material thickness.
Filler Compounds: Better Shape Retention for Embossed Patterns
Filler compounds change how embossed patterns hold their shape under stress. These tiny additives strengthen polymer blends used in synthetic bag materials. Particle shape matters more than chemical makeup for reinforcement strength.
How Filler Shape Controls Strength
In bag materials and embossing, fillers act like the internal skeleton of a bag. Their shape and size determine whether a logo or texture can truly stand out and stay sharp. Slender 1D fillers create continuous support inside the material, spreading embossing pressure and helping patterns remain clear and resistant to flattening. Smaller particles provide more contact with the base material, further improving embossing stability.
Different fillers shift the balance between flow and stiffness. Some improve mold flow for easier forming, while others increase surface hardness for sharper edges and finer details. Stiffer materials suit shallow textures, but deep 3D embossing requires enough flexibility to prevent cracking during daily use. From my own project experience, simply adjusting the filler ratio can completely change how long an embossed logo holds its shape—much like swapping out the bag’s internal frame.
Setting Filler Levels for Production Needs
Thermoplastic elastomer (TPE) blends gain flexural strength and modulus as filler content goes up. Impact strength drops at the same time. Less stretch and give make high-filler blends brittle under sudden stress.
Bending stiffness and stretch both get better with the right filler choice. Production settings boost these gains. 100% infill density gives maximum load-bearing capacity for embossed bag panels that carry weight. Lower infill speeds up printing but cuts strength. Larger nozzle sizes improve layer contact and bonding strength during material placement. This spreads filler better across embossed surface features.
Equipment Setup and Pressure Control Systems
In 3D embossing for bags, pressure control is the line between a sharp logo and a damaged surface. Think of pressure like a steady hand when stamping leather—too much or too little instantly ruins the detail. High-precision pressure regulators keep force stable during the embossing stroke, so depth stays consistent from bag to bag, even in large batches.
For thick leather and dense synthetic materials, higher and well-controlled pressure is essential to push material cleanly into fine mold details without crushing the grain. Clean airflow and proper filtration also matter, because unstable or leaking pressure causes uneven depth and blurred edges. From a production point of view, matching pressure curves to each custom bag material—leather, canvas, or nylon—is key to achieving crisp 3D embossing that holds its shape during daily use.
Custom Stamp Design and 3D Printing Technology
Digital tools have changed how we make 3D embossing dies for bag panels. Traditional brass tooling often takes about a month and can cost around $2,000 per die. With 3D-printed dies made from carbon-filled nylon, the cost drops to roughly $400, saving about 80%, and production time is reduced from four weeks to just three days. This speed makes rapid prototyping and design testing much easier.
In my view, this isn’t just a cost upgrade—it completely changes how confidently brands can experiment with logo depth and texture. When tooling is faster and cheaper, designers are far more willing to refine details, and the final embossed result is noticeably better.
Materials Unsuitable for 3D Embossing
Soft elastomers below 50 Shore A durometer: Tear risk exceeds 50% during die release. The material stretches instead of compressing. Pulled sections rip as dies separate. Better option: Digital printing with lamination overlay achieves 0.1mm detail resolution without mechanical stress.
Rigid plastics above 90 Shore D hardness: Minimum feature size jumps to 0.8mm due to brittleness. Fine details crack during compression. Better method: Waterjet cutting plus appliqué layering creates sharp-edged designs without embossing force.
Heat-sensitive materials with melting points below 100°C: Surface damage reaches 100% failure rate at standard embossing temps. Better process: Mold casting or UV-cured printing deposits raised patterns without thermal exposure.
Gummy chip-forming substrates: Processing time increases 300% as material sticks to dies. This requires frequent cleaning. Better approach: Die cutting for simple geometric shapes in high-volume production where embossing complexity isn’t needed.
Universal Design Constraints
Internal radius minimums: All materials require 0.8mm or larger corner radii on embossed patterns. Sharper corners concentrate stress. This causes tearing or cracking no matter what substrate you use.
Deep pocket clearance: Pattern cavities deeper than 3× the die tool diameter trap compressed material. Vacuum or manual removal becomes needed between cycles. This slows production. It also risks damaging formed impressions during cleaning.
Material Selection Reference Table
| Material Type | Temperature (°C) | Pressure (kg/cm²) | Time (s) | Max Depth (mm) | Min Detail (mm) |
|---|---|---|---|---|---|
| Vegetable-Tanned Leather | 60-80 | 50-100 | 10-20 | 0.5-1.0 | 0.3 |
| Chrome-Tanned Leather | 80-100 | 80-150 | 5-15 | 1.0-1.5 | 0.2 |
| PU Leather | 120-150 | 100-200 | 3-10 | 0.8-1.2 | 0.15 |
| Canvas | 100-130 | 60-120 | 8-15 | 0.4-0.8 | 0.4 |
Conclusion
3D embossing creates depth and shape in bags. This turns simple accessories into touchable art pieces. Customers can’t resist reaching out to feel them. You need to understand how materials move and shift. Cold stamping versus heat stamping—each choice affects your product’s quality and how long it lasts.
Taking flat material and shaping it into sculpted surfaces needs precision. The right filler compounds boost the height of your design. Good pressure systems protect your materials from damage. Custom-made stamps give you sharp, clear details. Working with leather? Synthetic fabrics? Specialty textiles? Each material has its own best practices. Follow them to get professional results instead of amateur ones.
Want to take your bag designs to the next level? Test different materials first. Find the perfect pressure settings for your fabric. Partner with experienced 3D embossing specialists. They’ll help you avoid problems like uneven depth or distorted patterns. The texture you add today gives you an edge over competitors tomorrow. Flat designs are everywhere. Depth makes your bags stand out and stick in people’s minds.
3D Embossing FAQ for Bag Manufacturers
Q1: Why is embossing depth uneven on bag panels?
Unstable die materials or poor heat control cause shrinkage.
Fix: Use stable embossing dies and controlled temperatures to keep depth consistent.
Q2: Why do embossed logos look blurry?
Rough or worn molds soften edges.
Fix: Use smooth, well-finished dies and inspect them regularly during production.
Q3: Why does the bag material stick to the die?
Demolding temperature is too high.
Fix: Lower demolding temperature to protect fine logo details.
Q4: Can embossing pressure damage bags?
Yes. Thin leather or fabric panels can weaken or crack.
Fix: Match pressure and embossing depth to each bag material.
Q5: How can a bag manufacturer keep embossing consistent batch to batch?
Mold wear and drifting settings cause variation.
Fix: Use durable dies, fixed process parameters, and routine quality checks.
Q6: How can bag manufacturers avoid embossing failures before mass production?
Unverified designs and deep patterns increase risk.
Fix: Test embossing settings first and document proven parameters for repeat orders.