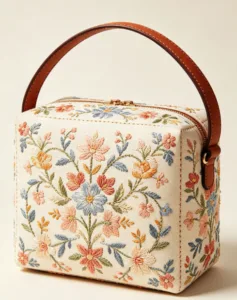
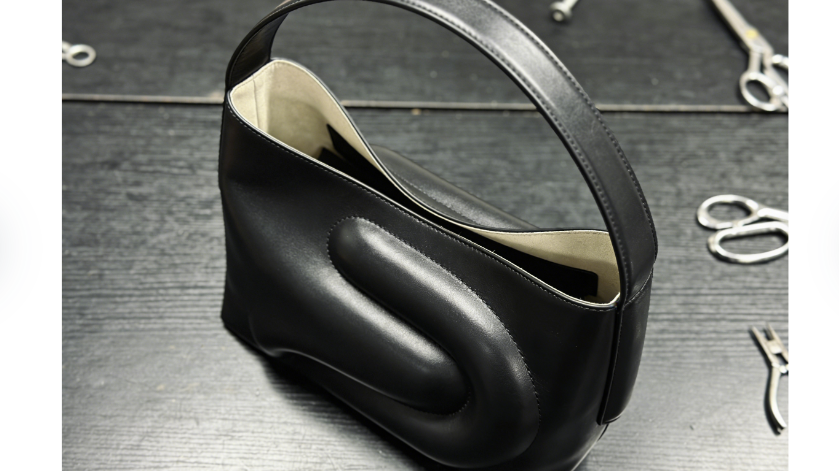
A leather tote bag with sculpted curves has real elegance. Those graceful arcs turn a simple rectangle into something special.
But getting those curved lines right? That’s one of the toughest parts of leathercraft. You need precise patterns, special techniques, and knowledge of how leather acts under tension.
Curve construction in leather tote bags takes more than basic sewing skills. It’s a balance between math and hands-on craft.
Struggling with puckered seams on curved gussets? Not sure about pattern calculations? Want to take your bag-making from functional to exceptional? These techniques will change how you build with leather.
You’ll learn leather prep secrets that stop warping. You’ll discover pro seam finishing methods that create smooth transitions. This systematic approach makes curved construction doable instead of scary. Plus, you’ll get solutions to those frustrating problems that have stopped you so far.
The Art Of Curve Construction In Leather Tote Bags
Curved gusset construction uses a clear step-by-step process. This stops common errors.
Mark your seam allowances first. Draw 3/8″ on curved gusset pieces. Place foam interfacing centered 1/2″ from the edge. Keep it out of the seam area.
Stitching happens in two passes. Set your primary line at 3/8″ seam allowance with stitch length 3. Add a secondary line right next to it at the same length or smaller. Double-stitching cuts down tension on curves.
Trim after stitching. Cut seam allowances down to 1/4″. Leave the top 1″ corners alone—they need the full allowance. Trim corner seams to just 1/8″.
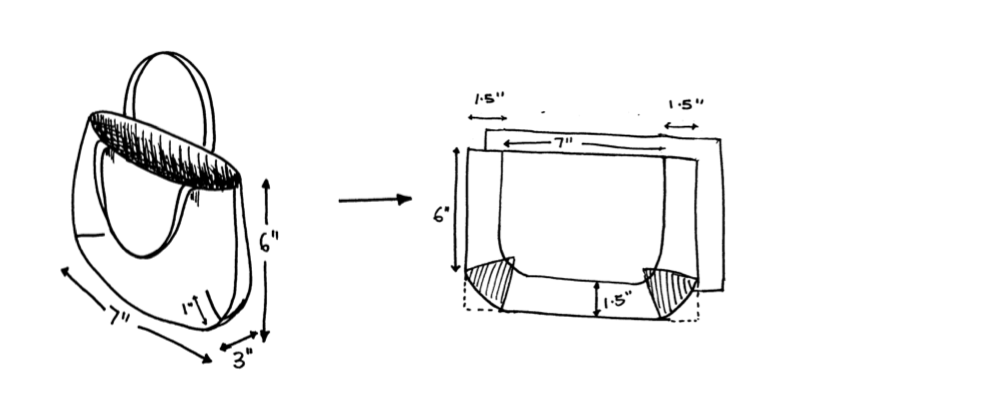
Box-corner gussets work from the centerline. A 4″ height needs 2.5″ width (not a 2″ square). Add 1/4″ seam allowance per side. Your total height becomes 3.25″ (3″ plus 1/4″ SA twice). Width measures 6″ across.
Follow the right installation order. Align center marks between exterior gusset and bottom. Clip lining away. Pin or clip with right sides together. Stitch the bottom curve first. Then work the curve up to the straight sides.
Curve Construction Basics for Leather Tote Design
Leather acts different than fabric around curves. The material’s thickness creates challenges at turns and folds.
Pattern compensation starts at the beginning. Add your leather thickness to pattern dimensions on sides and bottom. Got 1/8″ leather? Add 1/8″ per side. Thinner leather under 1/16″ needs a 1/16″ minimum addition. Skip this and your finished bag turns out too small.
Seam allowances in leather use different rules. The standard 1/8″ to 1/4″ width works because leather doesn’t fray. Offset this allowance 1/8″ outward on sides and bottom. The top opening gets no allowance.
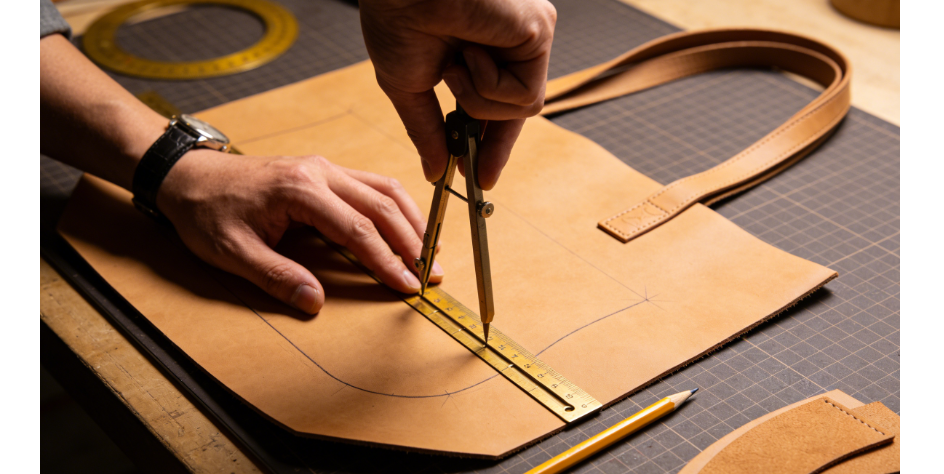
Gusset Pattern Math
Getting the gusset length right makes or breaks your curves. Measure the perimeter of your bag draft along the outside seam line. Add 1/4″ ease for leather thickness. That’s your gusset length.
Width equals your desired bag depth. A 1 5/8″ measurement creates a slim profile. Wider measurements give more carrying space.
Add seam allowance on the long sides. The short ends don’t need it. Snip small notches into these allowances. These cuts let the leather bend into 3D curves at corners. No fighting required.
Taper the bag body top narrower by 1/8″ per side. This small shape change looks more refined. Round the bottom corners instead of leaving them square. Those rounded corners sew in with half the struggle during assembly.
Hole spacing changes based on your seam shape. Curves need a 1-1.5mm single punch for precise control. Straight sections work better with a 6mm-spaced multi-prong tool. Match your punch size to thread thickness for clean results.
Basic Leather Prep for Curved Work
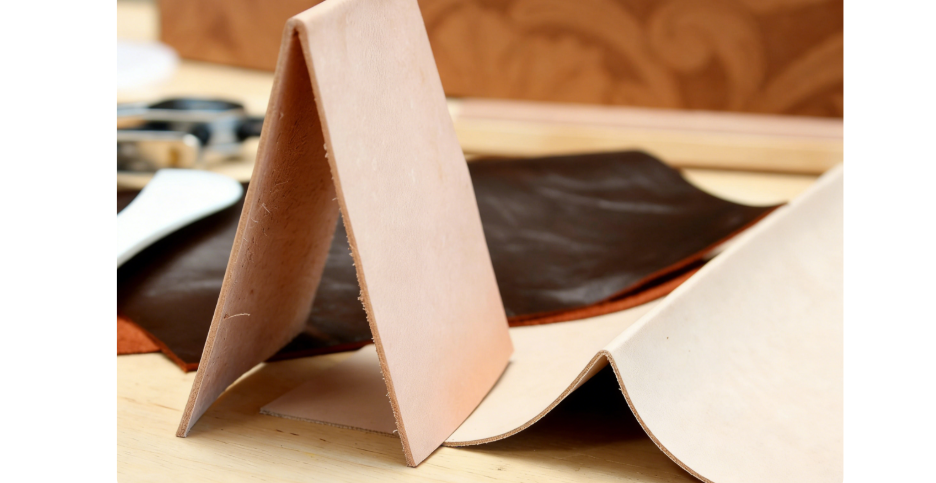
Your leather needs prep before you work with curves. Raw material fights back against complex shapes.
Pick leather based on your curve. Thickness and texture control how well it holds shape. Thick leather (5-6 oz) works for stiff curves. Medium weight (3-4 oz) bends easier for gussets and rounded edges. Lay your leather flat on a cutting mat. Mark curves with a pencil or leather tool. A curved ruler or template keeps your lines straight.
Cutting Tips to Avoid Edge Issues
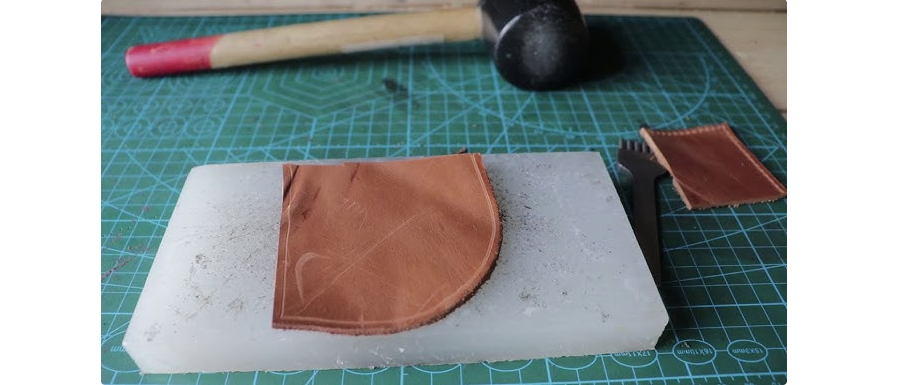
Each curve type needs its own cutting method. Long sweeping curves work best with a rotary cutter on thin to medium leather. Tight turns need a curved knife—it cuts all weights.
Use short, controlled strokes. Don’t slice the full curve in one go. Rotate the leather, not your tool. You get smooth edges without tears. Keep your blade angle the same through the cut.
|
Tool |
Best For |
Leather Thickness Suitability |
|---|---|---|
|
Rotary cutter |
Sweeping curves |
Thin to medium |
|
Curved knife |
Intricate turns |
All thicknesses |
|
Strap cutter |
Straight to mild curves |
Straps/pull lines |
Skiving thins areas where curves bend. Strap ends get light skives to keep strength. Gusset folds need deeper cuts so the leather bends well. Thin select areas on inside panels to stop bulges at curved seams. After skiving, bevel those edges. Dampen them and buff with cloth. Run a slicker wheel or rod over them until they shine. This step hardens the fibers and gets them ready to join.
Curved Gusset Pattern Design and Calculation Methods
Getting curved gusset patterns right separates amateur work from professional bag making. The math decides whether your gusset construction seams line up cleanly or fail under stress.
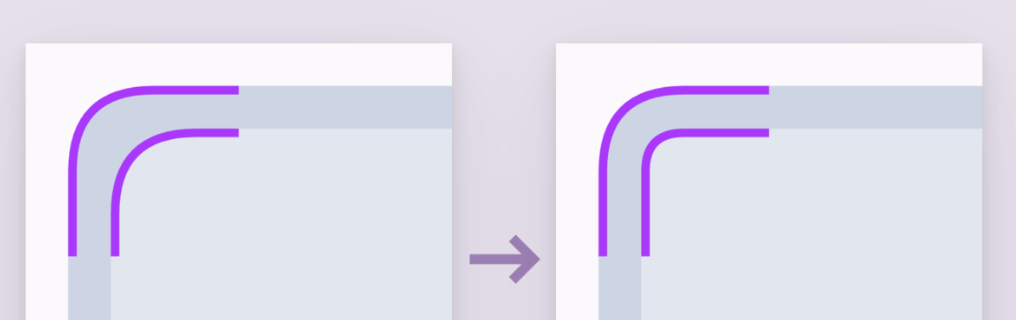
The Quarter-Circle Method for Rounded Corners
Think of each rounded bottom corner as a quarter circle. Pick your radius. This controls the arc length.
One curved corner measures: L = πr ÷ 2
Got a rectangular bag panel with two curved bottom corners? Use this calculation:
-
Top straight segments above curves = a (each side)
-
Bottom straight section between curves = b
-
Corner radius = r
Total panel edge length (before seam allowances):
L = 2a + b + πr
Here’s how this works with real numbers. Take a bag with radius 3 units, top sides 6 units each, bottom straight 6 units:
-
Curved portions total: π × 3 ≈ 9.42 units
-
Straight portions: (2 × 6) + 6 = 18 units
-
Gusset length needed: 18 + 9.42 = 27.42 units
Sharp Corners vs Curved Corner Math
Sharp 90° corners keep the math simple. Gusset length = Length + (2 × Height).
Example: Height 20 cm, Length 30 cm gives you 30 + 20 + 20 = 70 cm gusset.
Curved corners change the formula:
L = (Length – 2D) + Height + Height + (D × 3.14 ÷ 2)
D is your corner radius/diameter.
Try a 20 cm height, 30 cm length bag with 5 cm corner radius:
-
Length minus corners: 30 – 10 = 20 cm
-
Both heights: 17.5 + 17.5 = 35 cm (adjusted for allowances)
-
Quarter-circle substitution: (5 × 3.14) ÷ 2 = 7.85 cm
-
Final gusset: 20 + 35 + 7.85 = 62.85 cm (pattern adds 5 cm buffer = 67.85 cm)
Leather Thickness Compensation
Thick leather needs extra length. Figure out the extra material you need:
Δ = (thickness × 3.14) ÷ 2
9 oz leather runs about 3.6 mm thick:
-
3.6 × 3.14 ÷ 2 = 5.652 mm ÷ 2
-
Add 0.6 cm to your calculated gusset length
Different radius choices change total length. A 10 cm diameter change creates:
Δ = -2D + (3.14 × D ÷ 2)
= -20 + 15.7 = -4.3 cm
Your gusset needs 4.3 cm less material than a sharp-corner version. Plan your leather buy based on this.
Step-by-Step Curved Gusset Installation Process
A curved gusset needs precise marking and careful easing. Follow each step in order to avoid puckering and misalignment.
Mark All Center Points Before You Start
Pull out your gusset piece and bag panels for your tote bag. Mark the center point on both long sides of your gusset. Do the same on your bag panel base—mark center front, center back, and both side points. These marks anchor your pieces during the build.
Building a full loop gusset? Join your straight gusset strips first. Use a 1/4″ seam allowance to create the loop. Press that seam flat before moving forward with your tote bag construction.
Prep Steps for Lined Gussets
Leather gussets with lining need special prep. Skive the edges of both your lining and outer layer where they’ll join. Put glue on this skived edge zone—don’t spread it across the full surface.
Install the lining on a curve, not flat. Hold the pieces curved in your hands as you press them together. The lining pattern should be about 3mm larger all around than the outer. This extra material prevents pleats. The gusset bends into its final shape without wrinkles.
Working with a zipper at the top? Place the zipper tape face down on your gusset. Align the long edges and baste close to the edge. Lay your lining right sides together with the gusset. Stitch along the seam line. Press both layers away from the zipper. Add a topstitch for a clean finish.
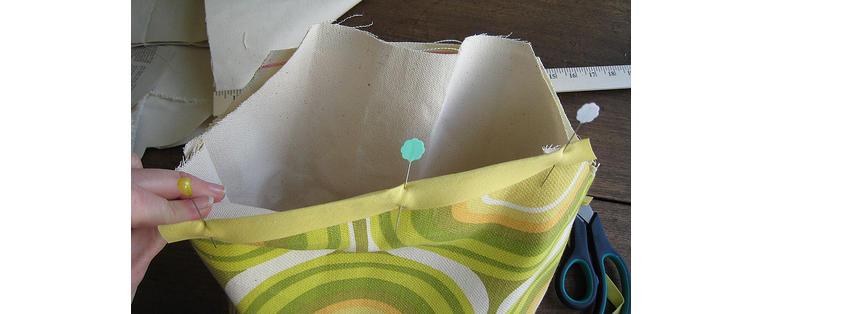
Baste and Clip for Curve Control
Baste your gusset’s curved edge first using a 1/4″ seam allowance. This basting line becomes your safety limit for clipping—never cut past it.
After basting, grab your scissors. Snip the gusset seam allowance up to (but not through) that basting line around tight curves. Slash the allowance at regular intervals for rounded corners. These notches let the material spread around the arc without fighting you.
The Clipping Sequence
Place your gusset and panel right sides together. Clip order controls tension and prevents distortion.
Start with these anchors:
-
Match the center bottom of your outer panel to the center mark on the gusset long side. Clip it in place.
-
Match the top corners of the gusset to the top corners of your panel. Clip both corners.
-
Work along the straight edges first. Stop clipping where the outer panel starts to curve.
Now tackle the curves. Use your fingers to pull the gusset edge outward to meet the panel’s raw edge when assembling a custom tote bag. Keep the spread from your slashed notches even. Add a clip every 1–1.5 cm around curved sections. This close spacing gives you control.
For a full loop around the base, follow this rotation method:
-
Clip center back of base to center back of gusset
-
Rotate the piece 180° and clip center front to center front
-
Clip both side marks together
-
Add one clip on each side of every center mark along straight sections
-
Finish with the four corners—pull the gusset out to meet each corner’s raw edge. Place one clip on each side of the corner point.
Machine Stitching the Final Join
Set your machine to needle-down position. The needle stops in the fabric each time you pause. This keeps everything aligned on curves.
First stitching pass: Use a 3/8″ to 1/2″ seam allowance (match your pattern specs). Start with a few backstitches to lock the seam. Guide the fabric around curves—let the clips you placed do their job. At the end, overlap your starting point by a few stitches and backstitch 2-3 times.
Got piping in your design? Stitch as close to it as possible on this first pass.
Second stitching pass: Run a second line over or just inside your first seam. Use the same seam allowance. Double-stitching makes the join stronger and creates a neater finish. Piping needs this step.
After stitching, trim your seam allowance down to 1/4″ along the curve. Leave the top 1″ near corners untrimmed. That full allowance adds strength where the bag joins at the opening.
Advanced Seam Finishing Techniques for Curves

Raw edges on curved seams need proper finishing to prevent fraying and bulk. Pick your technique based on leather weight and whether the bag has lining.
Princess Seam Method for Body Curves
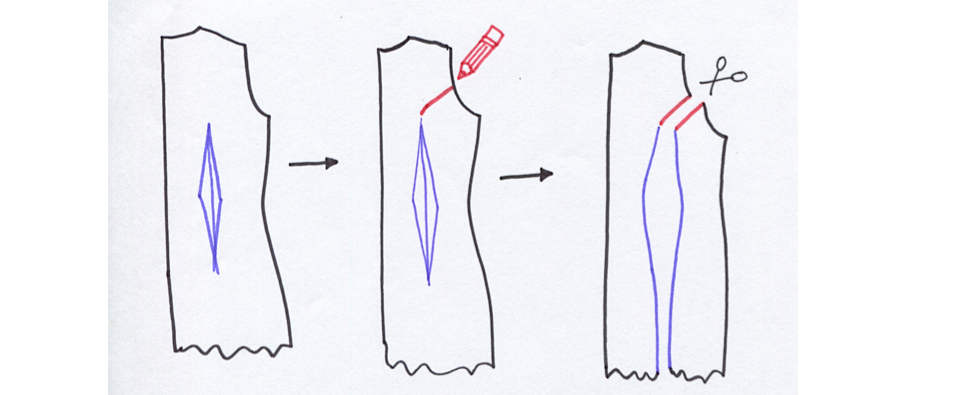
Princess seams work well on structured leather tote bags with shaped sides. Sew your curved seam first at the planned allowance. Press the seam open using a pressing tool—leather needs firm pressure to set.
Finish each raw edge one at a time. Run edge treatment along both sides of the split seam. Small notches cut from the raw edge toward (not through) your stitch line help the leather lie flat. Space these clips about 5-8mm apart on tight curves. Smaller radius curves need closer spacing—use 4mm intervals on a 5cm radius arc.
This method cuts bulk by half compared to pressed-together seams. The body curves of your tote bag sit smooth without lumps at the seam line.
Bias Bound Edges for Unlined Bags
Unlined leather tote bags show their seam allowances inside. Bias binding cleans up this view and adds structure.
Sew your curved seam using normal methods. Cut bias strips to match your seam length. Measure the actual stitched curve, not a straight estimate. Bind each side of the seam allowance one at a time instead of binding them together.
Press your binding open first. Attach one long edge to the seam allowance raw edge. Fold the binding over and secure the opposite side. This creates a neat channel that hides frayed edges.
Contrasting binding adds a design detail on jackets and coats. The same principle works inside premium leather tote bags. Try natural leather binding on black leather seams. It creates subtle visual interest.
Grading and Notching for Multi-Layer Curves
Curved construction with multiple leather layers gets tricky. Each layer needs different trimming to reduce stacked bulk.
Here’s what to do after stitching:
-
Grade your allowances by layer. Cut the outer layer to 6mm width. Trim the inner layer to 3mm. Any middle layers get cut to 4.5mm. This staggered edge prevents a hard ridge on the right side.
-
Notch convex curves. Cut triangular notches every 1cm along outward curves. Make each cut 3mm deep. These wedges let the leather compress into the curve without pleating.
-
Clip concave curves. Make straight cuts perpendicular to the seam every 5mm on inward curves. Stop just before your stitch line. The allowance spreads open to follow the arc.
-
Press over a curved surface. A tailor’s ham or rolled towel supports the 3D shape during pressing. Flat pressing crushes curved seams.
Data from knit seam testing shows proper notching improves drape by 10-15%. Leather responds even better due to its stiffness. Tight curves need closer clip spacing. A 5cm radius arc needs clips every 4mm to prevent puckering.
Flat-Felled Curves for Exposed Seams
Flat-felled seams create a clean finish on both sides. This works on gentle curves but struggles with tight turns due to bulk.
Place pieces wrong sides together. Stitch at 5/8″ (16mm) seam allowance. Trim one allowance down to 1/4″. Fold the wider allowance over the trimmed edge. Press both directions to set the fold. Topstitch close to the folded edge.
Save this technique for sweeping curves. Sharp radius turns bunch too much material inside the fold. Soft shoulder curves on tote bag straps work fine. Bottom corner curves don’t.
The double layer of turned fabric adds real thickness. Use this method on thin to medium weight leather (2-4 oz). Heavier leather makes a stiff, uncomfortable ridge.
Conclusion
Learning to build curves in leather tote bags changes everything. Your work goes from basic stitching to real artistry. You need patience and practice to master curved gussets and clean seam finishes. But the payoff? Bags with an elegant shape that flat designs can’t touch.
Focus on three key areas: proper leather prep stops 80% of problems before they start, accurate patterns keep your bag strong, and practice builds the skills you need. Each curved seam you sew improves your feel for the material.
Use vegetable-tanned leather for your first try. It forgives mistakes while teaching you what works. Make at least three practice bags before you use expensive leather. Your hands pick up things your eyes miss.
The curves you make show your style as a maker. They prove you won’t settle for basic work. Grab your pattern paper. Sketch your first curved gusset. Start your path into three-dimensional leather design today.