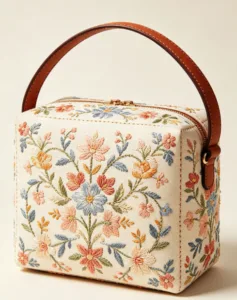
A good pleated bag looks sleek, like it knows it’s the star. A bad one? Bulky, confused, and crying for help. The secret isn’t magic—it’s engineering.
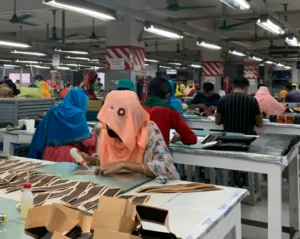
Whether you’re sourcing an accordion pleat handbag or experimenting with knife pleats in leather, how you fold it affects both style and lifespan. In custom fashion bags manufacturing, precise geometry, material know-how, and clever production tricks make all the difference.
This guide walks you through pattern math, heat-setting, and building pleats into the bag’s structure. You’ll learn why some leathers hold pleats better, how stability is engineered, and which quality checks separate exact pleating from cheap mass production. Armed with this, you can evaluate manufacturers, design standout lines, or just impress yourself.
What Are Engineered Pleats in Fashion Bags?

Engineered pleats control volume, structure, expansion, and stress distribution. They use exact geometry, repeat measurements, and stable fixation—pressing, stitching, or heat-setting. Simple decorative bag folding just adds surface texture. It’s shallow and focuses on looks. It doesn’t carry load.
The technical difference shows in the pattern. Engineered pleats add calculated width to the panel: finished width + (pleat depth × 2 × pleat count). Ten knife pleats at 10 mm deep? That’s 200 mm extra fabric before folding. Pattern pieces include fold lines, placement lines, direction arrows, and notches at every pleat edge. This makes production repeatable.
Engineered pleats in bag design can boost usable volume by 10–40%+ compared to a flat panel with the same seam outline. Pro pleating shops keep repeat tolerance under one millimeter across the width. Heat-set pleating locks polyester pleats through multiple wash cycles. You get minimal loss of definition. Stitching runs the full pleat length or locks at key zones—top 30–50 mm near openings, strap points, base seams. Edge topstitching stops ballooning under load.
Decorative folds? They’re secured at the top edge or a short segment. No stitch pattern to carry load. No capacity planning.
Core Pleat Types Used in Fashion Bag Manufacturing
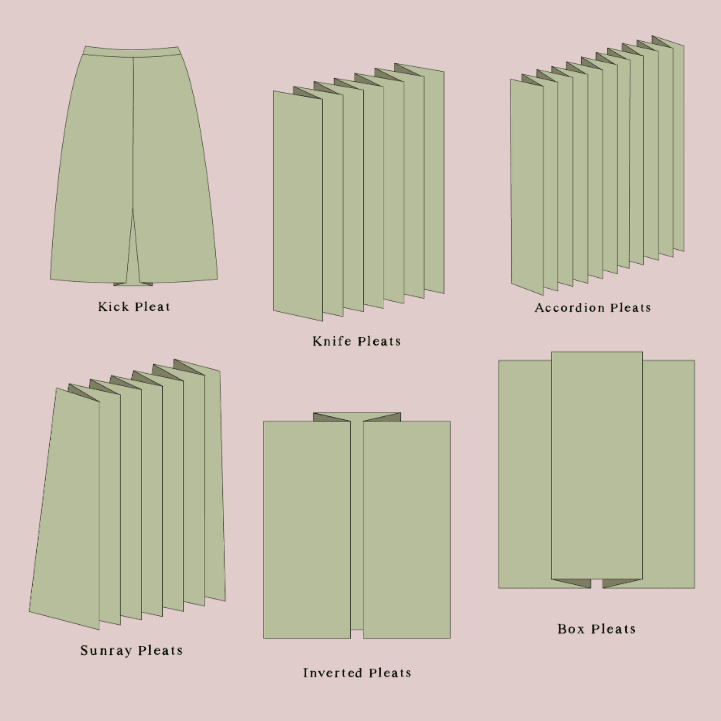
Fashion bags rely on a small set of pleat structures. Each type changes how a bag expands, holds its shape, and feels in daily use.
|
Pleat Type |
How It Works |
Common Uses |
|---|---|---|
|
Knife Pleats |
All folds press in one direction |
Handbag fronts, backpacks, tote bottoms |
|
Box Pleats |
Two knife pleats facing outward |
Handbag fronts, crossbody bags, flap pockets |
|
Inverted Box Pleats |
Two pleats folded inward |
Backpack cargo pockets |
|
Accordion Pleats |
Repeating narrow, evenly spaced folds |
Side gussets, mini bags, multi-compartment bags |
|
Fortuny / Plissé Pleats |
Fine, heat-set micro pleats |
Soft clutches, pouches |
|
Cartridge Pleats |
Rounded, tube-like gathers |
Drawstring pouches, bucket bag openings |
|
Tucks / Pintucks |
Narrow pleats stitched flat |
Front panels, quilted designs |

Knife pleats are one of the most commonly used structures. All folds press in the same direction, creating controlled expansion without extra hardware. They often appear on handbag front panels or at the bottom of tote bags, where extra capacity is needed without changing the silhouette. In one daily tote project, replacing a zipper gusset with knife pleats kept the bag flat when empty while allowing it to expand naturally under load—a small structural choice that noticeably improved both usability and appearance.
Box pleats and inverted box pleats add volume in different ways. Box pleats make fullness visible and are often used as design features, while inverted box pleats hide expansion inside the structure. This is why backpack cargo pockets frequently use inverted box pleats: the pocket stays flat until it’s actually needed.
Accordion pleats repeat narrow folds at a consistent pitch. They are essential for side gussets and small leather goods where expansion is required but width must stay controlled. Mini bags typically use tighter spacing, while larger bags allow wider pitch for smoother movement.
Fortuny and plissé pleats create fine, permanent texture through heat-setting. They are popular in soft clutches and pouches, especially when designers want surface interest without adding bulk. Cartridge pleats, by contrast, concentrate fullness at the opening, making them ideal for drawstring and bucket bags. Tucks and pintucks stay mostly decorative, adding subtle structure to otherwise flat panels.
Pleat Geometry Engineering: Pattern Math & Dimensional Planning

Pattern math turns flat material into controlled 3D shapes. Get the formula wrong? Your pleats won’t close. They won’t expand properly. They won’t lie flat when empty.
Base calculation for knife pleats and accordion pleats without gaps: Take your pleat count and multiply by pleat width. Then multiply by the stacking factor. Double-layer pleats (standard knife) use factor 2. Triple-layer uses factor 3.
Formula: L = n × w × (2k + 1)– L = fabric length needed
– n = number of pleats
– w = single pleat width
– k = stacking layers
Real example: You need 12 inches of finished pleated width. Each pleat measures 0.5 inches wide. Double stacking gives you 24 pleats total. Your cut length: 36 inches of fabric before folding.
Add a fudge factor—¼ to ½ inch per 8 inches of pleated length. This covers the turn radius at each fold. Cut 38 inches, not 36.
Box pleats purse design with spacing between pleats needs different math.
– Space width = finished length ÷ pleat count
– Fabric length = n × (2w + g) where g = gap width between pleats
You need three or more pleats for this pattern to hold up.
Dimensional bag design for gussets: Calculate expansion capacity before cutting. An accordion pleat gusset with 10 mm pleat depth × 8 pleats gives you 160 mm of side expansion.
Measure your target product volume first. Then work backward to find pleat count and depth.
Pattern pieces need these markings:
– Fold direction arrows
– Placement notches
– Stitch zones
The top 30–50 mm gets edge stitching. This stops ballooning under load.
Leather folding needs tighter tolerance: ±0.5 mm across the panel width. Fabric allows ±1 mm. Mark every crease line on your master pattern.
Material Selection & Stabilization Systems for Pleated Bags

Pleated bags fail when the base material can’t hold shape under stress. For accordion pleats handbags and knife pleats leather bags, choosing the right material is key.

-
Polyester – Strong, wear-resistant, and heat-stable. Ideal for heavy-duty totes, crossbody bags, and structured travel bags.
-
Polypropylene – Lightweight, water-resistant, suitable for casual clutches and beach bags.
-
Advanced Polymers (PTFE, PVDF) – Handle high heat, corrosive conditions, and non-stick surfaces. Perfect for tech pouches or industrial cases.
Stabilization systems keep pleats crisp and long-lasting:

-
Metal support cages and stainless steel snap rings lock pleats in place.
-
Heat-setting bonds synthetic fibers into permanent folds.
-
Spunbond polyester with fine fiber tech captures dust and maintains pleat shape.

With the right materials and stabilization, your pleated bags stay sharp, functional, and durable.
Heat-Set Pleating Process for Custom Bag Production

Polyester bag panels lock pleats in place at 195–205 °C under pressure for 30–60 seconds. This temperature sits below the fabric’s melting point (255–265 °C) but high enough to reshape polymer chains. The result? Crisp, durable pleats that hold up through repeated use and washing.
Temperature specs change with fiber type. Nylon 6 heat-sets at 170–190 °C. Nylon 6,6 needs 200–220 °C with shorter hold time to prevent yellowing. Polypropylene needs gentler care—140–160 °C for just 10–30 seconds. Go past these limits? You’ll melt fibers or create surface glaze that destroys pleat definition.
Core Heat-Set Workflow for Bag Panels

Fabric prep starts before any folding. Condition your base material at 45–65% relative humidity and 20–25 °C room temperature. This gives you repeatable pleat formation. Run a shrinkage pre-set cycle using dry heat or steam at 150–180 °C for 30–60 seconds. This step stabilizes the cloth. It also prevents size shifts later.
Pleat formation uses mechanical pleating machines. Standard bag bodies use 5–30 mm pitch. Decorative panels go finer at 1–3 mm for micro-pleats. Depth varies by function. Volume-expansion bags need 10–40 mm. Subtle texture uses 3–8 mm. Keep fabric tension at 3–15 N during pleating. This stops skew and uneven relaxation.
Heat-setting locks the geometry. Set your plate or mold temperature 10–20 °C below the fabric’s heat-set ceiling. This avoids surface damage. Use 0.2–0.6 MPa pressure for flat-plate systems or 0.1–0.3 MPa for oven-wrapped pleats. Contact time ranges 20–120 seconds based on fabric weight (80–250 g/m² is common), layer count, and pleat depth.
Cooling under restraint finishes the structure. Keep pleats clamped until material temperature drops below 40 °C. This locks in the crystal structure and stops spring-back. Release too soon? You lose 15–30% of pleat sharpness.
Panel Cutting and Assembly Integration
Position pleats so seam allowances fall on pleat ridge or valley—never mid-fold. This stops distortion during stitching. Increase needle size by 1–2 Nm compared to flat fabric specs. The needle must go through multiple pleat layers without skipping. Reduce stitches per inch a bit to limit perforation damage across folded zones.
Finished width calculation: A 300 mm flat panel with knife pleats (3× intake factor) yields about 95–120 mm finished width at medium depth. Accordion pleats boost expandable circumference by 150–250% at maximum opening compared to flat construction. Leave a 10–25 mm non-pleated border along seam lines for stable hardware attachment and clean finishing.
Sewing-Based Pleating Techniques for Bag Construction
Stitching locks pleats into place on bag panels. Thread creates structural stability. Pressing alone won’t give you that. You’ll use three core sewing methods. Pick based on pleat type and bag function.
Inverted Pleat Construction for Structured Bag Fronts
Each inverted pleat needs five marked lines on your pattern. One placement line at center. Two inner fold lines. Two outer fold lines. The math decides fabric usage. Allow 4× pleat depth per pleat. Got three pleats at 2.5 cm depth? You need 30 cm extra width (3 × 4 × 2.5 cm).
Mark all lines on the wrong side of fabric. Use different thread colors for fold lines and placement lines. This stops confusion during setup. Fold right sides together along the placement line. Match inner fold lines to outer fold lines. Tack outer lines together. Press flat so tacked edges sit on the placement line. Inner lines now form the pleat’s outer edges.
Tack across the pleat top. Machine stitch within your seam allowance zone—the top 15–20 mm. This locks pleat shape before you attach panels to yokes or bands.
Box pleats follow the same steps. But flip one detail: fold wrong sides together at the placement line instead of right sides. You get outward-facing pleats. Box pleats add visible bulk. Skip them on heavy canvas or thick leather. Use them on medium-weight fabrics for handbag fronts. They work great for bold dimensional features.
Knife Pleat Sewing for Directional Volume
Knife pleats fold all in one direction—toward side seams or toward center. Never mixed. Mark parallel fold and placement lines across your top edge. Space them based on your pattern calculation.
Fold each pleat the same way. Align edges. Press with a hot iron to set creases. Make them crisp. Baste across the top 6–10 mm from raw edge. This temporary stitching holds pleats flat. You can now attach the contrasting top band or yoke piece.
Stitch through all pleat layers during final setup. Use a size 16 or 18 needle (100/16 or 110/18 metric). This penetrates multiple fabric layers without skipping stitches. Drop stitch density a bit—8–10 stitches per inch instead of 12. You avoid perforation damage at fold zones.
Structural Integration: Layering Pleats into Bag Construction

Pleats don’t just sit on the surface. They lock into a multi-layer stack. This stack controls shape, supports weight, and protects the fold structure under stress.
A structured pleated handbag front uses four core layers, from outer to inner: pleated fashion fabric, fusible interfacing, foam stabilizer, and lining. Each layer does a specific job. The pleated outer creates controlled fullness and visual texture. Medium-weight cotton, linen, or canvas at 200–300 gsm (6–9 oz/yd²) works best. Fusible interfacing bonds the pleat folds to the base fabric. This stops relaxation, stretching, or bubbling. Use Decor-Bond or similar medium-heavy woven fusible at 70–135 gsm (2–4 oz/yd²). Foam stabilizer—usually 2–3 mm thick—keeps the box shape and vertical planes intact. The bag shows exterior texture, not overall slouch. Lining fabric strengthens the build from inside.
Pleat depth for handbag bodies usually measures 5–7.5 cm (2–3 inches) per pleat. Knife pleats need 25–40% extra width in the pleated panel versus finished body width. Box pleats need 50–100% extra based on volume and stiffness goals.
Integrating Pleated Panels with Flat Construction Zones
The pleated front must match the flat back panel’s finished width. Cut the pleated piece wider by your total pleat allowance. Form pleats first. Measure the finished pleated width. Adjust by 3 mm (1/8 inch) if needed so edges line up before you seam to lining or back. This prevents unwanted easing pleats at the top edge. For gusseted or box bags, keep a consistent finished edge across pleated fronts and flat gussets. All pleat intake stays internal. The outer seam line stays flat and stable.
Skip unreinforced pleats near stress zones. Strap attachment points need flat, interfaced, maybe doubled fabric. Keep pleats outside a 2.5–4 cm (1–1.5 inch) strap zone. Hardware—magnetic snaps, zippers, turn locks—goes on flat, interfaced panels above or between pleated sections. For top-edge pleats, put bulk 6–12 mm (0.25–0.5 inch) below the top seam. This prevents warping at the rim and too much thickness in the turning seam.
Locking Pleats into the Layer Stack
Baste and press in order. Mark pleat lines on the wrong side. Fold. Press hard. Baste top and bottom of the pleated section within 6 mm (0.25 inch) of the future seam line. This holds placement. Put fusible interfacing on the wrong side after pleats are basted. The glue bonds folds together and to the base fabric. For firmer control, edge-topstitch each pleat 2–3 mm from the fold line. This stitching runs the full pleat length or secures key zones—top 30–50 mm near openings and strap points.
Insert a rigid base—plastic, template plastic, or flexible cutting board at 0.5–1.5 mm thick—under pleated walls. The base lets walls stand upright. Pleats show their shape instead of falling flat.
Conclusion
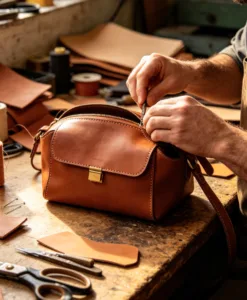
Engineering pleats into custom fashion bags blends precise math with textile art. Knife pleats leather bags feature sharp geometry. Accordion pleats handbags bring dynamic movement. Each fold shows careful choices about fabric behavior, structure, and visual impact. The heat-set pleating process and precision sewing we’ve covered? They’re not just manufacturing steps. They form the foundation of dimensional bag design that performs and looks great.
Developing your next collection? Partner with manufacturers who get it. Pleated leather bag craftsmanship needs technical skills and design sense. You might be prototyping a box pleats purse design. Or you’re scaling production for a full line. Either way, the core principles stay the same—material compatibility, structural planning, and strict quality control.
Ready to bring your pleated bag concept to life? Connect with our engineering team. Discuss your technical needs, material specs, and production timeline. We’ll turn your design vision into a real product. Our proven structured pleating methods back this up. Plus, we bring two decades of custom bag innovation.
Your next signature piece starts with the right engineering partner.
Common Technical FAQs — Custom Pleated Bags

Q1: Why do pleats collapse during use?
A: This usually happens for two reasons:
-
The stress exceeds the bag’s structural capacity.
-
Pleat spacing is too small (typically under 5-6mm), causing pleats to nest under pressure.
Q2: How can I ensure pleat geometry stays uniform?
A: Consistent pleat depth, spacing, and angle across the panel are key. Uneven pleats create stress points, wearing out tips and roots quickly. Precision tools and stable material handling are essential.
Q3: Can mismatched outer and lining materials cause problems?
A: Yes. Different stretch rates can lead to delamination or bubbling. Each material combination needs testing. Incorrect heat or pressure can damage surfaces, melt fibers, or relax pleats.
Q4: Are there issues when sewing multi-layer pleats?
A: Standard sewing machines may experience skipped stitches, broken threads, or uneven tension. Production speed may drop 30-40%. Using size 16-18 needles, adjusting presser foot pressure, and reducing stitch density helps prevent damage.
Q5: How does daily wear affect pleats?
A: Pleats experience friction and compression—crossbody bags rub against the body, handbag bottoms compress under load. High-quality leather bags reinforce pleat edges with 2-3mm topstitching and add stabilizing strips at stress points, ensuring 6-12 months or longer of durability.