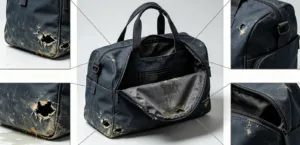
A backpack fails when the seam gives, not the fabric. Nine times out of ten, the cause is invisible until it shows up as a torn strap or pulled zipper. That cause is stitch density. It separates a bag that holds up through years of daily use from one that comes apart on its first heavy load. Most buyers look at fabric weight, thread color, or stitch pattern, and miss SPI (stitches per inch). That single number most directly controls seam strength and how the bag holds together under stress.
If you are a sourcing manager checking a factory‘s skill, or a consumer trying to spot a bad bag before paying, knowing how stitch count affects durability changes how you judge quality. Ahead we go through the mechanics, the data, and the inspection method that turns guesswork into certainty.
What Is Stitch Density and How Is It Measured (SPI Explained)
SPI stands for stitches per inch: the number of stitches counted within a 1-inch segment of a seam. Grab a ruler, lay it against the seam line, mark off one inch, and count every stitch inside that span. That’s stitch density in its rawest form.
The math is straightforward. Since 1 inch equals 25.4 mm, the conversion formula is:
SPI = 25.4 ÷ stitch length (mm)
The reverse conversion is stitch length (mm) = 25.4 ÷ SPI. For metric, stitches per centimeter = SPI ÷ 2.54. Some textile conversion tables use a different shortcut: number per inch × 0.3937 = number per centimeter, but the result lands in the same range.
A few quick benchmarks make this easier to visualize:
-
10 SPI = a 2.54 mm stitch length
-
0.40 mm spacing ≈ 63.5 SPI
-
20 stitches per 10 cm ≈ 5 stitches per inch
In field inspections, many technicians count stitches over a 2-inch stretch instead of one, then average the result to get a more stable SPI reading. That cuts down counting errors, especially on curved or reinforced seams where stitch spacing can look uneven.
Lockstitch vs Chainstitch: Why the Same SPI Isn’t Always Equal
A 301 lockstitch and a 401 chainstitch don’t behave the same way even at identical stitch counts. Seam strength for lockstitch is often modeled as SPI × thread strength × 1.5, while chainstitch runs closer to SPI × thread strength × 1.7. The gap comes down to thread use: chainstitch uses almost twice as much thread per inch because of its looped structure. So two seams showing the same SPI on a ruler can carry very different real-world strength. That matters when evaluating bag manufacturing standards or comparing factory samples side by side.
How Stitch Density Affects Seam Strength
Seam strength isn’t controlled by one variable alone. Fabric type, seam type, stitch type, thread tension, and thread strength all play a role. But stitch density sits at the center of that list. Industry standards define it as the number of stitches per unit length in a single row of stitching, and it’s the variable most sourcing teams can measure on-site without lab equipment.
Low Stitch Density: Where Seams Start to Fail
Too few stitches per inch and the seam can’t hold. A study on cotton fabrics tracked seam strength across 10 SPI, 12 SPI, and 14 SPI. Strength climbed steadily at each step. 10 SPI gave the weakest result across both thread types tested. 14 SPI gave the strongest.
A separate regression study quantified the jump more precisely. Moving from 3 stitches/cm to 7 stitches/cm increased seam strength by roughly 35%. The fitted relationship was:
Seam strength (kg) = 2.7 × stitch density + 12.2
There’s also seam slippage to consider: the load needed to pull a seam apart by a fixed distance. Higher stitch density increases friction between yarns and thread, which resists that pull. In cotton woven fabrics, raising weft density from 50 to 70 ppi improved slippage resistance by 22% in plain weave, 25% in twill, and 13% in satin. Below a certain density threshold, seams show visible grinning—small gaps opening along the stitch line under tension. That’s the early warning sign before full separation.
High Stitch Density: The Overlooked Risk
More stitches doesn’t always mean stronger seams. In compact fabrics, excessive density can cause puckering or structural jamming, which weakens the seam. Every additional stitch is another needle penetration, and too many penetrations cut yarns rather than joining them.
Needle size compounds this. One cotton study found larger needles increased puckering, while higher weft density reduced it: raising weft density from 50 to 70 ppi cut puckering by 38%. Concentrated perforation lines from over-dense stitching also raise long-term risk: crack propagation and fatigue under repeated load, even when the seam tests strong on day one.
Where the Standards Set the Baseline
ASTM D1683/D1683M uses 4.7 ± 0.5 stitches/cm as its stitch-density condition for seam-failure testing. ASTM D6193 lists stitch density as a core seam-strength variable alongside thread tension and thread strength. Typical seam efficiency, meanwhile, often lands below 85–90% depending on how these variables combine. This is why stitch density can’t be judged in isolation.
What Stitch Density Numbers Show
Numbers settle arguments that opinions can’t. Across multiple fabric studies, one pattern keeps repeating: seam strength climbs with stitch density, but it doesn’t climb forever. Testing on cotton woven fabric with polyester thread shows it in hard figures.
Using a 50-ticket 2-ply spun polyester thread, seam strength moved like this:
-
10 SPI: 6.09–6.15 lbs
-
12 SPI: 6.42–6.50 lbs
-
14 SPI: 6.65–6.74 lbs
Switch to a heavier 120-ticket 3-ply spun polyester and the trend holds, just at higher load values:
-
10 SPI: 6.39–6.46 lbs
-
12 SPI: 6.74–6.83 lbs
-
14 SPI: 6.98–7.08 lbs
Strength keeps rising from 10 to 14 SPI in both cases. But look closer at the gap between each step. The jump from 10 to 12 SPI is bigger than the jump from 12 to 14 SPI. That’s diminishing returns, visible in raw data.
Why 10–12 SPI Keeps Winning Across Different Fabrics
Material changes the answer, but not by much. Studies on each fabric type point to the same range:
-
Cotton woven fabric: best results fall between 10–12 SPI, sometimes extending to 14.
-
Linen and hemp-based fabrics: 12 SPI combined with a lapped seam produces the strongest result.
-
Printed cotton (batik-type) fabric: 12 SPI scores highest across strength, elongation, and seam efficiency. At 8 SPI, seam strength drops below the fabric’s own tensile strength. At 10–12 SPI, the seam tests stronger than the base fabric.
-
Jute and woven sack material: strength rises with stitch density, following a regression formula: Seam strength (kg) = 2.65 × Stitches/dm + 0.129 × Weft-way breaking strength (kg) + 12.55.
The Pattern That Matters More Than Any Single Number
Four rules emerge when these datasets sit side by side:
-
Higher stitch density improves seam strength, but the gain isn’t linear.
-
Most fabrics have an optimal window — usually 10–12 SPI, not the highest number available.
-
Thread type, seam structure, and fabric weight shift that optimal point. The same SPI performs differently depending on what it’s stitched into.
-
High-density stitching suits strength- and seal-critical products. Lower density suits softness and reduced fabric perforation.
For sourcing teams, this means a bag claiming “high stitch count” isn’t automatically the strongest option. Context decides whether 10, 12, or 14 SPI is the right call.
Matching Stitch Density to Product Type: A Practical SPI Range Chart
No single SPI number works for an entire bag. A backpack has thick canvas panels, thin nylon liners, and stress points at the shoulder straps. Each needs a different stitch count. The chart below translates fabric type and product function into an SPI number you can verify on arrival.
The Four-Tier SPI Reference
|
Density Tier |
SPI Range |
Best For |
|---|---|---|
|
Low |
6–8 SPI |
Thick canvas, heavy leather, decorative or low-load panels |
|
Standard |
8–10 SPI |
Everyday bag bodies, nylon/polyester, PU or synthetic leather |
|
High |
10–12 SPI |
Load-bearing straps, stress points, Box-X reinforcement corners |
|
Ultra-High |
14+ SPI |
Industrial-grade webbing, high-cycle load zones, reinforced seams |
Low stitch density is necessary for thick materials. Heavy canvas and full-grain leather already have dense fiber structures. Push the SPI too high and every extra needle pass becomes a perforation point, weakening what’s already strong.
Matching SPI to Fabric Type
-
Canvas: 6–8 SPI for heavy-weight, 8–10 SPI for mid-weight. Thicker material always goes lower first.
-
Nylon and polyester: 8–10 SPI is standard. Thinner synthetic fabrics lean toward the higher end to balance puckering resistance with seam strength.
-
Leather: 6–8 SPI for most grades. Thin leather can push to 8–10 SPI, but thick or heavy leather stays low to avoid crack lines forming along the stitch row.
Why One Bag Needs Several SPI Zones
Stress isn’t distributed evenly across a bag. Shoulder straps, handle connections, and corner reinforcements carry repeated pulling force that the main body panel never experiences. That’s why a single quality backpack often runs 8–10 SPI across the body and jumps to 10–12 SPI, sometimes 14+, at the strap attachment points and Box-X corners.
For sourcing checks, thick material drops the SPI, thin synthetic fabric raises it, and every load-bearing connection point gets its own denser setting.
How to Inspect Stitch Density Before You Buy or Approve a Shipment
A ruler and thirty seconds per seam is all it takes to catch a bad batch before it ships. Most QC checklists accept tech pack spec ±1 SPI as the pass band. Anything wider than that means inconsistent machine setup or operator error on the line.
Set Your Target Before Inspection, Not During It
Fabric weight determines the correct SPI window. Use these benchmarks to set the target before goods arrive:
-
Heavy fabrics, leather, vinyl, 500+ g/m²: 7–8 SPI on 301 lockstitch
-
Medium upholstery, 300–500 g/m²: 8–10 SPI
-
Light fabrics, 200–300 g/m²: 10–12 SPI
-
Stretch/elastane blends: 12–14 SPI, usually chainstitch
-
Structural denim seams: around 8 SPI
-
Decorative topstitching: 4–7 SPI
Three Visual Red Flags Anyone Can Spot
-
Loose seams: visible gaps between stitches, seam looks open under light pull
-
Puckering: rippled seam edge, fabric gathers, crowded needle holes. That means excessive stitch density.
-
Drift: the same seam alternates between tight and loose sections. Tension control failed mid-run.
A Four-Step Buyer Checklist
-
Ask the supplier for target SPI by seam type and fabric weight before production starts.
-
Require it written into the tech pack as a matrix: seam type + GSM + stitch class + SPI range.
-
Spot-check 3–5 seams per style at inspection.
-
Hold the shipment if any seam falls outside the agreed band or shows puckering.
Ask directly: “Please confirm the target SPI by seam type and fabric weight, and show your measurement method for verification.” A supplier who answers without hesitation already runs disciplined quality control.
Beyond Stitch Density: Other Factors That Determine True Seam Durability
SPI tells only part of the story. ASTM D6193 names fabric type, seam type, stitch type, thread strength, thread tension, and stitch density as the combined drivers behind seam strength, and durability depends on how these variables balance against each other, not on any single number.
Thread Strength Often Outweighs Stitch Count
A coarser thread frequently beats a denser stitch line. One upholstery study recorded the highest seam force at 135 tex thread, confirming that thread linear density carries real weight in the strength equation. Pair a high SPI with a too-fine thread, and the seam can still fail. ASTM D6193 flags this exact mismatch: dense fabric plus undersized thread produces a seam that looks reinforced but tests weak.
Stitch Length and Fabric Structure Change the Outcome
Stitch length matters as much as stitch count. Testing showed 3–4 mm stitches outperformed 5–6 mm stitches in seam strength, with strength and stiffness dropping as stitch length grew. Fabric structure adds another layer. A 2022 study found polyester-wrapped thread with a polyester filament core beat comparison threads across seam strength, slippage, and puckering, proving thread construction can outperform “more stitches.”
Seam Efficiency Is the Real Scorecard
The formula that ties it together: seam efficiency = seam tensile strength ÷ fabric tensile strength × 100. A supplier documenting this ratio, alongside slippage and puckering results, shows more engineering discipline than one citing SPI alone. That documented process, not stitch count in isolation, is what separates a qualified bag manufacturing partner from a risky one.