That nagging ache between your shoulder blades after a long hike is bad engineering. Every backpack that leaves you sore, hunched, or sweating through your shirt fails to transfer weight from your shoulders to your hips, where your body is built to carry load. The difference between a pack that disappears on your back and one that leaves you counting the minutes until you can take it off comes down to precise decisions in strap curvature, foam density, and panel geometry.
This guide explains how padded shoulder straps, back panel ventilation, and hip belt load transfer work together as an integrated suspension system rather than isolated parts. Whether you’re sourcing a manufacturing partner who understands this engineering at a technical level, or trying to choose a pack that won’t wreck your back, you’ll walk away knowing what separates a well-built bag from a poorly designed one.
The Core Engineering Principle Behind Backpack Weight Distribution
Physics determines whether a backpack feels light or brutal. The formula is Moment = Weight × Moment Arm. The farther your load sits from your spine, the longer that moment arm becomes, and the more rotational torque hits your shoulders, neck, and lower back. Keep the load center close to your spinal axis, and you shorten that arm dramatically — which is the entire point of a well-engineered backpack suspension system.
The Complete Load Path
Weight doesn’t just sit on your shoulders. It travels through a chain of components, each with a distinct job:
-
Shoulder straps stabilize and hug the pack; they’re not meant to bear the bulk of the load.
-
Back panel spreads pressure evenly across your back, preventing localized pressure point issues, and channels force toward the frame.
-
Frame sheet backpack structure transfers load from the panel down to the hip belt while preserving pack shape.
-
Hip belt transfers load onto the iliac crest, pelvis, and legs — muscle groups far stronger than your traps.
-
Sternum strap adjustment prevents shoulder straps from splaying outward; it stabilizes, it doesn’t carry weight.
The Numbers That Matter
A properly structured hip belt shifts roughly 70–80% of total load onto your hips, leaving only 20–30% on your shoulders. That’s why manufacturers who understand this ratio design load lifter straps and belt geometry around the pelvis first — everything else is secondary support.
Shoulder Strap Engineering: Curvature, Padding & Pressure Distribution
Strap geometry is where most backpacks quietly fail. A flat, straight-edged strap digs into the shoulder because it fights the body’s natural contour.
Ergonomic Strap Curvature
Well-engineered padded shoulder straps follow the natural arc from the shoulder peak to the outer collarbone — an S-shaped curve rather than a straight cut. A good fit gives you snug contact at the front shoulder, a slight lift at the top (avoiding direct crown pressure), then a smooth fall-back toward the spine. This curvature prevents that sharp, localized ache at the shoulder’s highest point.
Width and Pressure Distribution
Interface pressure testing has consistently identified 8 cm as a sweet spot for shoulder strap width, producing the lowest measured pressure across the shoulder surface. Pairing that width with a slightly higher load placement compounds the benefit, further reducing pressure concentration. Narrower straps concentrate force into a smaller contact area; 8 cm spreads that same force thin enough to disappear under a shirt.
Compression molded foam in shoulder straps falls between 10–20 mm. Thinner foam (around 10 mm) favors lightweight builds; thicker foam (approaching 20 mm) favors comfort and heavier load-carrying. Either way, foam must wrap the entire deltoid region without cutting into the neck — a fitting error that causes chafing regardless of density.
The Pressure Distribution Target
The engineering goal stays the same: roughly 80% of load goes to the hips, 20% to the front shoulder, and pressure at the shoulder crown should approach zero. Straps don’t carry weight; they stabilize and guide it. Manufacturers who chase this exact ratio when prototyping straps are the ones producing packs that vanish on your back rather than remind you they’re there every step of the trail.
Back Panel Design: Stability, Ventilation & Lumbar Support
A rigid backplate and a soft foam panel solve different problems. They’re built for different loads.
Rigid vs. Soft: Choosing the Right Structure
Hard or semi-hard back panels use a frame sheet, aluminum stays, or a rigid backplate to keep the pack body from collapsing. The rigidity boosts vertical stability and directs weight toward the hip belt, which is why hiking, cycling, and mountaineering packs almost always use one. Soft panels skip the structure. They’re lighter, flex with your body, and suit commuting or short trips where load transfer matters less than comfort against the back.
A frame sheet alone stops the pack from bulging or sagging. It doesn’t move weight to your hips. For real load transfer, you need the frame sheet paired with vertical stays and a belt shaped to fit you.
Ventilation: The Data Behind the Airflow
Suspended mesh, often called trampoline-style backing, creates a genuine air gap between your back and the pack body. Testing on ventilated back panels shows sweat volume dropping by as much as 21.6%, microclimate temperature falling up to 1.6°C, and humidity dropping 19.4%. Air channels cut into foam or support layers guide airflow across the back instead of trapping it. Airflow structure matters more than material choice alone.
Lumbar Support and Pressure Hotspots
Good lumbar support means the panel curves to follow the L3–L5 region. This locks the load’s center of gravity near your spine instead of letting it drift away. Full-contact foam panels trap heat across a large surface. Rigid, minimal-contact designs create pressure point problems at the shoulder blades and iliac crest. The fix uses zoned construction with broad flexible contact through the mid-back, structural reinforcement at the lumbar curve, and extra cushioning wherever bone meets panel.

Hip Belt System: The Critical Link for Heavy Load Transfer
Strip away a functioning hip belt, and spinal compression jumps by roughly one-third. That single fact tells you why this component is a structural load-transfer part. A well-engineered hip belt transfers 70–80% of pack weight, leaving your shoulders with 20–30% residual load. AMC data confirms that ratio, and spinal loading studies show the reduction is real.
Positioning: Where the Belt Actually Needs to Sit
The belt should press against the iliac crest, roughly 2.5 cm (about 1 inch) above the bone, not sink into the soft tissue at your waist. Get this wrong, and the belt slides down, the pack sags, and your shoulders absorb weight they were never meant to carry.
When you tighten the hip belt correctly, the pack body should lift slightly off your shoulders. That’s the tell. Shoulder straps then shift into a positioning-and-stabilizing role. Adjust the hip belt first, then the shoulder straps and load lifter straps fine-tune fit and center of gravity. On steep or technical terrain, some hikers shift weight back toward the shoulders temporarily to improve mobility. That’s a deliberate trade-off.
Structural Requirements for Real Load Transfer
A soft, padded belt alone won’t move weight anywhere. Effective hip belt load transfer requires rigid connection to the frame sheet backpack structure. Three components must work as one closed loop:
-
Hip belt: carries the load onto the pelvis and legs
-
Load lifter straps: pull the pack’s upper edge toward the body, cutting the moment arm and directing force downward into the belt
-
Frame/back panel: channels torque and shear force from the pack body into the belt without collapsing
Break this loop anywhere, and you get predictable failures: a thick belt with no frame support still leaves weight hanging on the shoulders; an overbuilt shoulder strap tricks users into loading the wrong point; a soft frame can’t push force down to the pelvis at all.
Shape Beats Width
Curved belts that wrap around the pelvis’s bony edges outperform flat, wide padding every time, as long as they’re stiff enough to hold shape under 10–20 kg loads. Wide-but-soft belts look supportive but fold and slip without a rigid backer. The benchmark combination of curved geometry, adequate stiffness, and frame-linked construction separates packs built for 25L+ heavy carrying from ones that only look capable on a shelf.
Load Placement & Internal Compartmentalization Strategy
Even a perfectly engineered suspension system fails if the pack is loaded wrong. Where you place weight inside the bag matters just as much as strap curvature or hip belt geometry.
Outdoor gear guides point to one target zone: the upper-to-mid back area, close to the panel, roughly between the shoulder blades. This is where the densest, heaviest items belong. The common benchmark puts 60–70% of total pack weight in this core zone, at roughly two-thirds of the main compartment’s height, centered horizontally and pressed toward the back panel.
Load height matters. Pack weight too low, and the bag sags backward, pulling your shoulders down. Too high, and you get a tippy feeling — unstable side-to-side sway with every step.
Practical Packing Order
A reliable loading sequence looks like this:
-
Bottom: soft, light, rarely-needed items (sleeping bag, spare clothing)
-
Core/back-side: heavy essentials (food, water, stove, cook set)
-
Top: moderate-weight items needed frequently
-
Outer pockets: rain gear, headlamp, first aid kit
The same logic applies to commuter bags. Laptops, chargers, and heavy books belong closest to the back panel, not floating in the main compartment where they drift and pull the load away from your spine.
Compartmentalization and Compression
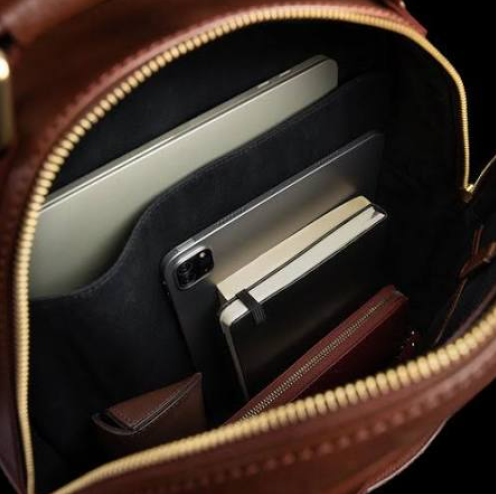
Internal dividers, sleeve pockets, and mesh compartments lock heavy items in place, preventing lateral or vertical shifting. Compression straps then cinch the pack body tight, pulling contents back toward the panel. This is critical for half-full loads, where empty space lets weight migrate and destabilize your center of gravity.
How to Evaluate a Well-Engineered Backpack (Buyer’s Checklist)
Testing tells you how a pack performs under real load. Whether you’re a brand sourcing a manufacturing partner or a consumer comparing options before purchase, these are the checkpoints that separate solid engineering from marketing claims.
Dynamic Stability Testing
Load the pack to 5% of body weight, the standard starting point in human stability research. Walk on flat ground, turn sharply, climb stairs, and bend forward. Watch for the pack swaying away from your back, bouncing upward, or twisting side to side. Shifting the load center back by just 0.20–0.40 m measurably destabilizes posture, so any visible sway at low load signals weak structural control. Run three 90-second static/dynamic reps per sample to confirm consistency.
Shoulder and Hip Belt Verification
Check whether pressure feels even across both shoulders, or concentrated at one point. Numbness after 5–10 minutes of walking indicates poor load lifter strap tuning. For hip belts, tighten both straps and confirm weight visibly shifts from shoulders to pelvis. The pack shouldn’t rock backward on stairs. Packs above 28L should include an adjustable or removable hip belt as standard.
B2B Sourcing: Manufacturer Durability Benchmarks
-
Suspension load test: 150% of rated capacity, held for 24 hours, checked for permanent deformation or strap/handle failure
-
Lift-cycle test: 20 repeated lift-and-drop cycles, inspecting strap roots and stitching for cracking
-
Drop test: six-sided drop from 1 meter, loaded, checking corners and zipper ends for seam failure
-
Zipper durability: multiple open-close cycles checking for derailment or fabric snagging
-
Reinforced base: 1200D polyester with frame sheet or stiffening strips for high-impact use cases
A pack that passes these thresholds and shows minimal “barrel wobble” after compression strap tightening reflects real frame sheet backpack engineering.
Custom Engineering Solutions for Different Bag Categories
No single suspension system works for every bag. A hiking pack, a school backpack, and a tactical rig solve completely different physics problems, so the engineering priorities shift category by category.
Hiking & Mountaineering Packs
The formula stays consistent. A wide hip belt, structured back panel, load lifter straps, and sternum strap work together to push 70–80% of total weight onto the hips. Everything gets built around long-distance load transfer.
School & Everyday Backpacks
Children’s spines aren’t scaled-down adult spines. Pediatric guidance caps school bag weight near 10% of body weight, with broader engineering references allowing 10–15%, and research citing a wider 5–20% range. The structural priority flips toward wide shoulder straps, a lightweight contoured panel that hugs the back, and compartmentalization that keeps heavier items pressed close to the spine, reducing sway rather than maximizing hip transfer.
Tactical Bags
Comfort takes a back seat to reliability under sustained heavy load. Tactical straps prioritize high-tensile webbing, abrasion resistance, and reinforced stitching at every stress point. Quick-adjust, one-handed buckles matter more than plush padding, since straps must lock without slipping during movement.
At SunteamBag, this is why OEM development starts by separating use-case categories before touching material selection. Hiking, school, and tactical each demand a distinct suspension architecture, verified through pull testing, buckle fatigue cycles, and full-pack load trials.