
What’s Really Driving Your Clutch Bag Production Costs Up
Pull apart the BOM on a typical clutch bag and the numbers tell a clear story.
A leather clutch retailing at $100 costs between $20–$35 to manufacture. Here’s where that money goes:
-
Primary material (leather/PU/fabric): 30–45% — the single largest cost driver. Switch to genuine leather and this climbs to 40–55% of total material cost alone
-
Labor: 20–30% — complex builds with multiple interior compartments or structured frames push this toward the upper limit
-
Factory overhead: 10–15% — covers equipment depreciation, facility costs, and management
-
Hardware (zippers, locks, chains, logo fittings): 5–10% — custom molds and plating push this to 12–15% on small runs
-
Packaging: 3–6% — a basic PP bag and hangtag sits at 2–3%; a gift box setup can double that
-
QC and rework: 2–5% — routine inspection runs 2–3%, but a low yield rate can push this past 5% without you noticing
-
Sampling and mold amortization: 1–3% — frequent revision rounds on small orders can spike this to 3–5%
Most brands fixate on material price. The real leaks are elsewhere.
Rework, excess sampling rounds, and tooling costs that don’t spread across enough units — these eat into margins fast. They often wipe out any savings you made on the cut sheet. A 300-unit run carries around $1.00/unit in mold and sampling costs. Scale to 1,000 units and that same cost drops to around $0.30/unit.
Know this full cost map first. You can’t make smart cuts until you see where the money is going.
Build a Should-Cost Model Before You Negotiate Anything
Here’s a mistake that costs brands more than any bad supplier deal: walking into a price negotiation without knowing what the bag costs to make.
A should-cost model fixes that. It’s a bottom-up cost estimate you build yourself — before you see a single factory quote. Break down every component, labor hour, and overhead line item. Price each one against real market inputs. Then use that number as your negotiation anchor.
Without it, you’re reacting to the supplier’s number. With it, you’re in control.
How to build one for a clutch bag:
The formula has seven inputs:
Total Should-Cost = Materials + Hardware + Trims/Packaging + Direct Labor + Factory Overhead + Logistics/Duties + Supplier Margin
A typical split looks like this: Materials 40–60% | Labor 10–25% | Overhead 15–30% | Supplier Margin 8–12%
Let’s run through a real example — a mid-range leather clutch, targeting 10,000 units FOB.
Step 1: Calculate Your Material Cost
Start with the pattern layout area and work forward.
-
Bag surface area: 3.0 ft²
-
Nesting/layout efficiency: 80% (accounts for waste and irregular hide shapes)
-
Actual leather needed: 3.0 ÷ 0.80 = 3.75 ft² per unit
-
Leather unit price: USD 3.50/ft²
-
Material cost: 3.75 × 3.50 = USD 13.13/unit
Add lining fabric at USD 1.08/unit. You’re past $14 before you touch a zipper.
For genuine leather, add a 10–20% waste allowance for natural hide defects. Coated PU cuts this to 5–8%.
Step 2: Price Out Every Hardware Component
Don’t estimate hardware as a lump sum. Break it down piece by piece:
|
Component |
Qty |
Unit Price |
Subtotal |
|---|---|---|---|
|
Metal zipper |
2 |
$0.40 |
$0.80 |
|
Magnetic snap |
2 |
$0.18 |
$0.36 |
|
Logo metal plate |
1 |
$0.25 |
$0.25 |
|
D-rings + adjusters |
4 |
$0.10 |
$0.40 |
|
Hardware total |
$1.81 |
Running custom plating or a branded mold? Add tooling amortization. A USD 500 mold across 10,000 units adds USD 0.05/unit — manageable at scale, punishing at 500 units.
Step 3: Estimate Direct Labor
Map each production step and assign a cycle time:
|
Operation |
Time |
|---|---|
|
Cutting |
6 min |
|
Stitching |
18 min |
|
Edge finishing |
6 min |
|
Hardware assembly |
4 min |
|
QC + packaging |
6 min |
|
Total |
40 min = 0.667 hrs |
At USD 4.50/hr (Southeast China all-in labor rate including benefits): 0.667 × 4.50 = USD 3.00/unit
Step 4: Add Overhead and Margin
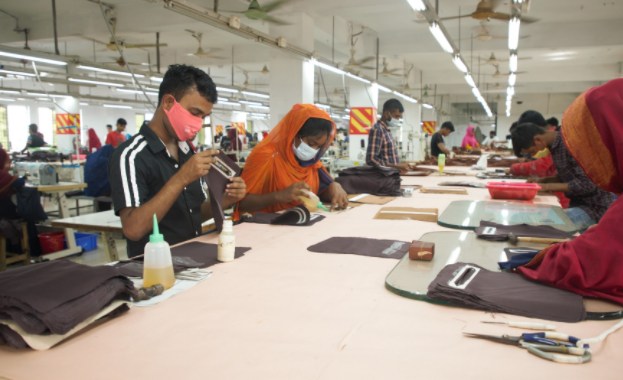
Factory overhead for bag sewing operations runs 50–100% of direct labor. Use 80% as a baseline. Go lower only if you’re working with a heavily automated facility.
-
Overhead: USD 3.00 × 0.80 = USD 2.40/unit
-
Packaging (box + dust bag + hangtag): USD 0.75/unit
-
Mold/development amortization: USD 0.20/unit (at 10,000 units)
-
Port and inland logistics: USD 1.00/unit
The Full Should-Cost Breakdown
|
Cost Module |
USD/Unit |
|---|---|
|
Primary leather |
13.13 |
|
Lining + trims |
1.08 |
|
Hardware |
1.81 |
|
Packaging |
0.75 |
|
Mold/dev amortization |
0.20 |
|
Direct labor |
3.00 |
|
Factory overhead |
2.40 |
|
Logistics + port fees |
1.00 |
|
Subtotal (ex-margin) |
23.37 |
|
Supplier margin (10%) |
2.34 |
|
Should-Cost FOB |
$25.71 |
How to Use This Number in Negotiation
Your should-cost model isn’t a price you demand. It’s a benchmark that shows you exactly where a quote stands.
If the factory quotes USD 32.00 FOB:
(32 – 25.71) ÷ 25.71 = +24.5% over should-cost → That’s your negotiation zone. Push back on material spec, labor assumptions, or overhead allocation. Ask the supplier to walk you through their own BOM line by line.
If the factory quotes USD 24.00 FOB:
That’s 3% below your should-cost floor. Don’t celebrate yet. Audit the material grades and check compliance standards first. A quote that undercuts your model almost always means something got substituted or skipped.
The sweet spot is a quote that lands within 10–15% of your should-cost. That’s a factory pricing at a fair level. Anything above 20% is up for negotiation. Anything that far below your floor deserves scrutiny, not a handshake.
Tie It Back to Your Retail Price
Build the should-cost from both ends — bottom-up from components, and top-down from your retail target.
For a EUR 250 retail clutch bag with a 65% gross margin target:
-
Target landed cost: 250 × 35% = EUR 87.50
-
Logistics and duties add 15–20% on top of FOB
-
Target FOB: 87.50 ÷ 1.20 = EUR 72.90 (≈ USD 79)
Your bottom-up should-cost lands at USD 25.71. Your top-down ceiling sits at USD 79. There’s room — but that gap is where your brand margin, freight, and tariffs all live. Don’t spend it twice.
Run both calculations before any supplier conversation. Know your floor. Know your ceiling. Then negotiate from a position grounded in numbers, not guesswork.
Choose the Right Materials to Cut Costs Without Cutting Corners
Material selection is where most cost-cutting efforts either succeed or fall apart. The decision isn’t “cheap vs. expensive.” It’s about knowing which materials justify the spend — and which ones you’re overpaying for with no gain in perceived quality.
Here’s a breakdown of the main material options across the cost range, plus where each one fits in your product line.
Material Cost vs. Quality: What the Numbers Look Like
|
Material |
Estimated Cost per Unit (mid-size clutch) |
Flex Durability |
Best Fit |
|---|---|---|---|
|
PVC |
~$0.55–$1.40 |
Poor below -10°C; cracks under stress |
Promo bags, event giveaways |
|
Standard PU (0.8–1.2mm) |
~$0.85–$2.10 |
50,000–100,000 flex cycles; 2–5 yr hydrolysis rating |
Mid-range fashion lines |
|
Recycled/Bonded Leather |
~$2.10–$4.90 |
Below mid-grade PU; ~3 yr hydrolysis |
Eco-positioned mid-tier brands |
|
High-Performance Vegan Leather (microfiber-based) |
~$8.40–$16.80 |
100,000–200,000+ flex cycles; near-leather tear strength |
Sustainable premium lines |
|
Full-Grain Cowhide |
~$8.40–$21.00+ |
5–10+ years with proper care |
High-end and luxury mainline |
A few things worth noting:
-
PVC costs 20–40% less than comparable PU, but the trade-offs are real — poor cold-weather flexibility, weaker environmental compliance, and a lower-quality hand feel that B2B buyers will catch on repeat orders.
-
Recycled leather sits in a solid middle ground for brands building an eco narrative on a tight budget. It won’t pass as top-grain leather up close, but surface embossing and finish coatings close most of the visual gap.
-
Microfiber-based vegan leather runs 30–80% more than standard PU — but it still costs less than genuine leather while matching it on flex and tear specs. Worth the upgrade if your brand positioning supports the price point.
Use Stock Materials to Cut MOQ and Sampling Costs
One of the fastest, least-used cost levers in clutch bag bulk production is switching from custom-developed materials to supplier stock fabrics.
The difference in practice:
-
Custom-color PU: MOQ runs 300–500 meters. Color development fees add $42–$112 per colorway. Small trial orders carry 10–20% material waste from leftover inventory.
-
Stock-color PU: MOQ drops to 100–150 meters. Most suppliers waive sampling fees — you pick from their existing color cards. Core colorways (black, tan, navy, burgundy) are almost always available off-the-shelf.
The time savings matter too. Skipping custom color development cuts lead time by 3–7 days and removes batch color variance risk between reorders.
What to lock in with stock materials:
– Request a batch test report covering GSM, tear strength, flex cycles, and colorfastness
– Keep a confirmed reference swatch on file — “same stock code” doesn’t guarantee the same formulation across supplier batches
– Require key spec tolerances within ±5% batch to batch
Zone Your Materials: Spend Where Customers Look, Save Where They Don’t
This is one of the most effective moves in handbag manufacturing — and the end buyer never sees it.
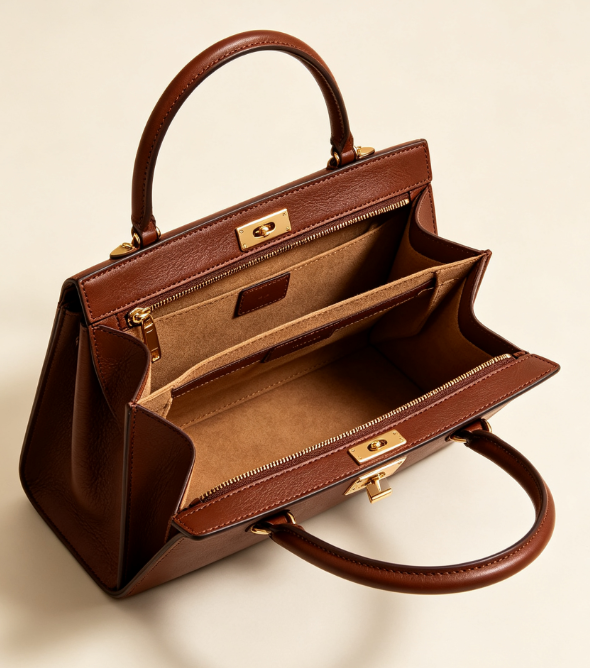
High-perception zones (exterior shell, closure flap, handle, zipper pull area) get the most contact from your customer’s hands and eyes. These areas set the quality impression. Don’t downgrade materials here.
Low-perception zones (interior base support, side lining panels, internal stiffeners) have almost no effect on how the finished bag feels or looks. These are your real cost reduction targets.
What this looks like in practice:
-
Keep the exterior shell in full-grain or high-grade PU — no change
-
Replace thick leather handle cores with high-density board or rigid plastic wrapped in a thin leather layer — material volume drops 30–50% in that one component
-
Switch interior lining from heavy custom-print fabric to stock 210D or 300D polyester lining — per-unit lining cost drops 40–60%
Put those three together and you’re looking at 10–30% total material cost savings with zero visible change to the bag’s exterior.
Spec Verification: What to Check So You Don’t Get Substituted Materials
Supplier substitution is a real risk in clutch bag OEM manufacturing. It’s more common on repeat orders after the first confirmed sample. Lock down these specs in writing before production starts:
For PU / synthetic leather:
– Base fabric weight: ≥120–150 g/m² — lighter base fabrics tear faster and let the bag body deform under load
– Coating type: confirm full PU coating vs. PU/PVC blend — blended coatings cost less to produce but degrade faster and score lower on environmental compliance
– Coating thickness: 0.15–0.25mm minimum — thinner coatings crack and peel with regular use
– Flex performance: ≥50,000 cycles for mid-tier and above; hydrolysis rating ≥3 years
For lining and structural materials:
– Lining GSM by grade: 190T polyester taffeta ≈ 60–70 g/m²; 210D ≈ 110–130 g/m²; 300D ≈ 150–180 g/m²
– Check actual GSM against what’s quoted — a common swap is billing 210D while delivering fabric at 80–90 g/m²
– For base boards and side stiffeners, state whether the material is paperboard, plastic sheet, or composite — each one reacts to moisture and pressure in its own way
The practical rule: any spec left out of your purchase order becomes negotiable on every reorder. Write it down.
Simplify Your Clutch Bag Design to Save Labor Without Losing Appeal
Design complexity is one of the most underestimated labor cost drivers in clutch bag bulk production. The good news: you have full control over it before the first unit reaches the sewing floor.
Every extra pocket, curved edge, or non-standard zipper routing adds stitching passes, alignment steps, and inspection points. Scale that across thousands of units, and the labor costs climb fast. Most of that complexity sits in places customers never see.
Where Hidden Complexity Eats Your Labor Budget
These four construction details drive up build time without improving how the bag looks or feels to the buyer:
-
Multiple interior compartments — each divider needs at least two extra straight stitching rows across the bag body, plus alignment work. One extra pocket section adds a full stitching sequence per unit
-
Complex zipper routing — enclosing a zipper between layers means pinning, sandwiching, and full perimeter stitching with a turning gap. Non-standard zipper sizing adds changeover time at the machine level
-
Curved top edges and frame openings — these need custom templates, seam allowance adjustments, and trace-and-cut steps. A single standard piece would be faster and simpler
-
Bulk-reduction finishing (trimming seam allowances, clipping corners) — necessary for shape control, but it still costs labor time. Simplify the base construction and you cut down the bulk you need to manage in the first place
The Simplification Targets Worth Hitting
Aim for these three benchmarks across your clutch range:
-
1 main body pattern + 1 lining pattern + 1 reinforcement pattern — cut out separate pocket panels and trim pieces wherever you can
-
One zipper size and one clasp size across all SKUs — same build route, no machine changeovers between styles
-
One perimeter stitch path, one turning opening, one final topstitch — the most labor-efficient clutch builds run on this single-sequence logic
A frame-style clutch can often be cut from one mirrored pattern piece. A folded fabric body with straight-line stitching gives you a clean, polished exterior. Neither style needs interior complexity to look finished.
Keep Premium Finishing Where Customers Actually Look
Simplifying your design does not mean cutting visible quality. It means putting your finishing budget where buyers actually focus their attention.
-
Exterior shell, closure flap, and visible edge treatments: keep full quality here. This is where the buying decision gets made
-
Interior base panels, side lining, and internal stiffeners: these are your real targets for simplification. Switch to stock polyester lining and single-layer construction — the exterior appearance stays exactly the same
Run a DFM Audit Before Finalizing Your Design
Before locking down production specs, run every pattern piece through a Design-for-Manufacture (DFM) review:
-
Sort all pattern pieces into three groups: shell, lining, reinforcement — anything outside these three is a candidate for removal
-
Check every seam type for hidden bulk. Dense interior construction is a clear sign to simplify
-
Verify fabric width against supplier technical specs before building your cut markers. This prevents waste and recut risk before production starts
-
Ask your factory directly: where can sewing be replaced by gumming in non-stress areas? Partial adhesive bonding with reduced stitching is a valid build method. It cuts cycle time without weakening the structure
-
Run a side-by-side prototype comparison — original vs. simplified. Check silhouette, zipper action, interior bulk, and packability before committing to mass production
The production rule of thumb: every added internal compartment or non-standard opening adds at least one extra stitching sequence, more alignment steps, and extra inspection points. Strip those back, and your factory’s output rate goes up — with zero visible change to the finished bag.
Optimize Your Material Sourcing and Supplier Structure
Most brands treat supplier management as a logistics problem. It’s a cost structure problem — and the numbers prove it.
Cut your supplier count from 20+ down to 3–5 core suppliers. Unit procurement costs drop 3–8%. On top of that, procurement process costs — headcount, approvals, reconciliation — fall by another 20–30%. You get that margin improvement without changing a single design spec.
Consolidate Suppliers Around Three Tiers
Not every material needs the same supplier strategy. Build your supply base around risk and volume:
-
1–2 core suppliers: Standard-grade materials with low technical complexity — generic zippers, stock lining, standard closures. These are commodities. Concentrate volume and push hard on price.
-
2 parallel suppliers: Mid-complexity materials — functional fabrics, key hardware fittings. Two active suppliers keep price competition alive and give you backup capacity.
-
3–4 suppliers: Custom or high-variability materials — long-lead specialty fabrics, custom-made fittings. More options here protect you against supply disruptions.
Any supplier missing a 95% on-time delivery rate — or running a defect rate above 2% for two consecutive quarters — goes on your rationalization list. Don’t treat that as a judgment call. Make it a written policy.
Share Components Across Styles to Get Volume Pricing
Hardware and lining costs fall once you consolidate SKUs across your product range. The savings are real and repeatable.
Take zippers. Standardize five styles onto one #5 nylon zipper spec — say, 5,000 units per style per month. Your total zipper volume hits 25,000 units per month. At that scale, supplier pricing steps down 3–5% versus ordering five separate small batches. Annual savings on that one component alone: around ¥15,000.
Lining works the same way. Pull four lining variants down to one or two standard weights and compositions. Push annual volume past 5–10 metric tons. Fabric mills give you 2–5% unit price reductions at that level.
Hardware follows the same pattern. Unify your plating color and fitting series across a collection. Once monthly volumes exceed 50,000 units, per-piece hardware costs drop 5–10%. Defect rates also fall — from 2–3% to under 1% — because fewer batch changeovers mean fewer production errors.
Evaluate Suppliers on Quantified KPIs — Not Just Price
Low quotes are easy to find. Suppliers who protect your margins over 12 months are not. Build your scorecard around these benchmarks:
|
KPI |
Target Threshold |
Action Trigger |
|---|---|---|
|
Batch defect rate |
<0.5–1% |
>2% for 2 quarters → reduce orders |
|
On-time delivery |
≥97–99% (core) / ≥95% (standard) |
<95% → formal review |
|
Quote response time |
≤24–48 hours |
>3 days = risk signal |
|
Sampling lead time |
5–10 days (standard) |
>15 days impacts launch windows |
|
Annual cost-down contribution |
2–5% via process or volume |
Absence = low collaboration value |
|
Complaint response |
Initial response <24 hrs; 8D report within 3–5 business days |
Delays = supply risk |
Suppliers who provide cost breakdowns on request and commit to annual cost improvement targets are worth more than those who quote the lowest number. The first group protects your margin. The second group erodes it — through material substitutions and quality drift on repeat orders.
Local vs. Cross-Border Sourcing: Run the Full Landed Cost
Cross-border sourcing looks good on a quote sheet. The full-cost picture is a different story.
For fabric and trims imported into China, the costs stack up fast: 5–12% import duty (HS-code dependent) + 13% VAT + customs brokerage fees of 0.3–1% of cargo value. An overseas supplier quoting 8–10% below domestic pricing? Those layered costs close — or wipe out — that gap.
Delivery timelines make it worse. Domestic sourcing within the same region runs 1–3 days, with logistics costs under 2–3% of cargo value. Sea freight from overseas adds 20–35 days door-to-door and 3–8% of cargo value in freight costs alone — climbing above 10% during peak season. Air freight fixes the timing problem, but it costs 15–30% of cargo value. That only makes sense for urgent replenishment or high-margin components.
Quality disputes add another layer of cost. A domestic supplier issue gets resolved with an on-site reinspection or rework in 1–3 days. The same dispute with a cross-border supplier stretches to 2–4 weeks — samples going back and forth, rework cycles, replacement shipments.
Plan for 1–1.5 order cycles of safety stock on any cross-border supply relationship. That safety stock carries an annualized holding cost of 5–10% of inventory value. That’s a real cost. Put it in your landed cost model — not a footnote.
Negotiate MOQ and Pricing Without Losing Supplier Goodwill
Suppliers remember how you negotiate. Push too hard on price without giving anything back, and you’ll get the quote — but lose the relationship. That relationship is what keeps reorders smooth, quality consistent, and lead times reliable.
The goal isn’t the lowest unit price on your first order. You want a pricing structure that works across multiple runs, with a supplier who stays motivated to protect your quality.
Split MOQ Into Mixed SKUs Instead of Cutting Volume
Most factories quote MOQ by style and colorway. That doesn’t mean you have to order 1,000 units of one variant.
The better ask: keep total quantity the same, split across multiple SKUs.
Factory MOQ: 1,000 units/style → Counter with: 1,000 units total, split across 4 colorways at 250 units each.
The factory runs a full batch. Your risk per variant drops. Unit price stays flat or rises by 3–5% — far less than the 8–20% premium you’d absorb by cutting volume in half.
Need to drop total quantity? Offer something in return. Accept standard packaging, remove custom color requirements, or reduce interior complexity. That trade holds single-unit price increases to 5–8% rather than triggering full small-batch penalty pricing.
Use Annual Volume Commitments to Unlock Lower Per-Unit Pricing
Can you forecast demand across 12 months? Use that as leverage — even without confirming each batch upfront.
The structure: commit to a total annual volume, agree on release schedules every quarter, and lock in pricing based on the full-year figure.
For example: you project 3,000 units across the year but can confirm 600 per quarter. Go to your factory with a rolling 12-week forecast and a contractual annual minimum — say 3,000 units, released in batches of 600–800. The factory prices against the annual total, not the batch size.
Once annual commitments reach 3× the factory’s standard MOQ, you have a solid basis to request:
– First-batch quantity as low as 30–50% of standard MOQ
– Unit pricing indexed to the full annual volume tier
This works best with a credible forecast. Bring 12–24 months of past purchase data. Numbers carry more weight than promises.
Build a Tiered Price Ladder Into the Agreement
Negotiating a single unit price is a short-term fix. Every reorder becomes a new fight.
Propose a tiered structure upfront. Get it written into your purchase agreement or long-term supply arrangement (LTA):
|
Order Quantity |
Unit Price |
|---|---|
|
≥1,000 units |
$1.00 |
|
500–999 units |
$1.08 (+8%) |
|
200–499 units |
$1.20 (+20%) |
The factory gets a clear cost-recovery structure for smaller runs. You get automatic price improvement as you scale — no renegotiation needed each time.
To make this work: ask the factory to show you their cost breakdown first — setup fees, tooling, materials, labor. Then set the tier thresholds around where their fixed costs get covered. You’re not squeezing their margin. You’re helping them price in a way that makes sense, which makes the whole conversation easier.
Lower Price Through Spec Engineering, Not Just Pressure
Asking for a discount puts a factory on the defensive. Asking to co-engineer a lower-cost version gives them a problem to solve — and that tends to get better results.
Three questions that open cost reduction conversations:
-
“Do you have in-stock materials or standard trims we could switch to? That would let us lower MOQ requirements and reduce per-unit cost.”
-
“What process changes would let you reduce the price by 5–10% without affecting quality?”
-
“Could you break the unit cost into materials, labor, setup, and packaging? We want to align the spec to your most efficient production process.”
In practice, switching to factory stock materials and removing first-order custom packaging cuts unit cost by 3–10%. It also lowers MOQ thresholds from 500–1,000 units down to 200–300 units.
Give the Supplier Something Real in Return
Strong supplier relationships run on give and take. Want flexibility on MOQ or pricing? Offer something the factory values:
-
Faster payment terms: Moving from net-60 to net-30 can unlock a 2–3% unit price reduction — or equal flexibility on minimum quantities
-
Confirmed annual minimums: A contractual annual purchase commitment of $100k–$300k moves you from a transactional buyer to a planned account — your orders get prioritized differently in their production schedule
-
Predictable forecasting: A rolling 12-week forecast updated every 4 weeks costs you nothing. The factory gets material planning visibility, and they’ll factor that into pricing
The message you want the factory to take away: you’re a reliable volume source, not a one-time buyer chasing the cheapest deal. That position is worth more than any single negotiation tactic.
Set Up Quality Control Checkpoints That Protect Your Standards
Quality failures don’t announce themselves during production. They show up in your customer’s hands — and by then, rework costs 3–5× what a checkpoint would have caught.
A structured QC system for clutch bag bulk production runs across five stages. Each one targets a different failure point.
The Five Checkpoints
Checkpoint 1: Incoming Material Inspection (IQC)
Inspect every material batch before it touches a sewing machine. For primary materials — leather, PU shell fabric, main zippers — sample at AQL 1.5–2.5. Or inspect 100% for color and spec matching. Key thresholds:
-
Fabric weight tolerance: ±5%; thickness: ±0.1–0.2mm
-
Zipper length deviation: ≤±2mm; test smooth operation across 10–20 pulls
-
Hardware salt spray: 24–72 hours without red rust (mid-tier); 96 hours for premium
Batch defect rate above 2–3%? Trigger a supplier corrective action. Don’t absorb bad materials into production.
Checkpoint 2: Pre-Production Sample Sign-Off
Lock down a confirmed sample report before mass production starts. Test the physical bag — not just the spec sheet:
-
Dimensions: ±3mm on length/width/height
-
Load test: suspend at 1.5–2× design weight for 24 hours — no deformation, no broken stitching
-
Strap pull strength at attachment points: ≥150–200N (≈15–20 kgf)
This report becomes your production bible. Any deviation from it during manufacturing counts as a quality event.
Checkpoint 3: Pre-Production Trial Batch
Run a PP batch at 1–5% of total order quantity before committing to full production. A 5,000-unit order means 50–250 trial units. Check:
-
Process stability at each workstation — cutting, skiving, bonding, stitching, edge finishing
-
Total defect rate above 5%? Critical defects above 1%? Stop. Fix the process before you scale up
Checkpoint 4: In-Process Inspection (IPQC)
This is your real-time safety net. Inspect the first piece from every workstation at 100%. After that, pull 3–5 units every 1–2 hours from the line and record defects. Watch these numbers:
-
Stitch pitch: 3–4mm; back-stitch length: ≥8–10mm
-
Seam allowance deviation: ≤1.5mm
-
Edge finish: coat thickness variation ≤0.1mm; minimum 2–3 coats with drying between passes
Keep process defect rate below 3%. Critical defects stay below 1%.
Checkpoint 5: Final Goods Inspection (FQC)
Sample finished units against AQL standards. Zero tolerance on critical defects. AQL 0.65–1.0 for major defects. AQL 2.5–4.0 for minor ones. Check dimensions, zipper function, lining adhesion, and packaging label accuracy — all against the original order.
Run Early-Stage Sample Tests Before Mass Production
Inspections alone miss one thing: environmental stress. Pull 5–10 units from your trial batch and run these tests:
-
Store at 30–40°C with 75–85% humidity for 7 days — look for delamination, edge cracking, fabric bubbling
-
Cycle shoulder straps 1,000–2,000 times under load — check stitching at attachment roots and hardware seating
The math is simple. A glue failure caught at PP sample stage costs $0.05–0.10 per unit to fix. That same failure found during mass production runs $0.50–1.00 per unit in rework. And that’s before you count production delays and potential order cancellations.
Real Cost Reduction Benchmarks: What’s Achievable
Brands that hit meaningful cost reductions share one trait. They start with a clear baseline — not a target discount percentage.
In clutch bag bulk production, 10–20% cost reduction is within reach without any visible quality loss. You get there through material standardization, process simplification, and fewer sampling rounds. Projects with a structured, phased approach show success rates up to 30% higher than those built around one-time price negotiations.
Here’s what that looks like in practice. A mid-range PU clutch at US$12.00/pc can drop to US$9.60–10.20/pc — a 15–20% reduction. That comes from five targeted moves: switching to stock PU, consolidating hardware SKUs, cutting sampling rounds from four to two, simplifying edge finishing, and tightening the supplier base. No exterior quality change. No margin squeeze on the factory side.
The five metrics worth tracking:
– Unit cost per piece
– Material waste rate
– Number of sampling rounds
– Rework and rejection rate
– Quote spread across 3–4 suppliers (high variance signals negotiation room)
A supplier quote running 20%+ above market midpoint is a red flag. Audit the material grade, hardware spec, and check whether sampling costs are buried inside the unit price. A promised reduction above 20% also deserves scrutiny — verify it isn’t hiding material substitution or silent process cuts.
The three fastest levers to pull first: material standardization (5–8% savings), fewer sampling revisions, and RFQ competition across 3–4 qualified suppliers (3–7% additional reduction).
Clutch Bag Production Cost Optimization Checklist
Run through this checklist before your next production cycle. It covers every stage where cost decisions get made — and where quality gets traded away without notice.
Sourcing Stage
– [ ] Set your cost ceiling: Target Retail → Target Landed Cost → Max FOB — include freight, duties, and bank fees
– [ ] Build a full BOM with unit price, consumption per bag, and wastage % for every component
– [ ] Compare the last two supplier quotes side by side — flag hidden add-ons and unapproved line items
– [ ] Use standard stock zippers, hardware, and lining wherever possible — avoid custom molds and high-MOQ trims
– [ ] Consolidate shared materials across styles to reduce SKU fragmentation
Design Stage
– [ ] Freeze tech pack and BOM before sampling — each revision round adds cost
– [ ] Cut down pattern piece count. Simplify hidden structure and interior dividers
– [ ] Limit colorways — fewer colors means fewer small batches and less switching cost
Production Stage
– [ ] Track material waste: compare BOM theoretical yield against actual factory usage
– [ ] Add a rework line to your cost model — it’s the most overlooked internal failure cost
– [ ] Amortize sampling fees and mold costs across 500 / 1,000 / 2,500-unit scenarios
Quality Non-Negotiables
– [ ] Hold the line on load-bearing stitching, hardware pull strength, zipper action, and seam integrity. These standards don’t get cut
– [ ] Keep all four inspection stages: IQC → pre-production sign-off → IPQC → FQC
– [ ] Maintain full compliance documentation — REACH, CPSIA, OEKO-TEX. Skip this and short-term savings turn into returns, delays, and fines