
What Does “Brand Identity” Mean for a Physical Product Like a Clutch Bag?
Brand identity on a clutch bag is concrete. It’s a repeatable set of physical cues your customer can see, touch, and predict — before they read a single tag or label.
Think of every clutch your brand produces as a walking billboard. The shape, the hardware finish, the material texture, the logo placement — each element either reinforces your brand promise or contradicts it. No element is neutral.
Clutch bag branding works across six physical dimensions:
-
Silhouette — your recognizable shape (define 1–2 signature profiles and use them on ≥70% of models)
-
Material — smooth calf, pebbled leather, certified vegan PU — each signals a different brand personality
-
Color palette — 2–3 core colors appearing across ≥60% of products and packaging
-
Hardware finish — one primary tone (gold, gunmetal, brushed silver) kept consistent brand-wide
-
Logo application — placement, size (5–12 mm height), and format standardized across every SKU
-
Surface treatment — signature quilting, embossing, or monogram pattern that builds tactile recognition
Get all six elements aligned. Customers will recognize your clutch on sight — no name needed.
Step 1: Extract Your Brand’s Design DNA Before Touching Any Spec Sheet
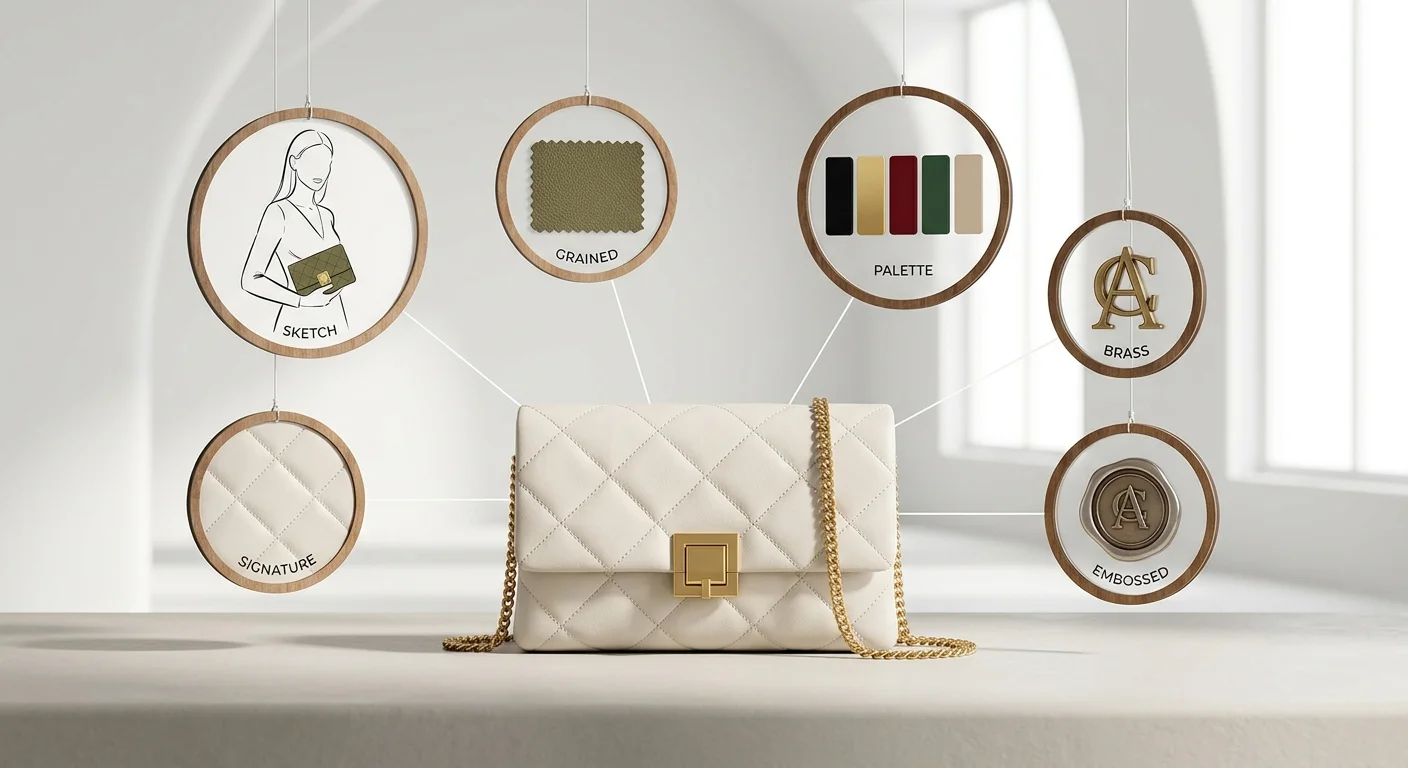
Brands that skip this step don’t fail at manufacturing — they fail at clarity. No codified Design DNA means every downstream decision turns into a negotiation. Your factory fills in the blanks. The result looks generic, because it is.
Design DNA extraction is not a mood board exercise. It turns your brand’s visual, structural, and sensorial rules into a written constraint set. Every spec sheet, CAD brief, and material selection must answer to that set.
Before you write a single dimension, lock in these four outputs:
-
A Brand DNA statement — 25 words or fewer. Example: “Timeless minimalism built for urban professionals.” Test it against four criteria: Does it speak to your customer’s real pain points? Is the language specific and compelling? Does it show at least 2–3 clear differences from your top competitors? Can you back every word with an existing product feature or manufacturing capability?
-
3–7 Distinctive Brand Assets (DBAs) — the design cues that make your clutch identifiable without a logo. A signature color block covering 30–40% of the front face. An asymmetric silhouette. A diagonal motif at a fixed 27° angle across all primary surfaces. For each asset, set a minimum presence rule (e.g., “appears on 100% of primary packaging and >80% of product variants”) and a no-go rule (e.g., “angle, thickness, and orientation never change”).
-
Quantified visual identity rules — not “navy blue,” but HEX #0052CC, RGB 0/82/204, Pantone 286 C. Not “small logo” — minimum 8 mm print width, 0.5× logo height clear space on all sides. Lock in your primary typeface, weight, and size for product labels. Define your corner radius standard (e.g., R3 mm across all primary panels).
-
A stakeholder-approved guideline document — 5–10 pages, covering color, typography, shape rules, DBA hierarchy, and do/don’t visual examples. Every team that touches your custom clutch bag design treats this document as required reference material.
The practical process looks like this:
-
Run 15–20 internal interviews (60–90 minutes each) with leadership, design, sales, and key channel owners. Ask: “What must never change in our look and feel?” and “Which three design cues tell a customer this is us?”
-
Ask each stakeholder to draft their own Brand DNA view — top 5 personality words, 3 core visual attributes, and 2–3 product examples that feel right versus wrong.
-
Hold a synthesis workshop. Pull out any descriptor that appears in 60–70%+ of submissions. Those become your core DNA candidates. Cut it down to 1–2 primary themes and 2–3 secondary themes.
-
Stress-test against 3–5 direct competitors. Where your themes overlap with theirs, you don’t have differentiation — you have a category cliché.
-
Codify everything into your guideline document. Present it to every team touching specs before a single measurement gets discussed.
This process gets you 75% of a solid Design DNA with just 20–25% of the usual research effort — as long as you interview the right people.
The output of Step 1 is not inspiration. It’s boundaries. Your clutch bag manufacturer asks why the hardware must be brushed gold and not polished — your Design DNA document is the answer. Your packaging team proposes a new lining color — your DBA rules decide. Every downstream decision in this guide — material selection, logo application, custom hardware — moves faster and lands more reliably once Step 1 is done right.
Step 2: Choose the Right Clutch Style and Size That Reflects Your Brand Positioning
Size and shape are not aesthetic preferences — they are positioning statements measured in inches.
A clutch that’s 2 cm too wide reads as casual on a brand built around refinement. A flat envelope silhouette undercuts a bold, statement-forward brand the moment a customer picks it up. Every structural decision either reinforces what your brand promises or contradicts it.
Here’s how to make those decisions with precision.
Map Your Brand Archetype to a Clutch Style Family
Start by identifying which style family your brand belongs to. Then assign the matching structural rules:
Minimalist / Modern Brand
– Clutch types: flat envelope, slim rectangle, fold-over with ≤1 visible hardware element
– Target dimensions: 7–9 in width × 3.5–5 in height × 1–1.5 in depth
– The thin profile signals “streamlined” — every extra millimeter of depth works against that message
Bold / Statement Brand
– Clutch types: box clutches, oversized soft clutches, sculptural shapes
– Width range: 8–11 in (but always ≤ shoulder width to maintain polish)
– Push height and depth — 5–7 in height, 2–3 in depth — to project presence and impact
Heritage / Classic Brand
– Clutch types: structured framed clutches, traditional envelope shapes
– Classic sizing benchmark: 8 in (20 cm) width × 4–5 in height × 1.5–2 in depth
– Stay close to these standard proportions. It signals timelessness, not trend-chasing
Translate Positioning Keywords Into Numeric Rules
Pull 3–5 keywords straight from your brand positioning statement. Then convert each one into a measurable spec:
-
“Luxury” → hardware in polished metal, limited to 1–2 visible pieces; material thickness ≥ 1.5–2 mm to convey substance; no plastic components
-
“Sustainable” → use recycled nylon or certified vegan leather; target clutch weight < 300 g to signal everyday lightness
-
“Professional” → internal length ≥ 7.5–8 in, depth ≥ 1.5 in to fit a smartphone and cards; exterior colors match corporate hex/CMYK codes
-
“Discreet” → micro-debossed logo ≤ 10 mm wide; no external metal logo plate; logo covers ≤ 5% of front surface area
-
“Expressive” → monogram or pattern coverage can reach 10–15% of front-surface area
This step stops vague brand language from producing vague manufacturing briefs.
Size Your Clutch to Your Target Customer’s Body
A clutch that looks proportional in a flat lay can look oversized on your actual customer. Use this rule:
Clutch width should not exceed shoulder span when held at the side.
Beyond that rule, segment your sizing by body proportion:
|
Target Audience |
Recommended Width |
|---|---|
|
Petite consumers (under 5’4″) |
≤ 7 in (≈18 cm) |
|
Average height (5’4″–5’7″) |
7–8 in |
|
Taller consumers (over 5’7″) |
Up to 9 in (≈23 cm) |
Your primary customer segment skews 80% women between 5’3″–5’5″? Keep your core line in the 7–8 in width range. That’s the safe zone.
Decide Where You Stand on Practicality vs. Pure Fashion
This is a positioning call, not a design preference. Be honest about it.
Functional / problem-solving brands (e.g. “for busy professionals”):
– Minimum internal capacity: smartphone (≈6.5 in × 3 in) + card case + keys
– Required depth: ≥ 1.5 in for real-world use
– Sizing method: lay must-carry items flat, measure, then add 0.5 in padding for closure tolerance
Event / occasion luxury brands (function is secondary):
– Width can approach the aesthetic shoulder-span rule even if depth falls below 1.5 in
– A shallower profile signals intentional style prioritization — that’s not a compromise, it’s a brand statement
Trying to serve both at once without a clear trade-off decision is where most custom clutch bag designs lose their identity. Pick a side and commit.
Define One Hero Clutch Size Per Positioning Pillar
Don’t let your line sprawl. Assign one explicit W×H×D spec to each positioning pillar — and document it in your brand guidelines:
-
“Office” clutch: 8×4.5×1.5 in — professional capacity, structured silhouette
-
“Evening” clutch: 7×4×1 in — refined proportions, shallow depth, high-impact finish
-
“Weekend” clutch: 9×5×2 in — relaxed scale, removable strap option
Lock these into the clutch specs section of your brand book. Place them alongside approved hex/CMYK color codes, logo placement diagrams with exact mm offsets, and documented no-go examples. Treat them as positioning tools — not just product specs.
A factory questions a dimension? Your brand guideline document answers. Your team proposes a seasonal variation? The hero size stays fixed. Only 1–2 parameters shift — color or surface texture. That discipline keeps every production run telling the same brand story.
Step 3: Select Materials That Speak Your Brand’s Visual Language
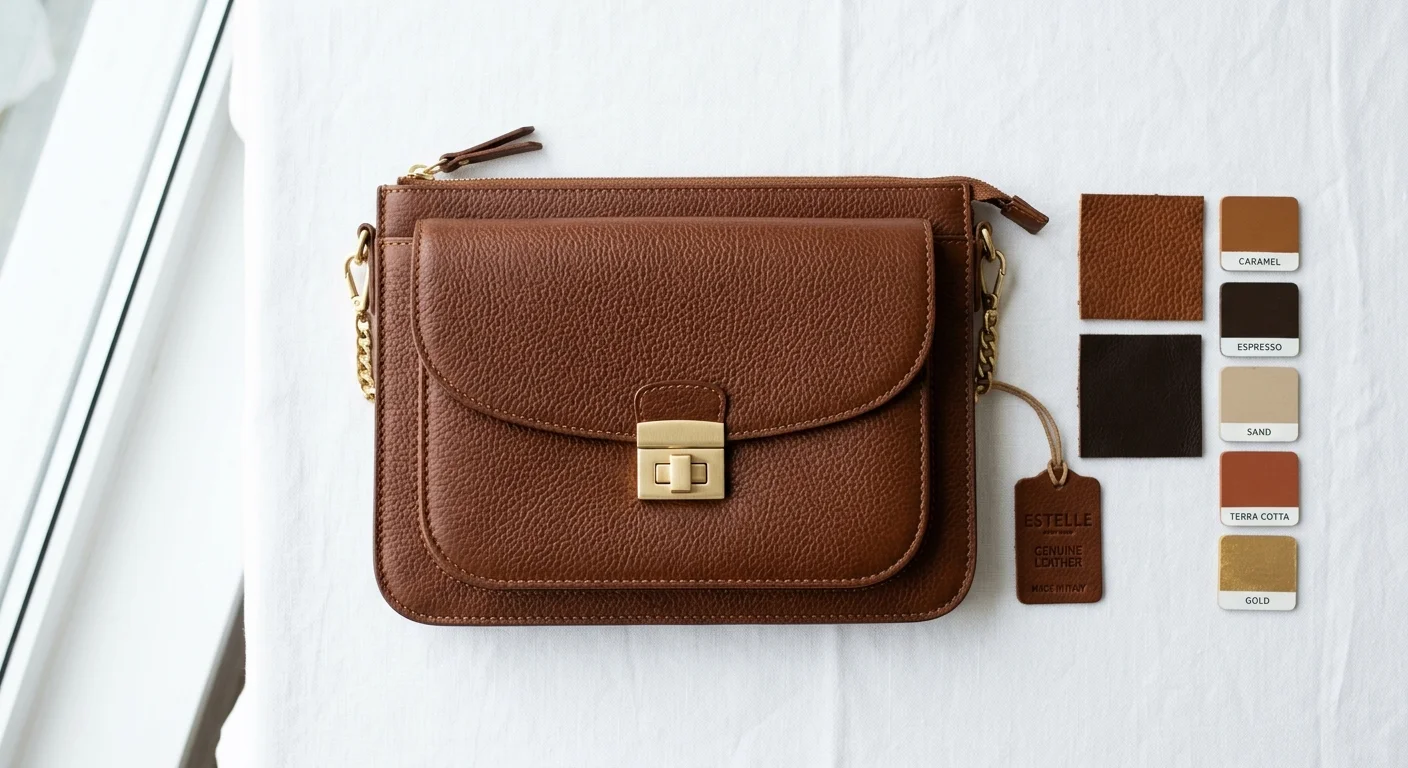
Material selection is where brand identity either lands or falls apart. The leather grain on your clutch’s exterior, the weight of the hardware, the sheen of the lining — these aren’t finishing touches. They’re your brand talking in a language that goes deeper than any logo.
Map Your Brand Attributes to Specific Material Cues
Start with 3–5 core brand traits. Then assign clear material properties to each:
-
“Premium / Luxury” → full-grain leather ≥ 1.5–2 mm thickness, brushed or polished metal hardware, soft microfiber lining; no plastic components visible anywhere
-
“Sustainable / Conscious” → certified vegan PU or recycled nylon, water-based edge paint, natural cotton lining; target clutch weight < 300 g to reinforce lightness and purpose
-
“Minimal / Modern” → smooth calf or saffiano leather, single hardware element, tonal stitching; keep surface coverage clean with ≤ 10% decorative treatment
-
“Bold / Expressive” → textured or metallic PU, contrast lining in a secondary brand color, statement hardware finish (antique brass, gunmetal)
Each material choice should hit at least two of your brand traits at once. A recycled canvas exterior with tonal blind debossing = sustainable and minimal. That’s the kind of discipline that keeps your product line tight and consistent.
Lock Your Material Specs Into Your Brand Standards
Before sampling starts, write down your material decisions with factory-level detail:
-
Exterior material: specify type, surface finish, and thickness (e.g., “pebbled PU, matte finish, 1.2 mm”)
-
Lining: define fabric weight and color using Pantone or hex reference
-
Hardware finish: one primary tone brand-wide — never mix gold and silver in the same SKU
Run a quick reality check. Show material mockups to 5–8 people in your target audience. Ask what words come to mind. ≥ 70% should echo your intended brand traits — that’s when your material set is locked. If the numbers don’t add up, go back and fix the mapping before you get anywhere near a factory.
Step 4: Apply Your Brand Identity Through Hardware, Stitching, and Trim Details
Hardware, stitching, and trim are where brand identity gets physical. Your customer might never notice your zipper pull length or topstitch spacing. But they feel whether a clutch is coherent or not. That feeling is the difference between a bag that reads as designed and one that reads as assembled.
Hardware: Set Specs, Then Lock Them Brand-Wide
Every hardware element on your clutch should trace back to a single approved finish. Define 1–3 core finishes in your brand guide — matte black, aged brass, brushed silver, for example. Any finish outside that list is a brand violation, not a design option.
Match your finish to your positioning:
-
Luxury / heritage brands → PVD-coated brass or stainless, gold tone (~#D4AF37), gloss level 70–90 GU at 60°
-
Minimal / modern brands → matte black or gunmetal anodized aluminum, gloss < 20 GU, weight reduction 15–30% vs brass
For logo application on hardware, use laser-etched marks with 0.1–0.2 mm line thickness. On hardware pieces smaller than 15 mm in diameter, drop the full wordmark. Keep it to 1–2 letters or an icon only. Full wordmarks go illegible below 2–3 mm cap height.
Zipper pulls deserve their own standard. Set pull length at 25–35 mm, thickness 2–3 mm. Use the same silhouette across every SKU. That repeated shape builds into a recognizable brand signature over time.
Also: any logo-bearing metal plate or badge should sit at least 10–15 mm from seams. This stops distortion and keeps the mark centered.
Stitching: Make Stitch Type a Brand Decision, Not a Factory Default
Stitch style is not a production detail. It’s a visible signal of brand personality.
-
Heritage / structured brands → contrasting topstitching, stitch length 3–3.5 mm, 6–8 SPI
-
Minimalist / premium brands → tone-on-tone stitching, stitch length 3.5–4 mm, 7–10 SPI for a refined finish
-
Bold / expressive brands → contrast thread color tied to a secondary brand Pantone, with stitch direction angled to reinforce the design motif
Applying an embroidered logo? Set text height at ≥ 4–5 mm for legible sans-serif letterforms. Use satin stitch for narrow shapes up to 10–12 mm wide. Switch to fill stitch beyond that — it holds up better over time. Thread colors should match your brand Pantone references. Keep ΔE < 2–3 across dye lots.
Trim Details: Small Elements, Consistent Rules
Interior labels, edge tapes, and flag labels tend to get treated as afterthoughts. They shouldn’t be.
-
Interior brand message labels: text size ≥ 1.8–2 mm, limited to 1–2 lines of ≤ 15–20 characters — enough to land a tagline, not enough to crowd the space
-
Side seam flag labels: 10–15 mm × 20–30 mm, placed on the same side every time, at the same height. That consistency turns into a quiet discovery detail — something loyal customers start to look for
-
Sustainable brands: visible trims should use ≥ 50–100% recycled content, printed or etched onto the trim itself rather than added as a separate tag
The Cohesion Rule
Cap total visible brand elements per clutch at 3–4 — main logo, hardware mark, interior label, and one accent detail. Go past that, and the clutch stops reading as designed. It starts reading as decorated.
Check every sample against this standard. Reject any piece where logo dimensions drift ± 5% from spec. Reject any piece where hardware color shifts beyond ΔE 3–4 from your target finish. These aren’t high-bar thresholds. They’re the bare minimum that keeps every production run telling the same brand story.
Step 5: Choose the Right Branding Technique for Your Logo and Graphic Elements
Logo placement on a clutch bag is permanent. A website lets you push a CSS update at midnight. A production run of 500 bags does not. Every decision locks in — size, position, technique, color. Get the branding method wrong, and no post-production fix will save it.
The technique you pick determines how your logo holds up through heat, friction, moisture, and light. It also controls how much of your brand identity carries over from screen to surface.
Build a Logo System Before You Brief Any Factory
Your factory needs more than a PNG file. Give them a 3-variant logo system:
-
Primary mark — full logo, used on front panels and packaging
-
Secondary mark — horizontal or stacked version for interior labels and narrow trim placements
-
Icon/monogram variant — simplified mark for hardware badges, zipper pulls, and embossed details under 15 mm
Set a minimum print width of 20 mm for complex logos on exterior surfaces. Below that, fine detail falls apart. For embossed or debossed applications on hardware smaller than 15 mm, strip back to 1–2 letters or a single icon — full wordmarks become unreadable below 2–3 mm cap height.
Define clearspace as at least 0.5× the height of your key logo element on all sides. This stops your mark from getting swallowed by seams, stitching, or panel edges.
Match Technique to Surface and Brand Positioning
Each surface type needs its own application method. Pair the right technique with the right surface — and your brand tier — to keep quality consistent across every SKU:
|
Brand Positioning |
Recommended Technique |
Key Spec |
|---|---|---|
|
Luxury / Heritage |
Blind emboss or deboss |
Depth 0.3–0.8 mm, heat 120–160°C |
|
Minimal / Modern |
Tone-on-tone foil stamp |
Matte foil, ΔE < 2 from base material color |
|
Bold / Expressive |
Screen print or heat transfer |
Ink opacity ≥ 90%, edge sharpness ≤ 0.3 mm bleed |
|
Sustainable |
Water-based ink screen print |
VOC-free ink, ≥ 50 wash cycles without fading |
Lock Color Roles Before Sampling
Give your brand colors a functional role, not just a swatch:
-
Primary color — used on ≥ 60% of major visible surfaces: main logo fill, exterior hardware, primary packaging
-
Secondary colors (2–3 max) — cover 20–30% of surfaces: lining accent, interior label background, secondary packaging
-
Neutral scale — base backgrounds and edge treatments; should occupy ≥ 70–80% of interior layouts
For any logo color applied to fabric or leather, specify in HEX + Pantone + CMYK. Do not hand a factory a JPG with “the blue from our website.” Color drift between dye lots is real. Require ΔE < 2 from your approved Pantone reference on every production run.
Run Three Tests Before You Approve Any Artwork File
Send your clutch bag manufacturer a final artwork file only after running these checks:
-
Blur test — Apply a Gaussian blur at 8–10 px radius to your logo. The silhouette should stay readable. If it dissolves into noise, simplify the mark.
-
Scale test — Reduce the logo to your smallest intended application size (badge, zipper pull, favicon). Key elements vanishing? Use your icon variant. Do not force the full mark into a space it cannot fill.
-
Contrast test — Check every logo-on-background combination against a 4.5:1 contrast ratio minimum. For large embossed marks (equivalent to ≥ 18 pt), the floor drops to 3:1 — but do not stop there. Higher contrast reads better on textured surfaces where light shifts and changes.
Any artwork file that fails one of these three tests does not go to production. That standard is non-negotiable.
Step 6: Avoid Costly Mistakes in the Design-to-Production Workflow
Production errors don’t announce themselves. They build up across sampling cycles until you’re absorbing redesign costs, missed launch windows, and MOQ penalties you never budgeted for.
The fix isn’t a perfect design. It’s building the right handoff structure before your files ever reach a factory.
Lock your production volume and unit cost ceiling before you finalize detailed specs. A clutch built for 200 units costs out very differently than one built for 5,000. Set your target volume first, then work backward from your retail price — subtract margin, logistics, and overhead. What’s left is your allowable manufacturing cost. That number drives every material grade, hardware choice, and finish spec from that point on.
Cap your revision cycles before sampling starts. Set a hard limit of 2–3 design changes per prototype stage. Uncapped revisions are the single biggest cause of budget overruns in custom clutch bag production. Assign one dedicated reviewer per cycle. Slow feedback triggers resampling. Resampling adds weeks and cost.
Track four metrics across every sampling cycle:
-
Dimension deviation vs. approved spec (flag anything beyond ±0.5 mm on critical panels)
-
Color fidelity against your locked Pantone reference (reject if ΔE > 3)
-
Scrap and rework rate (anything above 5–10% signals a tolerancing problem, not a one-off issue)
-
Actual lead time vs. planned — rush slots carry premium pricing that eats into your margin fast
Send design concepts to your custom clutch bag manufacturer before drawings are frozen — not after. A one-hour early review from a production-experienced team catches material substitution risks, edge finishing conflicts, and hardware sourcing gaps. Miss that window, and those same issues show up as expensive tooling changes post-sampling.
Build iteration buffers into your timeline. They aren’t slack. They’re your protection against the premium pricing that comes with rushed production slots.
5 Common Brand Identity Mistakes on Custom Clutch Bags (And How to Fix Them)
Most brand identity problems on custom clutch bags don’t show up at launch. They appear in the first production sample — and by then, fixing them costs real money.
Here are five mistakes that wreck clutch bag branding, and how to fix each one.
Mistake 1: Overloading the surface with brand information.
A logo, tagline, website, and social handle on a single clutch face doesn’t build recognition — it kills it. Treat the clutch like a small-format product, not a brochure. Pick one primary logo. Add one short brand line at most. Keep clear space around the mark so it stays readable at a glance.
Mistake 2: Sending vague instructions to your manufacturer.
“Make the logo blue and centered” is not a spec. Vague briefs lead directly to color drift, off-center placement, and inconsistent sizing. Send a full brand package instead. Include Pantone/CMYK codes, logo dimensions in millimeters, placement notes for front/back/side panels, and a visual mockup. Zero guesswork for the factory.
Mistake 3: Designing for aesthetics instead of your actual buyer.
A clutch that looks sharp in a flat lay but doesn’t fit your customer’s real life gets left at home. Build a buyer persona before any design decisions. Style, size, finish, and functionality should all trace back to one specific person with one specific need.
Mistake 4: Letting materials undercut your brand positioning.
One mismatched component does real damage. A plastic zipper pull on a luxury clutch or cheap edge paint on a premium leather body signals inconsistency faster than any logo error. For mid-tier and above, upgrade at least one signature element. Swap basic printed branding for a metal badge, molded rubber mark, or blind-debossed finish. That one change lifts the perceived value of the whole product.
Mistake 5: Skipping a pre-production sample review.
Color drift, misprints, and loose stitching don’t fix themselves in bulk production. Before you approve a full run, check print alignment, stitch quality, and final material color against your locked spec. All three need to match. No match, no production.
How to Find a Custom Clutch Bag Manufacturer That Can Execute Your Brand Vision
Finding a manufacturer is easy. Finding one that can translate your brand DNA into a finished clutch — consistent across every production run — is where most brands lose time, money, and momentum.
Here’s a practical framework for getting it right.
Step 1: Convert Your Brand Vision Into a 1-Page Product Requirements Brief
Before you contact a single factory, turn your brand language into measurable specs. Vague briefs produce vague results.
Your brief should include:
-
Exact dimensions: e.g. H 12 cm × W 22 cm × D 4 cm
-
Target weight: e.g. ≤ 350 g empty
-
Capacity requirement: “fits iPhone Pro Max + cardholder + lipstick”
-
Materials: e.g. LWG Gold-rated cow leather, 1.2–1.4 mm; lining 100% recycled polyester, 150–200 gsm
-
Hardware specs: zipper brand and code, chain thickness in mm, closure type
-
Brand feel references: 3–5 reference products with photos and specific callouts (“edge paint finish like Brand X, model Y”)
Abstract positioning needs a numeric translation too:
-
“Minimalist luxury” → stitch length 3–4 mm, clean edge paint, brushed gold hardware at 5–8 μm plating thickness
-
“Soft and casual” → slouchy structure with no board, specify foam thickness and leather temper rating
This document separates a brand-aligned production run from a generic bag with your logo on it. Without it, factories default to their own standards — not yours.
Step 2: Set Hard Filters Before You Start Searching
Not every factory that makes bags can make your bag. Filter early.
MOQ benchmarks:
– Most Asian handbag factories: 300–500 units per style, 100–200 per colorway
– Smaller workshops or European manufacturers: 50–100 units per style. Some go as low as 20–30 pieces at premium pricing
Price segment alignment:
– Your retail target is US$200–400? Avoid factories whose main output sits at US$10–20 FOB
– Ask them straight: “What is the average retail price of brands you produce for?” Look for answers within ±30% of your target
Compliance requirements by brand positioning:
– Ethical or sustainable brands: ask for BSCI, SEDEX, SA8000, ISO 14001, or LWG certification
– Luxury positioning: confirm they produce for recognized premium brands. Check they sign NDAs with redacted client names as standard practice
Step 3: Use the Right Sourcing Channels
Different channels surface different factory types. Use all of them at the same time.
B2B platforms (Alibaba, Global Sources):
Run specific search queries — “custom leather clutch bag factory low MOQ”, “evening clutch OEM manufacturer”, “acrylic minaudière manufacturer”. Filter for “Manufacturer” (not trading company), 5–8+ years in business, and verified or assessed supplier status.
Google search:
Try combinations like “handmade clutch bag factory Italy private label” or “evening bag manufacturer Guangzhou”.
Trade shows:
Leather and bag fairs let you compare stitch consistency, edge painting quality, and hardware feel across 20–50 factories in 1–2 days. No sampling fee needed for that first read.
Referrals and LinkedIn:
Contact 10–20 founders in adjacent categories — wallets, mini-bags, small leather goods. Ask who they use and who they avoid. Target 5–8 solid leads from referrals alone. These tend to be the strongest introductions you’ll get.
Step 4: Build a Shortlist, Then Funnel It Down
Don’t evaluate 20 factories at once — you’ll burn time and lose clarity.
|
Stage |
Target Number |
|---|---|
|
Initial scan |
10–20 candidates |
|
After portfolio and profile review |
5–8 promising candidates |
|
After calls and sample discussions |
3–5 finalists |
|
RFQ (formal quotation) round |
8–15 factories |
Send your brief to 8–15 factories for RFQ. That gives you enough price and capability spread to spot outliers — both overpriced and those quoting figures that seem too good to be true.
Step 5: Verify That a Factory Can Execute Your Specific Vision
Browsing a portfolio is not the same as verification. You need real evidence of category and detail competency.
Category match:
– Request 5–10 photos of previous clutch, minaudière, or evening bag work — not backpacks or totes
– Skip factories that show large soft bags if you need small structured clutches
– Ask: “What percentage of your production is small leather goods and clutches versus other categories?” Favor factories at ≥ 30–40% in similar items
Material and detail competency:
– Your design uses exotic textures, glitter, acrylic panels, or beading? Request past work with those exact materials
– For premium leather clutches: ask for edge painting close-ups and stitch-per-inch data — 6–8 SPI signals luxury-level construction
Portfolio consistency check:
– Check their Instagram and LinkedIn — look for the same factory floor, machines, and workers across multiple posts
– Stitch quality and edge finish should hold up throughout, not just in 1–2 polished hero shots
Step 6: Score Factories Against a Weighted Evaluation Matrix
Drop gut-feel decisions from the shortlisting process. Build a 1–5 scoring matrix with clear weightings:
|
Pillar |
Weight |
What “5” Looks Like |
|---|---|---|
|
Product fit |
25% |
5+ years making clutches for your price segment |
|
Aesthetic execution |
20% |
Clean edge paint, symmetrical logo application, quality lining on samples |
|
Sampling system |
20% |
2–3 revision rounds included; 10–21 day sample lead time |
|
Communication |
15% |
<24 hour weekday response; can restate your brand values in manufacturing terms |
|
Quality systems |
10% |
AQL-based QC with in-line checks, not final inspection only |
|
Capacity and reliability |
10% |
Can produce 500–1,500 units in 6–8 weeks post-approval without outsourcing |
Pay close attention to the communication pillar. A factory that can restate your brand positioning back to you in concrete production terms — not just nod along to everything you say — is showing real manufacturing intelligence. That’s different from simple sales responsiveness.
Step 7: Ask These Questions Before You Commit to Sampling
Get specific answers to these questions before you go further. Vague responses are data points too.
-
Capacity: “What is your monthly capacity for clutch bags?” — a real answer sounds like “10,000 units per month across two lines, minimum 200 per style”
-
Sample lead time: look for 7–21 days with a clear process breakdown, not “around 2–3 weeks”
-
Bulk lead time: standard is 30–60 days after deposit and sample approval for a 500–1,000 unit run
-
Revision rounds: “How many sample rounds are included in the sample fee, and is that fee deducted from the bulk order?”
-
IP handling: “What percentage of your work is private designs versus open catalog?” — favor factories that handle custom tech packs and sign NDAs as routine
Step 8: Lock a Golden Sample Before You Place Any Bulk Order
A golden sample is not just an approved prototype — it’s a binding production standard.
Build a sample package first:
-
Tech pack: dimensions in mm, tolerances of ±2–3 mm, construction diagrams, stitch type and thread spec
-
Material swatches: target leather or fabric, lining, and hardware color chips
-
Reference clutches: 1–2 physical samples with written notes on what to replicate and what to avoid
After 2–3 iterations, both parties sign and stamp one golden sample as the benchmark for:
-
Color (Pantone code), edge paint tone, and hardware finish
-
Internal layout: pocket dimensions in mm, card slot count, logo placement distance from edges in mm
Attach a photo report and defect criteria to your purchase order. Define the threshold in writing:
– “Logo misalignment > 1 mm from spec = major defect”
– “Scratches > 3 mm on front panel = reject”
No golden sample, no bulk order. That standard protects your brand on every production run that follows.
Red Flags That Signal a Factory Will Not Execute Your Vision
Walk away from any factory that shows more than one of these:
-
Refuses to provide production-line photos — showroom images only
-
Cannot show prior clutch-specific work
-
Says “we can do anything” without offering specific technical input on edge type, reinforcement, or construction method
-
Gives vague QC answers with no AQL standard (“we check everything by eye”)
-
Takes more than 72 hours to answer basic questions
-
Cannot restate your brief requirements back in their own words — or keeps glossing over key brand elements in follow-up messages
The right manufacturer acts like a production partner, not an order-taker. They push back on specs that won’t hold up in bulk. They catch material conflicts before sampling starts. That friction is a sign of competence, not resistance.
Real Brand Applications: Custom Clutch Bags Across Different Industries
Custom clutch bags appear across more industries than most brand managers expect. Production parameters shift based on where your brand sits — so let’s break it down by sector.
Fashion brands use clutches as limited-edition drops (300–2,000 units) or seasonal VIP gifts. Branding is a debossed logo (tooling cost: $80–150 per die) or a metal front plate (add $0.30–0.80/pc at 1,000 units). Material standard: 1.1–1.4 mm cow leather or 0.8–1.2 mm PU microfibre. You’ll also need nickel-free hardware for EU compliance.
Beauty and cosmetics brands run the highest volumes. Regional GWP campaigns start at 5,000–50,000 units. Global launches can exceed 100,000 pieces. Target landed cost is tight: $1–3/pc in PU or satin. Interior specs follow the product — lipstick slots at Ø12–15 mm, compact sections at 70–90 mm width. At these quantities, zipper cycle testing (≥2,000 cycles) is a hard requirement, not optional.
Hospitality brands — hotels, resorts, airlines — use clutches as amenity kits. Run sizes fall between 1,000–20,000 units. Key specs include:
– Water-resistant lining
– 18–22 cm interior length
– A co-branded color scheme, especially for fashion or beauty partnerships
Corporate events land in the 300–3,000 unit range. Branding is 1–3 color screen print. Wedding and bridal batches run smaller — 50–300 units — with foil-stamped monograms adding $0.50–1.50/pc.
Across all sectors, the total timeline breaks down like this:
– Design and sampling: 4–8 weeks
– Bulk production: 4–6 weeks
– Shipping: 2–4 weeks