A fraying strap on a beloved tote bag feels like a small tragedy. That feeling hits harder with a well-crafted Japanese tote bag — one you searched for and can’t picture replacing. We’ve been there.
It started as a minor loosening at the stitching. Then it got worse, fast. A bag we carried every day ended up sitting in a corner, too damaged to use. Instead of tossing it or dropping it off at a repair shop, we fixed it ourselves — and picked up a lot of useful knowledge along the way.
Here’s what we did to fix the strap on our Japanese tote bag. We’ll also cover what caused the damage and what to do to stop it from happening again.
Strap Issues We Encountered on Our Japanese Tote Bag

The damage showed up in four distinct ways — and each one got worse the longer we ignored it.
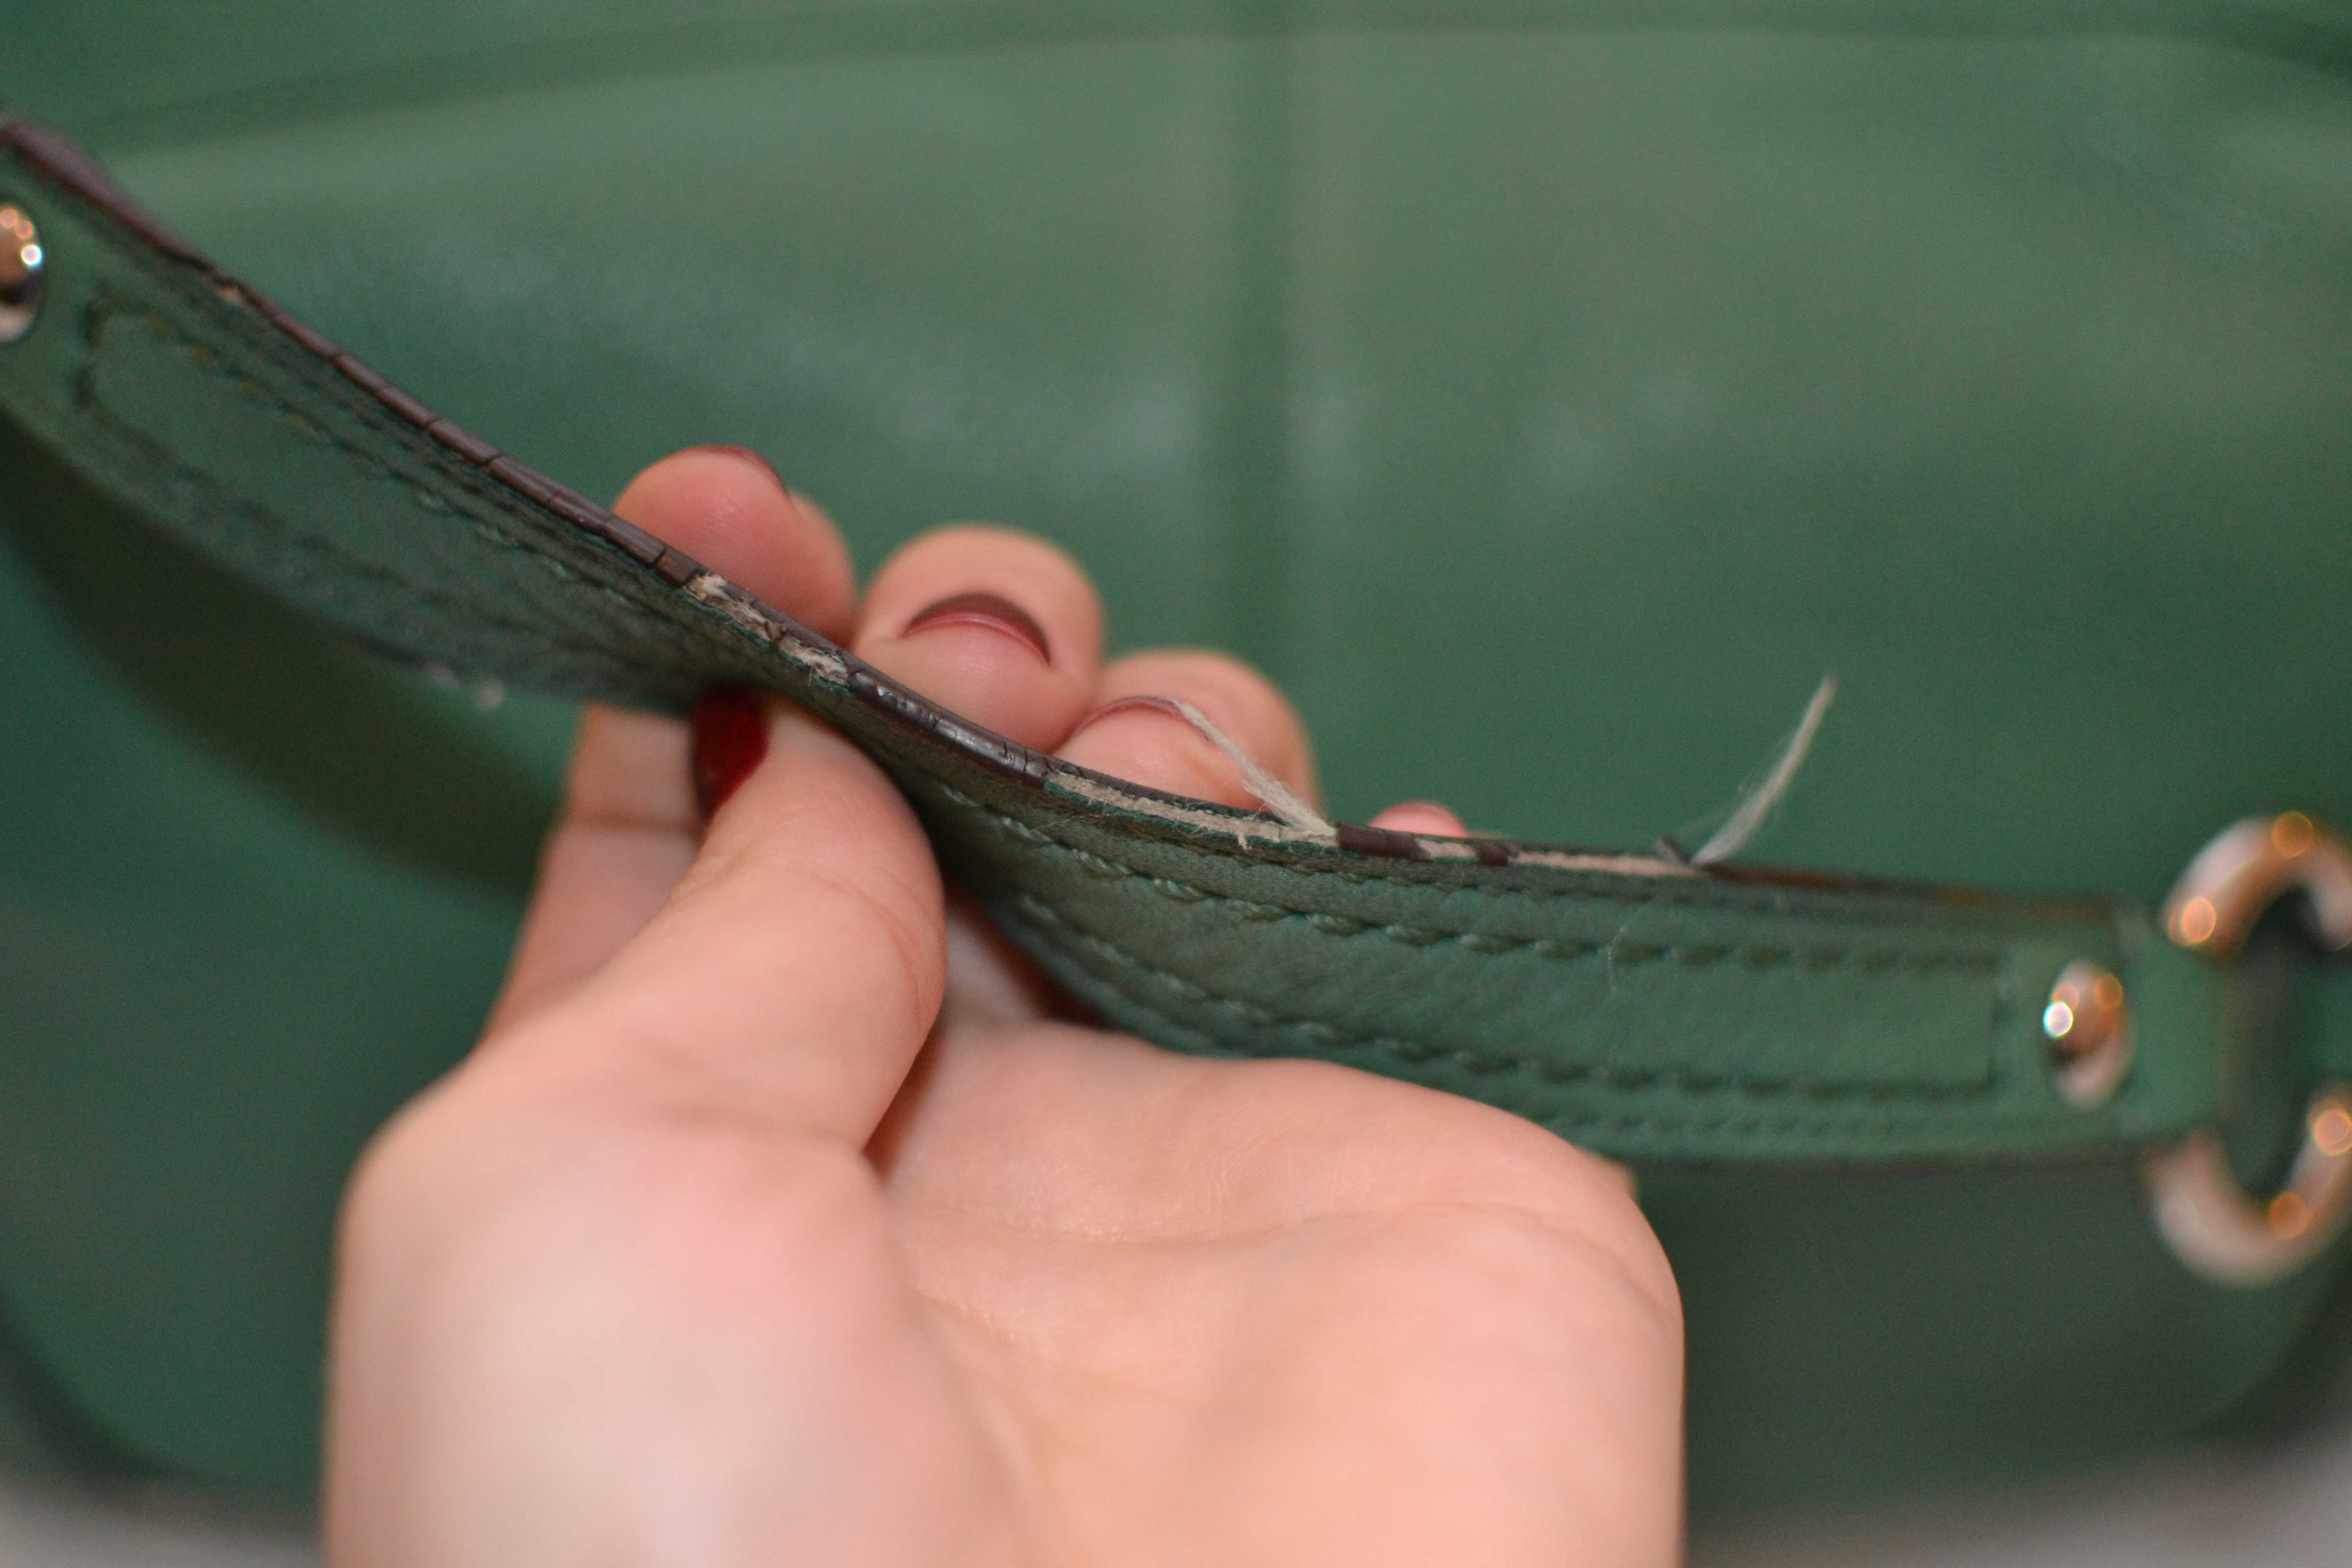
Stitching came apart at the attachment point. The first sign was a small cluster of loose threads where the strap folds back and connects to the bag body. Within a few weeks, a 3–5 mm gap in the stitching had pulled into a full 2–3 cm section of unraveled thread. The bag had just two parallel straight lines holding the strap in place. No box-X reinforcement. No diagonal backup stitching. Once one thread snapped, the rest followed fast.
The strap material itself tore. About 10–12 mm above the stitched connection, the fabric fibers started fraying along the edges. This is common with thinner Japanese cotton or linen straps. Most use single-layer construction around 0.4–0.8 mm thick, with no inner webbing for support. Ours gave out carrying 5 kg: a laptop, two books, and everyday items.
The hardware deformed. The D-ring connecting the strap to the bag started opening up over time. After about two months of commuting use, the gap had widened to 1 mm. On one sharp movement, the strap popped free.
The strap wouldn’t stay in place. Even before the hardware failed, the strap kept sliding off the shoulder — sometimes three or more times on a ten-minute walk. The smooth cotton surface and narrow 2.5 cm width gave it almost no grip. The adjustment buckle also slipped under load. The strap would slowly lengthen as we walked, making the bag drop lower and lower during use.
Why Japanese Tote Bag Straps Fail (And What We Got Wrong)

Most strap failures don’t come from one weak moment. They build up over time, driven by material limits and habits we didn’t know were a problem.
The materials have a real ceiling. Standard Japanese tote bag straps use 12–16 oz cotton canvas. The safe working load sits at 10–15 kgf for a single layer. That sounds like enough — until you factor in long-term wear. Cotton fibers exposed to sweat, friction, and constant load can lose 10–20% of their tensile strength within one to two years. The bag feels fine at first. Then the same load you carry every day starts pushing the material past what it can handle.
The stitching design carries more risk than it looks. Many Japanese tote bags use two to three rows of straight-line stitching at the strap attachment point. No box stitch. No X reinforcement. That setup puts stress in one spot instead of spreading it out. The stress at those attachment points can run 1.5 to 2 times higher than a balanced load distribution. One thread breaks. The rest follow in sequence — a chain failure, not a single snap.
Here’s what we got wrong. We carried 7–9 kg in a bag built for 5–8 kg. That 20–40% overload doesn’t destroy a strap on the spot. It cuts the lifespan short — from an expected 3–5 years down to under two. We also missed the early signals:
-
Slight thread fuzz near the seam
-
A millimeter of visible gap at the attachment point
-
Minor edge fraying on the strap
Each one was a warning. We ignored all of them.
The failure wasn’t all the bag’s fault. We were using it wrong, and the design had less margin than we assumed.
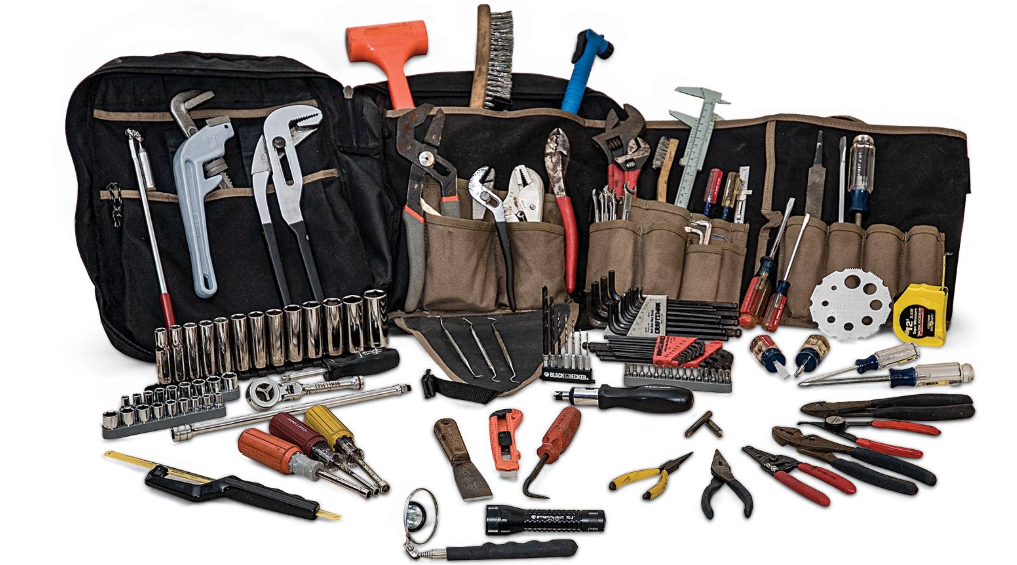
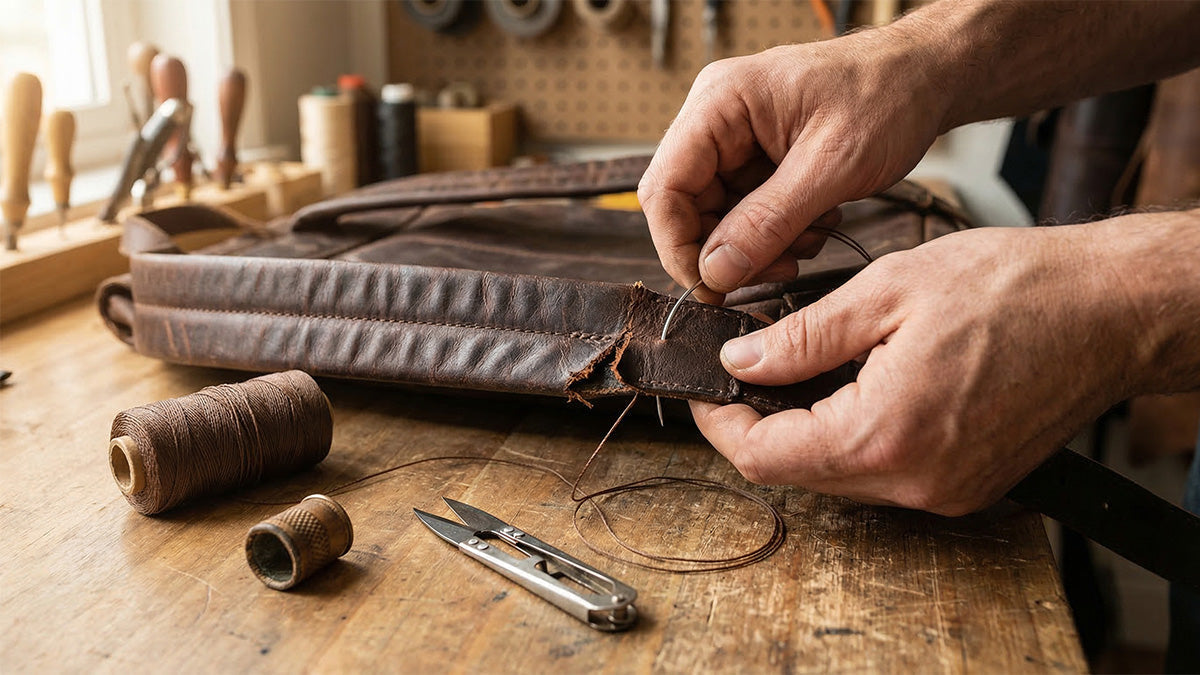
Tools and Materials We Used for the Tote Bag Repair

Before touching the bag, we laid everything out on a flat surface and made a call: no machine. The strap attachment point sat too close to the bag’s inner structure to feed through a presser foot. The layered fabric at the connection point was also too thick for a standard home machine to handle.
Here’s what we used.
Heavy-duty hand sewing needles — We went with needles in the 45–55 mm range. Shaft diameter was between 0.9–1.2 mm, with a wide eye to fit thick thread. Keep three on hand. Needles bend and snap in dense fabric. Running out mid-repair slows everything down.
Pair these with a rubber fingertip grip or a leather thimble. Pick the kind with a closed tip. The inner diameter should be just smaller than your finger — tight enough that it stays put under pressure.
Sashiko thread — This was the most deliberate choice. Standard polyester machine thread runs about 0.2–0.3 mm in diameter. Its tensile strength sits at around 2–3 kgf per strand. Sashiko thread is thicker — 0.5–0.8 mm in diameter. Its multi-strand twist construction delivers 1.5–2× the strength of standard thread.
It also spreads stress across a wider contact area. That reduces the cutting effect on cotton fibers under repeated load.
Cut thread at 2.5–3× the length of each repair segment. For a 40 mm attachment point, that’s about 100–120 mm per pass — more for reinforcement layers.
Two pairs of scissors — a 20–25 cm fabric shear for trimming patch material, and a small 10 cm thread snip for cuts at the needle end. Clean cuts matter. A frayed thread end won’t pass through a needle eye, and rough edges leave loose finishes.
A lighter — use this on synthetic thread ends. Trim to 2–3 mm, hold the flame near the tip for under one second, then pinch the melted end flat. This keeps the thread from pulling back through the stitch or unraveling over time. Skip this step on cotton thread — cotton burns instead of fusing.
Step-by-Step: How We Fixed Each Strap Problem
Four separate problems. Four different fixes. Here’s each one, in the order we tackled them — starting with the stitching failure that started it all.
Fix 1: Restitching the Attachment Point
The old stitching came out before anything new went in. We used a seam ripper and cut the thread every 2–3 stitches before pulling. No yanking the whole line at once. One hard pull on thick canvas can tear the fiber around the needle holes. Cutting in intervals keeps that from happening.
We left the original needle holes intact. They work as alignment guides for repositioning the strap. The holes already show you where the strap sat before — no guessing needed. Reusing them also reduces the risk of new perforations weakening the fabric.
Repositioning the strap: We pinned it back with 4 straight pins, starting from the corners and working inward. The goal was keeping both sides within 2 mm of each other. Go beyond that and the strap pulls unevenly under load. One side takes more stress. That side fails first.
Stitching specs we followed:
– Stitch length: 3–3.5 mm for canvas (about 7–8 stitches per inch)
– Thread: Nylon #69 — single-strand tensile strength runs around 4–5 kgf. That’s noticeably stronger than standard polyester thread at 2–3 kgf
– Seam area: at least 50–60 mm in length, covering the full strap width
The stitch pattern matters more than most people realize. We sewed a full rectangle first, staying 2–3 mm from the edge. Then we added the X crossing inside the rectangle — the classic box-X structure. The ends of the X lines landed 1–2 stitches inside the corners, not on the corners themselves. Corner points concentrate stress. Place the endpoint right on a corner and the thread has nowhere to go except into a tear.
Every line ended with 2–3 backstitches to lock the thread before cutting.
Fix 2: Trimming and Resealing the Frayed Strap Edge
The fraying on our strap had moved about 10 mm in from the edge before we caught it. We trimmed back until we hit fabric with no broken threads and no visible gaps in the weave. That meant removing around 8–12 mm of material.
We didn’t shorten the strap overall. Instead, we folded the trimmed edge inward by 7–10 mm and wrapped it with a 20–25 mm bias binding tape. This kept the strap close to its original length and fully covered the raw edge.
For the overlap seam, we used two parallel lines of stitching:
– First line: 2–3 mm from the edge
– Second line: 5–7 mm from the edge
– Overlap length between old and new material: at least 15–20 mm
Two lines instead of one spreads the load. One line develops a weak point — the second line holds. On a strap carrying 5+ kg every day, that backup is worth the extra few minutes.
We also added short 10–15 mm cross-stitches every 80–100 mm along the repaired edge. Think of them as anchors. They stop a small split from running along the entire seam length.
For sealing the cut edge: use a zigzag stitch at 3–5 mm width before folding. No sewing machine? Fray Check applied in a 1–2 mm band along the cut edge works as a solid backup.
Fix 3: Replacing the Deformed D-Ring and Reinforcing the Hardware Base
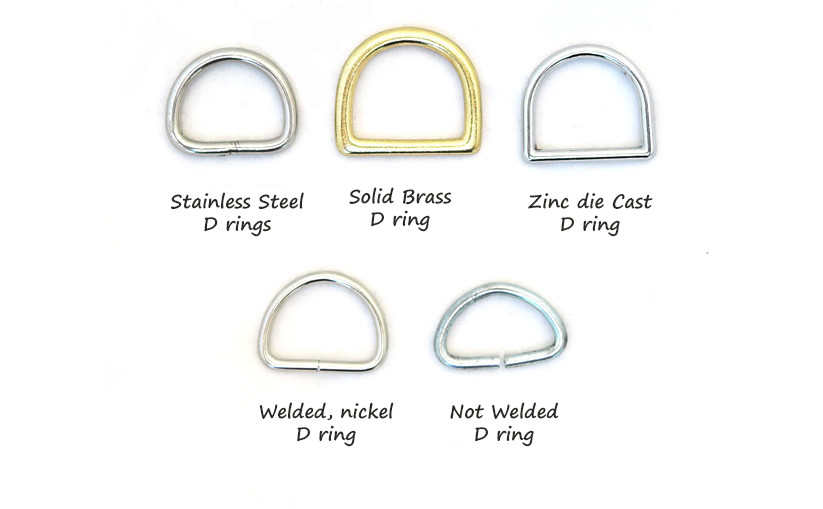
The D-ring that had widened by 1 mm wasn’t usable anymore. A deformed ring under continued load will keep opening. We replaced it with a new one.
Before installing the new hardware, we cut away all material around the old attachment point — including 5–10 mm beyond the damaged area. That zone had already taken stress. It wouldn’t hold with a new ring on top, even with fresh stitching.
We made a reinforcement patch from 1.8 mm cowhide leather:
– Patch size: 70 mm long × 32 mm wide, sized to extend at least 10 mm past the repair zone on every side
– We applied PU adhesive to both the patch back and the bag surface. Let both sides sit for 5–8 minutes until tacky, then pressed the patch down from center to edges
Once bonded, we pre-punched holes at 3.5–4 mm intervals, 3–4 mm from the edge. Then we stitched a U-shaped perimeter seam around the patch. After that, we cut the slot for the D-ring — 1–2 mm shorter than the ring’s inner width so it sits snug, not loose.
For our bag, stitching alone was enough. Bags that carry over 8 kg on a regular basis need more. Add 2 hollow rivets (4–5 mm diameter) at the highest-stress points. Drill the holes 0.1–0.2 mm wider than the rivet shaft. Go tighter than that and the surrounding material can crack during installation.
Conclusion
Fixing strap issues on a Japanese tote bag isn’t as hard as it looks. You just need the right tools, a little patience, and a clear sense of why the problem started. Reinforced a fraying edge? Restitched a loose anchor point? Made the tough call to replace instead of repair? All of that counts. You’ve extended the life of something worth keeping.
The real lesson? Most strap failures come from preventable wear. Spot the warning signs early. Use the right materials for your bag’s construction. Do that, and you won’t find yourself mid-repair again.
Tried how we fixed strap issues on a Japanese tote bag with our guide? We’d love to hear how it went — drop your experience in the comments below.
And if your bag still doesn’t feel quite right after the repair, go back to the Repair vs. Replace section. Sometimes the best fix is starting fresh.